
Rocket paper craft supplies for pretend play should combine a firm cardstock body, lightweight decorative paper, broad-base fins, a secure nose cone, and child-appropriate adhesive so the finished launch set survives repeated handling. Add foil details, tissue-paper flames, windows, control-panel shapes, and astronaut figures to give children useful prompts for mission play. Rounded edges and securely attached parts matter more than elaborate decoration, especially when younger children will carry or wear the rocket. Avoid heavy attachments, exposed staples, long cords, and tiny loose pieces that can detach during play. Build and test the main structure before adding surface details.
Choose Supplies That Match the Rocket’s Job
The rocket’s intended use determines which paper supplies belong on the worktable. A tabletop model needs a stable base and crisp shape, while a handheld rocket needs low weight and reinforced gripping areas. A wearable rocket pack requires flexible straps and adult-controlled fitting, making it a different project from a paper tube that children will fly around a room.
Cardstock is the most useful primary material for a freestanding or handheld rocket. It bends into a cylinder without collapsing as readily as printer paper, yet children can still decorate it with crayons, markers, or glued shapes. Poster board works for a larger body, although broad panels may crease where children squeeze them. Corrugated cardboard is stronger, but its thickness makes small cones and curved details harder to form.
A practical supply set can be limited to nine functional items: cardstock, lightweight colored paper, a cardboard tube, tissue paper, child-appropriate glue, paper tape, crayons or washable markers, blunt-tip scissors, and aluminum foil or metallic paper. Each item should serve either the structure, the visual design, or the pretend-play story. Decorative extras that do none of those jobs tend to create clutter and weak attachment points.
Adhesive choice changes how quickly the rocket becomes playable. A glue stick is clean and suitable for flat windows, numbers, and control buttons, but it may not hold a springy cone seam. White craft glue makes stronger paper-to-cardboard joints when used sparingly and allowed to dry. Paper tape provides immediate reinforcement inside a seam. Applying too much liquid glue is a common failure: saturated cardstock softens, warps, and can take much longer to become usable.
Match the supplies to the child’s cutting and assembly ability rather than selecting the most elaborate design. Younger makers may work best with a prepared tube, large fin shapes, and peelable paper tape. Older children can measure a cone, create symmetrical fins, or design a removable crew capsule. For a focused shopping and setup reference, use this Rocket paper craft supplies for pretend play resource when deciding which components should be prepared in advance.
A successful material selection feels manageable before construction begins. The body sheet rolls without cracking, the fins are stiff enough to stand, and the decorations remain noticeably lighter than the structure. If the planned rocket already feels heavy or crowded while its parts are still separate, simplify it before gluing.
Build a Body, Nose Cone, and Fins That Hold Their Shape
A durable paper rocket relies on three load-bearing areas: the body seam, the connection beneath the nose cone, and the fin joints. Children naturally grip the body, bump the top, and set the rocket down on its fins. Reinforcing those locations produces more play value than covering the entire model with extra layers.
For a cylindrical body, wrap cardstock around a clean cardboard tube or form it into a tube of its own. Overlap the seam by roughly a finger’s width rather than trying to join two edges exactly. The overlap gives glue or tape a broad contact area. Place tape inside the cylinder when possible so the outside remains available for decoration. If the body springs open when released, hold the seam with removable clips until the glue sets; do not expect a glue stick to resist strong paper tension immediately.
The nose cone can be made from a paper circle with a wedge removed. Bring the cut edges together until the circle forms a cone, then secure the overlap. A shallow cone is easier to attach than a narrow, sharply pointed one. Trim or fold the point so it is not rigid or scratchy. Small tabs cut around the cone’s bottom edge can fold under and attach to the body, but an adult should prepare those closely spaced cuts for children who are not ready to control scissors around narrow sections.
Fins work best as broad triangles or curved trapezoids with folded attachment tabs. Three evenly spaced fins usually balance more easily than several narrow decorative fins. For a rocket that must stand upright, align the bottom edges of all fins on a flat surface before the adhesive dries. If one fin sits higher, the body will lean and repeated tipping will weaken the other joints.
A simple construction sequence keeps weak work from being hidden under decoration:
- Form and reinforce the body seam.
- Fit the nose cone without attaching it, then adjust its diameter.
- Fold fin tabs and test the rocket on a flat surface.
- Glue the cone and fins, then allow the joints to set.
- Gently handle the body before adding windows, flames, or controls.
The test fit is the step most often skipped. Gluing a cone before checking its diameter can leave a loose cap, while decorating fins before aligning them can hide crooked folds. A rocket is ready for surface details when it can be lifted by the middle without its seam opening and can rest upright without a hand holding it. If either test fails, reinforce the inside rather than adding tape across every visible surface.
Add Pretend-Play Details Without Overloading the Rocket
Pretend-play features should suggest actions children can perform, not merely make the rocket look busy. A numbered hatch invites a countdown, a control panel supports pilot play, and removable astronaut figures create a crew. Three purposeful details often sustain more play than dozens of tiny shapes that detach, disappear, or make the body difficult to grip.
Windows can be cut from blue or black paper and edged with narrow foil rings. A control panel can use large circles, switches, and directional arrows drawn on a separate card before it is attached. Creating that panel separately lets a child redesign it without weakening the rocket body through repeated erasing or heavy marker use. Mission labels such as “fuel,” “communications,” and “samples” connect the craft to a specific story while leaving children free to invent what each system does.
Tissue-paper flames add movement with very little weight. Layer short red, orange, and yellow strips, then attach them inside the bottom opening rather than covering the outside edge. Long streamers can wrap around hands, furniture, or other children during active play, so keep them short enough to flutter without trailing. For a standing model, the flames should not extend below the fins or they will crumple against the table.
Consider making related props instead of placing every feature on the rocket. A folded mission card can hold a destination, crew names, and a return plan. Cardstock astronaut figures can fit into a paper pocket attached to the body. A separate launch-control board can contain the countdown numbers and switches. This distributes handling across several pieces and keeps the main structure light. The approach is particularly useful for siblings or a small group because pilot, engineer, and mission-control roles can operate at the same time.
Decoration methods also involve tradeoffs. Markers add almost no weight and cannot peel off, but heavy coloring may buckle thin paper. Glued paper shapes provide bold color and tactile edges, yet poorly covered corners catch on clothing. Foil creates a convincing metallic surface, although large sheets wrinkle and can obscure a failing seam. Use metallic material for compact accents rather than wrapping the full body unless an adult can smooth and secure it.
The best sign that details are working is behavioral: children refer to them while playing. If a window becomes a lookout port or a paper dial starts a countdown, it has a clear function. If decorations continually fall off or prevent children from holding the rocket, remove them. The related Rocket paper craft supplies for pretend play planning page can help separate story-building pieces from purely ornamental additions.
Check Safety, Durability, and Play Readiness
A finished rocket should be evaluated as a play object, not only as a display piece. Look at it from the child’s perspective: where will hands grip it, which edge points toward the face, and what happens when it is dropped? Paper feels harmless, but stiff corners, exposed fasteners, and loose miniature decorations can create avoidable problems.
Run a hand lightly around the cone, fins, seams, and bottom opening. Fold or trim sharp cardstock points and cover any rough cardboard edges with paper tape. Staples are quick, but exposed legs or raised crowns are unsuitable in gripping areas; glued overlaps or enclosed tape are better for a rocket that will be carried. Tiny sequins, beads, buttons, and magnets are unnecessary for this project and may be inappropriate for younger children or homes where smaller siblings can reach fallen pieces.
Check every attachment with a gentle pull. The goal is not to make paper indestructible but to identify parts likely to detach during the first play session. A loose fin can often be repaired with an interior cardstock tab. A lifting window needs adhesive at its corners, not a thick coat across the whole shape. A cone that twists may need an internal paper ring supporting its base. These targeted repairs preserve the design without making it bulky.
Wearable versions need a stricter review. Avoid tying long cords around the neck, chest, or waist. If children want a rocket pack, attach lightweight decorated tubes to a properly fitted costume base under close adult supervision, and make sure the assembly releases easily rather than catching on furniture. A handheld or tabletop rocket is the simpler option when active movement, mixed ages, or limited supervision makes straps impractical.
Set a clear play boundary as well. Paper rockets are props for carrying, aiming toward imaginary destinations, or moving through a pretend launch sequence; they are not meant to be thrown at people. Indoors, designate a launch pad on the floor or table and keep running routes away from stairs and hard furniture. Outdoors, moisture and wind quickly damage paper components, so use the craft in dry, calm conditions and bring it back inside afterward.
Store the rocket upright in an open box rather than placing books or toys on top of it. Keep a few matching scraps, tape, and glue nearby for repairs. A seam that repeatedly opens or fins that bend after every use indicate the base material is too light for the way the rocket is being played with. Rebuild that component in cardstock or thin cardboard instead of applying endless surface patches.
Frequently Asked Questions
What paper is best for a pretend-play rocket?
Medium-weight cardstock suits most bodies, cones, and fins because it holds a shape without becoming too difficult to cut. Use lighter colored paper for decorations and tissue paper for flames.
Can a rocket be made without a cardboard tube?
Yes. Roll cardstock into a cylinder with a generous overlapping seam, then reinforce the seam from inside with paper tape. A tube is easier for beginners, but it is not required.
Which glue works best for the rocket parts?
Use a glue stick for flat decorative shapes and a small amount of white craft glue for structural overlaps. Paper tape can hold springy seams while the liquid glue dries.
How can paper fins be made stronger?
Cut fins from cardstock, fold a wide tab along each attachment edge, and glue the tab firmly to the body. An extra cardstock tab inside the joint can reinforce a fin that receives frequent bumps.
What details make the rocket useful for pretend play?
Add a large window, labeled controls, a crew pocket, mission numbers, and short tissue flames. Choose details that prompt actions such as counting down, steering, communicating, or collecting imaginary samples.
Conclusion
A useful launch set begins with a body that can be gripped, fins that sit evenly, and a cone without a hard point. Cardstock, a clean tube, lightweight decorative sheets, modest amounts of adhesive, and short tissue flames cover most construction needs without overcomplicating the project. Build the structure first, test its seams and balance, and reserve decoration for features that encourage a mission, role, or action.
Before play begins, check for lifting corners, loose parts, rough edges, long streamers, and attachments that add unnecessary weight. Repair weak joints from inside whenever possible. If the rocket repeatedly collapses under ordinary handling, replace the affected piece with heavier stock rather than layering on more glue. Once the craft passes a gentle handling test, add a mission card or separate control panel and let the launch story determine what the crew needs next.
Now retrieving an image set.
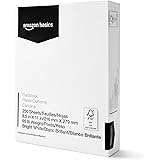
Amazon Basics Cardstock Paper, 8.5" x 11", 65 lb/176 gsm, 96 Bright White, 250 Sheets
$10.63 (as of October 21, 2026 23:20 GMT -04:00 - More infoProduct prices and availability are accurate as of the date/time indicated and are subject to change. Any price and availability information displayed on [relevant Amazon Site(s), as applicable] at the time of purchase will apply to the purchase of this product.)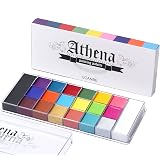
Now retrieving an image set.
UCANBE Athena Face Body Paint Oil Palette, 20 Colors Large Black White Professional Flash Tattoo Halloween SFX Party Artist Costume Festival Stage Cosplay Full Size Makeup Painting Kit 168g
$19.99 (as of October 21, 2026 23:20 GMT -04:00 - More infoProduct prices and availability are accurate as of the date/time indicated and are subject to change. Any price and availability information displayed on [relevant Amazon Site(s), as applicable] at the time of purchase will apply to the purchase of this product.)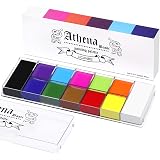
Now retrieving an image set.
UCANBE Athena Basic Face Body Paint Oil Palette, 12 Color Large Black White Professional Face Painting Makeup Kit, Facepaint Pallet for Halloween SFX Party Art Stage Costume Cosplay Clown Goth Make Up
$16.99 (as of October 21, 2026 23:20 GMT -04:00 - More infoProduct prices and availability are accurate as of the date/time indicated and are subject to change. Any price and availability information displayed on [relevant Amazon Site(s), as applicable] at the time of purchase will apply to the purchase of this product.)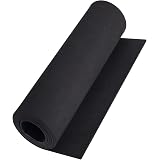
Now retrieving an image set.
Black eva Foam roll, (1mm to 20mm) Premium Cosplay EVA Foam Sheet,2mm Thick,49"x13.5",High Density 86kg/m3 for Cosplay Costume, Crafts, DIY Projects by MEARCOOH
$8.96 (as of October 21, 2026 23:20 GMT -04:00 - More infoProduct prices and availability are accurate as of the date/time indicated and are subject to change. Any price and availability information displayed on [relevant Amazon Site(s), as applicable] at the time of purchase will apply to the purchase of this product.)
Now retrieving an image set.
UCANBE Face Body Paint Set-Athena Painting Palette,10 Professional Artist Brush,Large Deep Pan Ideal for Halloween Cosplay Party SFX Arty Stage Makeup
$23.99 (as of October 21, 2026 23:20 GMT -04:00 - More infoProduct prices and availability are accurate as of the date/time indicated and are subject to change. Any price and availability information displayed on [relevant Amazon Site(s), as applicable] at the time of purchase will apply to the purchase of this product.)
Now retrieving an image set.