
Choose a Bag and Handle Design That Can Carry Weight
The bag and handle materials determine how much reinforcement the finished pumpkin will need. A medium kraft lunch bag is easy for children to decorate, but its thin upper edge can split when a narrow handle pulls against it. A heavier shopping-style paper bag offers better load capacity, although its existing handles may limit where the pumpkin face and stem can be placed. Inspect the folds, corners, and rim before beginning; creases that are already separating will continue to open under tension.
Handle width matters as much as handle material. Narrow string, yarn, and pipe cleaners concentrate force in a small area and may cut through paper. A strip of grosgrain ribbon about an inch wide spreads the pull more effectively and remains comfortable to hold. A folded cardstock strip is inexpensive and coordinates with the pumpkin, but repeated bending can create a weak point near each end. Twisted paper cord works for a light display bag, though it is less forgiving if children swing or sharply lift the project.
Choose the attachment method according to the expected use. A decorative pumpkin that will hold tissue paper needs less support than a bag intended to collect classroom treats. For light display use, glued cardstock handles with broad overlapping ends may be adequate. For carrying, pass ribbon through reinforced holes or secure each end with a staple over an interior patch. Metal brads can create neat pivoting connections, but an adult should make the holes and check that the prongs are fully flattened and covered inside the bag.
A sensible materials check for a Paper bag pumpkin craft with sturdy handles includes:
- Bag: kraft paper with intact side seams and a firm folded rim
- Reinforcement: four cardstock rectangles and an optional cardboard base
- Handle: two wide ribbon loops or one broad paper strip
- Fasteners: tacky glue plus staples or covered brads for carrying use
- Decoration: lightweight paper shapes, crayons, or a thin layer of paint
A common mistake is choosing materials for appearance without considering load direction. Soft yarn may look rustic, yet it pulls like a thin cord at the hole. Wide ribbon or folded paper distributes the same weight over a larger reinforced area. Before decorating, decide whether the pumpkin will be carried, displayed, or filled; that decision should control every structural choice that follows.
Reinforce the Rim and Attachment Points
Reinforcement should extend beyond each handle hole or staple so the pulling force reaches a larger section of the bag. Cut four cardstock rectangles approximately two inches tall and wide enough to cover the planned attachment zones. Glue one patch inside each handle location, keeping its top edge just below the bag opening. If the kraft paper feels especially thin, add matching patches outside and treat the bag wall as a sandwich between two stronger layers.
Let glued patches dry before punching holes. Wet adhesive allows layers to slide, which can create misaligned holes and wrinkled paper. Once dry, fold the top edge inward by about an inch if the bag does not already have a firm rim. This folded band resists stretching better than a single sheet. Keep holes below the fold rather than directly on the top edge, and leave enough paper around each hole that the punch does not create a narrow bridge likely to tear.
For ribbon loops, mark paired attachment points at equal heights on both sides. An adult can punch the holes, thread each ribbon end from outside to inside, and tie a large knot. A knot alone can still pull through, so place it against the cardstock patch and add a short piece of tape over the loose end. If using staples, overlap at least an inch of ribbon inside the bag and staple through the ribbon, bag, and patch. Cover staple legs with sturdy tape to prevent scratches and snagged contents.
Glue-only construction looks clean but has a meaningful limitation: a peel force acts on the end of the handle whenever the bag tips. Adhesive performs better across a broad, flat overlap than at a sharply bending edge. Combining glue with a mechanical fastener gives the joint two forms of support. For younger children, an adult can complete the punched holes and fasteners while children handle the safe decorating tasks.
Spacing also affects strength. Handles placed too close together pull the rim inward and make the bag buckle. Position attachments toward the outer thirds of each side while staying clear of the side gussets. Press the empty bag into its normal open shape before marking positions; marks made while it is flattened can shift toward a fold after opening. The reinforcement is working when the rim stays level during a light test lift and no crescent-shaped crease appears above a hole.
Assemble the Pumpkin Without Weakening the Bag
Decoration should add the pumpkin shape without saturating, crushing, or cutting the load-bearing parts of the bag. Open the bottom fully and place a small piece of corrugated cardboard inside if the bag must stand while holding items. Cut the insert slightly smaller than the base so it lies flat without forcing the corners outward. This base will not strengthen the handles directly, but it keeps contents from collecting against one side and twisting the upper joints.
Color the bag orange with crayons, washable markers, or a light coat of tempera paint. Crayons preserve the paper’s stiffness and allow immediate assembly. Paint produces broader color coverage, but excess water softens kraft fibers and can loosen glued seams. Apply a thin layer with a sponge or broad brush, keep paint away from the handle patches, and let the bag dry while open. Do not use a heater to rush drying; uneven heat can curl the rim and distort glued areas.
Create pumpkin ribs with narrow paper strips, marker lines, or shallow vertical folds. Marker lines add almost no weight and are the safest choice for a bag expected to carry treats. Applied strips give more dimension, although thick foam or multiple wet layers may cause the front panel to sag. Position the face below the reinforced band. Cutting large eyes or a mouth directly from the bag removes structural material, so glue contrasting paper shapes onto the surface instead.
A green paper stem can be attached to the center of the rim without becoming part of the handle. Fold a cardstock stem over the edge and glue it to the front and back, leaving the handle paths clear. If the stem is tall, use lightweight cardstock rather than craft sticks, which can make the top lean. Paper leaves may conceal the handle attachments, but they should not be glued across an opening that must flex.
For a classroom version, prepare reinforcement rectangles, base inserts, and handle lengths in advance. Children can color the bag and position facial features while an adult manages holes and staples. This division preserves creative choice without asking small hands to control sharp tools or align structural layers. A more decorative Paper bag pumpkin craft with sturdy handles can include layered leaves and name tags, provided those additions remain outside the reinforced joints.
The warning signs of over-decoration are a wavy rim, damp seams, or a bag that tilts before anything is placed inside. Stop adding layers if the front panel bows outward or the base no longer sits flat. Lightweight details generally produce a cleaner pumpkin and leave more of the bag’s limited strength available for carrying.
Test the Handles and Fix Common Failures
Testing should be gradual and should happen before the bag is handed to a child. Begin with the empty pumpkin on a table. Lift both handles only an inch or two while supporting the base with the other hand. Watch each attachment point for stretching, pale stress lines, separating cardstock, or holes changing from round to oval. Those changes indicate that force is concentrating at an edge rather than spreading through the patch.
Add weight in small, soft increments, such as crumpled paper or a few lightweight wrapped items. Lift briefly after each addition instead of filling the bag all at once. The purpose is not to find the maximum possible load; it is to confirm that the intended light contents do not distort the rim. A bag that survives one heavy test may still fail after repeated swinging, so conservative loading is more useful than a dramatic strength demonstration.
If a hole begins to elongate, unload the bag immediately. Glue a larger cardstock patch over the damaged area, allow it to dry, and make a new hole farther from the tear. Do not punch through the same weakened edge. For a separating glued handle, flatten the overlap and add a staple through a fresh interior patch. If the entire rim folds inward, insert a continuous cardstock band around the inside top edge rather than trying to repair each handle independently.
Uneven handle lengths create another common failure. The shorter side takes the load first, causing the bag to tilt and placing extra force on one pair of attachments. Set the pumpkin upright, hold both loops together, and compare their highest points. Retie ribbon or reposition a paper handle until both sides rise evenly. A balanced bag should lift without twisting its face toward one side.
The strongest repair is not always the neatest, so decide whether appearance or carrying function has priority. A concealed interior patch preserves the pumpkin’s front, while an exterior leaf-shaped patch can turn visible reinforcement into decoration. If the paper has torn through the rim or a side seam has opened, retire the bag as a tabletop display rather than continuing to add fasteners. Structural damage can migrate beyond a small repair.
Complete the final check by confirming that knots cannot slip, staple legs are covered, brads lie flat, the base insert does not have sharp corners, and the bag remains comfortable to hold. Repeat the gentle lift after the project has dried overnight because adhesives and painted paper can change stiffness. These checks make the finished pumpkin suitable for its planned light-duty use without implying that a handmade paper container should carry heavy objects.
Frequently Asked Questions
What material makes the strongest child-friendly handle?
Wide grosgrain ribbon is a practical choice because it bends comfortably while spreading force across reinforced attachment points. Avoid thin cord when the bag will carry contents.
Can the original paper bag handles be used?
Yes, if they are firmly attached and show no lifting or tears. Add cardstock behind their attachment areas before painting or filling the bag.
Should the pumpkin be painted before adding handles?
Paint first, let the open bag dry fully, and then install the handles. Keeping paint away from reinforcement zones helps adhesive bond to dry, clean paper.
How much can the finished pumpkin hold?
Capacity varies with bag thickness and construction. Treat it as a light-duty container, test it gradually, and stop adding contents if the rim bends or holes stretch.
How can staples be made safer inside the bag?
Have an adult apply them through interior cardstock patches, press the legs flat, and cover them completely with sturdy tape before the bag is used.
Conclusion
A durable pumpkin bag comes from managing force at the rim rather than simply adding a thicker handle. Begin with an undamaged kraft bag, reinforce every attachment point with cardstock, and choose a wide handle that will not slice into the paper. Glue is useful for broad patches, while staples, covered brads, or reinforced holes provide more dependable support for a bag that will be lifted.
Keep paint thin, place decorative cutouts below the reinforced band, and use a flat base insert when the pumpkin needs to stand with contents inside. Before use, compare handle lengths and test the bag with light weight while watching for stretched holes, curling patches, or a tilting rim. Repair small damage before loading the bag; convert extensively torn projects into displays. Those priorities preserve both the pumpkin design and the carrying function without asking thin paper to handle more weight than it reasonably can.
Now retrieving an image set.
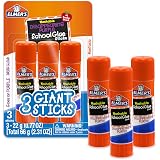
Elmer's Disappearing Purple School Glue Sticks, Washable, 22 Grams, 3 Count - Poster, Vision Board, Back to School Supplies, #1 Teacher Brand
$3.99 (as of October 2, 2026 22:55 GMT -04:00 - More infoProduct prices and availability are accurate as of the date/time indicated and are subject to change. Any price and availability information displayed on [relevant Amazon Site(s), as applicable] at the time of purchase will apply to the purchase of this product.)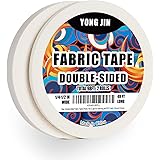
Now retrieving an image set.
Double-Sided Fabric Tape,Hem Tape No Sew No Iron,1/4"+1/2" (2 Rolls) | No Sewing or Ironing Required, Quick Clothing Repairs, Fabric Bonding, For Hemming and DIY Crafts
$7.99 (as of October 2, 2026 22:55 GMT -04:00 - More infoProduct prices and availability are accurate as of the date/time indicated and are subject to change. Any price and availability information displayed on [relevant Amazon Site(s), as applicable] at the time of purchase will apply to the purchase of this product.)
Now retrieving an image set.
Crayola Air Dry Clay (5lbs), Teacher Supplies, Natural White Modeling Clay for Kids, Sculpting Material, Bulk Craft Supplies for Art Classrooms
$13.58 (as of October 2, 2026 22:55 GMT -04:00 - More infoProduct prices and availability are accurate as of the date/time indicated and are subject to change. Any price and availability information displayed on [relevant Amazon Site(s), as applicable] at the time of purchase will apply to the purchase of this product.)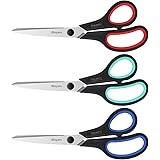
Now retrieving an image set.
iBayam 8.5" Heavy Duty Scissors All Purpose for Office School Crafts Sewing | 3-Pack, Ultra-Sharp 2.5mm Stainless Blades, Comfort Grip Handles, Left & Right Handed – Teacher Desk & Classroom Must-Have
$9.99 (as of October 2, 2026 22:55 GMT -04:00 - More infoProduct prices and availability are accurate as of the date/time indicated and are subject to change. Any price and availability information displayed on [relevant Amazon Site(s), as applicable] at the time of purchase will apply to the purchase of this product.)
Now retrieving an image set.
Amazon Basics Mini Size Hot Glue Sticks, 4" x 0.27", 100-Pack, Hot Melt Compatible with Most Glue Guns for Crafting, DIY, Home Repair, Transparent
$6.47 (as of October 2, 2026 22:55 GMT -04:00 - More infoProduct prices and availability are accurate as of the date/time indicated and are subject to change. Any price and availability information displayed on [relevant Amazon Site(s), as applicable] at the time of purchase will apply to the purchase of this product.)
Now retrieving an image set.