
An easy New Year craft preschoolers can decorate is a cardboard countdown clock with a preattached movable hand and five open-ended decoration choices. An adult cuts the circle, makes the center hole, and secures the hand, while children add large number stickers, washable-marker lines, paper shapes, dot-paint patterns, or foil stars. Using a shallow tray and a small selection of large materials keeps the activity manageable and reduces choking, spill, and frustration risks. The finished clock gives preschoolers a recognizable New Year object without expecting accurate numeral placement, precise cutting, or identical results.
Why a Cardboard Countdown Clock Works for Preschoolers
A countdown clock gives young children a clear shape to decorate without requiring them to understand how a real clock measures time. The round base provides a generous working area, the movable hand adds play value, and the New Year connection remains visible even when every child chooses different colors and marks. That combination makes the project more forgiving than a craft built around precise folding, matching, or cutting.
The strongest preschool version separates adult construction from child decoration. An adult prepares the cardboard circle and moving hand before materials reach the table. Children then make meaningful visual decisions: where to place a star, which number to use, whether to draw lines or dots, and when their clock feels finished. They participate in the creative work without being asked to manage a difficult fastener or force scissors through stiff cardboard.
Expect developmental variation. One child may arrange number stickers around the edge, while another may place every sticker in one cluster. Both approaches exercise peeling, pressing, grasp control, and decision-making. A numerically accurate clock face can be shown as a reference, but it should not become the standard by which the finished piece is judged. For a three-year-old, independently peeling and attaching a large sticker may be the more relevant accomplishment.
A common mistake is covering the base with a polished adult-made design before the activity begins. A clock that already has printed numerals, decorative borders, and a completed center leaves little room for preschoolers to affect the result. Prepare only the features needed for function: the circle, center hole, clock hand, and perhaps four light position marks. Leave the visible surface mostly open.
This project is best for a seated small group, a family craft table, or a classroom center where an adult can monitor loose materials. A flat celebration collage may be a better alternative when children are likely to pull at the moving hand or when fasteners cannot be supervised. For more variations on an Easy New Year craft preschoolers can decorate, keep the same child-led principle even if the clock is replaced by a party hat or fireworks picture.
Materials and Adult Preparation
Successful preparation reduces waiting without deciding what each finished clock must look like. Cut one circle per child from corrugated cardboard, a cereal box, or a sturdy paper plate. Corrugated cardboard is durable but harder to cut; cereal-box card is easier to pierce but may bend during vigorous coloring. A plain paper plate is convenient for groups, although ridged or coated surfaces can make stickers lift and markers skip.
Make each clock hand from cardstock or thin cardboard with a wide base and rounded tip. The adult should create the center hole and attach the hand with a paper fastener. Close the fastener securely on the back, then cover its prongs with strong tape so sharp ends are not exposed. The hand should turn with gentle pressure but should not wobble loosely. If the fastener can be pulled free, replace it or switch to a fixed paper hand glued in place.
Choose decorations for their size, handling characteristics, and compatibility with the base—not merely for sparkle. Large paper shapes, broad number stickers, washable markers, dot painters, and pieces of metallic paper are easier to manage than sequins, loose glitter, tiny gems, or confetti. Small components can create choking concerns and quickly turn a calm table into a cleanup problem. Check product labels, follow the stated age guidance, and supervise the entire activity.
A compact setup usually needs:
- Prepared base: one sturdy circle with an attached hand per child
- Mark-making tools: washable markers or crayons that show on the chosen surface
- Adhesive option: glue sticks for paper pieces or self-adhesive shapes
- Large decorations: number stickers, stars, circles, strips, or squares
- Work controls: a shallow supply tray, table covering, and a separate drying area
Test one sample before preparing a group set. Apply a sticker, draw a marker line, glue on a paper shape, and rotate the hand. This quick check reveals whether the surface repels adhesive, the marker smears, or the center tears under movement. Craft foam and heavy paint may look appealing, but both can add enough thickness or moisture to obstruct the hand. Keep the center area clear and use wet materials sparingly.
Do not place every available supply on the table at once. Two or three decoration types support choice while keeping the visual field manageable. Additional trays can be introduced after children understand where materials belong. This staged approach is especially useful when several preschoolers share supplies and are still learning to wait, pass, and return items.
Five Child-Led Decorating Choices
Five distinct choices provide variety without turning the activity into an unrestricted supply dump. Present them as invitations rather than required stages. A child can use one method extensively, combine several, or stop while open cardboard remains visible. The goal is recognizable ownership of the clock, not complete surface coverage.
1. Large Number Stickers
Offer a small group of large numerals rather than a full sheet that is difficult to peel and share. Children may place them around the rim, in the center, or on top of one another. Adults can name a numeral when asked, but correcting its position repeatedly changes a decorating experience into a placement test.
2. Washable-Marker Celebration Lines
Preschoolers can draw straight, curved, circular, or radiating lines around the clock. Radiating marks can resemble fireworks without requiring a model to copy. Markers offer immediate results and little drying time, but their caps need active management. Crayons are a useful lower-mess substitute when the base is not coated.
3. Paper Shape Collage
Precut large stars, circles, and short strips allow children to arrange and overlap pieces. A glue stick generally creates less saturation than liquid glue on lightweight card. If liquid glue is used, place a small amount in a shallow dish and provide a short-handled brush. Pools of glue can warp the base and immobilize the hand.
4. Dot-Paint Patterns
Dot painters produce bold marks with a repeated pressing motion. They work well for children who find sticker backing frustrating, although overpressing can release too much paint. Demonstrate one gentle press on scrap paper, provide only a few colors, and move completed clocks to a level drying space.
5. Foil or Metallic-Paper Stars
Large precut stars made from metallic paper create shine without loose glitter. Foil tears easily and can develop sharp-feeling corners when tightly crumpled, so cardstock-backed metallic paper is often easier for young hands. Keep every piece large enough to notice and retrieve promptly.
The activity is working when children can reach supplies, make choices, and attach materials with limited adult intervention. It is failing when adults spend most of the time repairing wet cardboard, peeling tiny stickers, or insisting that each clock match a sample. If frustration rises, reduce the available methods rather than adding more instructions. One tray of large shapes and one marker cup can produce more sustained participation than five crowded bins.
Families or teachers adapting this Easy New Year craft preschoolers can decorate for mixed ages can give older children numeral-placement or pattern challenges while preserving free decoration for younger participants. That adjustment lets children share a theme without expecting identical fine-motor control.
Assembly, Troubleshooting, and Display
The final check should protect the child’s design while confirming that the clock remains safe to handle. Let glue or paint dry flat before testing the hand. Turn it slowly through a full circle and look for raised stickers, thick collage pieces, or paint ridges that block movement. Trim or press down an obstruction instead of forcing the hand, which can enlarge the center hole.
If the hand will not turn, first check the fastener rather than rebuilding the entire clock. It may be clamped too tightly, taped across a moving part, or surrounded by thick decorations. Loosen the connection slightly from the back while keeping the prongs covered. When the cardboard around the center has torn, place a larger cardstock circle over the damaged area, make a new hole, and reattach the hand. An adult should complete this repair away from children because the fastener must be removed.
If stickers lift, the likely cause is a dusty, ridged, damp, or highly coated surface. Pressing harder rarely solves the underlying mismatch. Reinforce large stickers with a small amount of glue stick, or replace them with paper shapes suited to the base. If marker lines smear, allow more drying time and avoid layering glue over them. A tested material combination prevents these problems more reliably than correcting them during a busy group session.
Display choices affect durability. For a wall display, attach a loop to the back rather than punching a hanging hole close to the rim. For pretend play, leave the clock unstrung and reinforce the back center with tape. Write the child’s name on the reverse before decorating begins; adding it later risks flipping a wet clock or mistaking one child’s work for another’s.
Adults sometimes demonstrate “midnight” by moving every hand to the same position and then resetting children’s clocks for display. That creates a tidy row but removes evidence of individual choice. If the group is discussing a countdown, show the idea on a separate demonstration clock. Children’s own hands can remain where they placed them.
Before sending the project home, use a brief check: the fastener is secure and covered, no loose small pieces remain, wet media are fully dry, and the child can move the hand without tearing the center. A fixed hand is preferable to an unreliable moving part. Functional simplicity matters more than preserving a mechanism that will detach during play.
Frequently Asked Questions
What age is this New Year clock craft suitable for?
It generally suits preschool-aged children when an adult prepares the cardboard, hole, and fastener. Material size, supervision, and each child’s tendency to mouth objects matter more than a single age cutoff.
Can preschoolers cut out the clock themselves?
They can practice cutting separate paper decorations with suitable child scissors, but an adult should cut thick cardboard circles and pierce the center hole.
What can replace glitter on a preschool New Year craft?
Use large metallic-paper stars, foil-finish stickers, shiny paper strips, or washable metallic paint. These provide a festive surface with less scatter than loose glitter.
How can a group complete the craft with less mess?
Prepare the bases in advance, offer two or three supplies at a time, use shallow trays, and establish a flat drying area before children begin.
Do the numbers need to be in the correct clock positions?
No. A separate reference clock can support children who are interested in numeral order, but free placement keeps decoration accessible to younger preschoolers.
Conclusion
A preschool countdown clock succeeds when construction is handled in advance and the visible decisions remain with the child. Use a sturdy base, a securely covered fastener, large decorations, and only a few material choices at one time. Test the supplies together before a group session, especially if the plate is coated or the clock hand must rotate over collage pieces.
Prioritize safe handling and independent participation over a perfectly numbered clock face. Watch for lifting stickers, saturated cardboard, blocked movement, and loose components; each is a signal to simplify the design or substitute a better-matched material. Prepare the functional parts, set out one manageable tray, and let each preschooler decide how the New Year clock should look.
Now retrieving an image set.
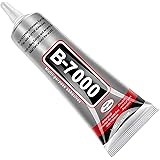
B7000 Jewelry Glue for Making, FITTDYHE 1PCS 50ML/1.69 fl oz Clear Adhesive for Rhinestone, Fabric, Multipurpose Super B-7000 for Phone Repair, Nail Art, Wood, Glass, Charms
$5.99 (as of September 26, 2026 22:43 GMT -04:00 - More infoProduct prices and availability are accurate as of the date/time indicated and are subject to change. Any price and availability information displayed on [relevant Amazon Site(s), as applicable] at the time of purchase will apply to the purchase of this product.)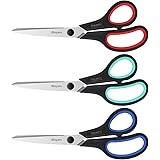
Now retrieving an image set.
iBayam 8.5" Heavy Duty Scissors All Purpose for Office School Crafts Sewing | 3-Pack, Ultra-Sharp 2.5mm Stainless Blades, Comfort Grip Handles, Left & Right Handed – Teacher Desk & Classroom Must-Have
$9.99 (as of September 26, 2026 22:43 GMT -04:00 - More infoProduct prices and availability are accurate as of the date/time indicated and are subject to change. Any price and availability information displayed on [relevant Amazon Site(s), as applicable] at the time of purchase will apply to the purchase of this product.)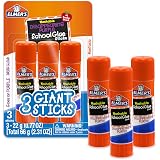
Now retrieving an image set.
Elmer's Disappearing Purple School Glue Sticks, Washable, 22 Grams, 3 Count - Poster, Vision Board, Back to School Supplies, #1 Teacher Brand
$3.99 (as of September 26, 2026 22:43 GMT -04:00 - More infoProduct prices and availability are accurate as of the date/time indicated and are subject to change. Any price and availability information displayed on [relevant Amazon Site(s), as applicable] at the time of purchase will apply to the purchase of this product.)
Now retrieving an image set.
Astrobrights/Neenah Bright White Cardstock, 8.5" x 11", 65 lb, 75 Sheets | 96 Brightness, Smooth Premium Finish
$5.79 (as of September 26, 2026 22:43 GMT -04:00 - More infoProduct prices and availability are accurate as of the date/time indicated and are subject to change. Any price and availability information displayed on [relevant Amazon Site(s), as applicable] at the time of purchase will apply to the purchase of this product.)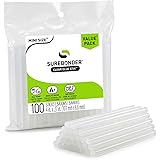
Now retrieving an image set.
Surebonder Clear, All Purpose, All Temp., Mini Size Hot Glue Sticks 0.27 in. Diameter, 4 in. Length -100 Pack
$5.97 (as of September 26, 2026 22:43 GMT -04:00 - More infoProduct prices and availability are accurate as of the date/time indicated and are subject to change. Any price and availability information displayed on [relevant Amazon Site(s), as applicable] at the time of purchase will apply to the purchase of this product.)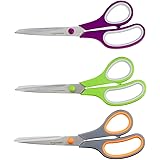
Now retrieving an image set.