
Choose a Stable Base and Preschool-Friendly Supplies
The base determines whether the finished wreath stays round or bends under the weight of its decorations. A ring cut from a cereal box, poster board, or heavyweight cardstock is usually more dependable than a single sheet of thin construction paper. An adult can draw around a dinner plate for the outer edge and a smaller bowl for the opening, then cut out both circles before the activity begins. A base about 9 to 12 inches across gives preschoolers enough room to place several shapes without creating an unwieldy classroom display.
Paper choice affects both cutting difficulty and durability. Construction paper is easy to trace and available in useful seasonal colors, but very soft sheets may wrinkle when covered with wet glue. Lightweight cardstock keeps the fingers of each handprint more defined, although it takes greater hand strength to cut. For children still developing scissor control, use construction paper for child-cut shapes and reserve cardstock for adult-prepared pieces. Mixing the two is practical: sturdier handprints can form the first layer, while lighter ones fill visible gaps.
Keep the supply set focused. The core items are a prepared ring, colored paper, a pencil or washable marker, child-safe scissors, and a glue stick or small amount of washable school glue. Optional additions can include large paper circles, wide ribbon, crayons, or washable paint. Avoid small loose decorations when children may still put objects in their mouths, and follow the age guidance and supervision instructions for every product. Staples, hot glue, sharp craft knives, and long cords belong in the adult preparation area rather than at the preschool table.
A glue stick is cleaner and allows immediate handling, but it may release from dusty cardboard or heavily textured paper. Liquid school glue generally creates a stronger bond when it dries, yet a thick puddle can soak the shapes and make their fingers curl. If using liquid glue, place a small amount in a shallow container and let children apply it with a cotton swab or short craft stick. The material setup for a Preschool wreath craft using handprint shapes is working when children can reach what they need without leaning across scissors, wet glue, or another child’s project.
Trace and Prepare Handprint Shapes
Clear handprint outlines begin with a relaxed, open hand rather than fingers stretched as far apart as possible. Place the child’s palm flat on the paper, spread the fingers gently, and trace from the wrist around each fingertip. An adult can hold the paper steady while the child watches or helps guide the pencil. If tracing directly around a hand feels ticklish or causes movement, trace one successful outline onto thin cardboard and use it as a reusable template.
The tracing stage can be shared without expecting preschoolers to complete every motion independently. Younger children may choose colors and press down the template while an adult draws. Children with more control can trace the palm section themselves and receive help around the narrow spaces between fingers. Use a visible pencil line on dark paper or a washable marker when the outline would otherwise disappear. A broad outline is easier to cut than one that follows every tiny curve of a finger.
Cutting should match the child’s current ability, not the desired appearance of the final display. A beginner can cut along the wrist and broad outside edge while an adult handles the finger spaces. A child with established scissor skills can rotate the paper with the helper hand and make short cuts around each fingertip. Cutting into the tight valleys between fingers often causes accidental tears, so leave a small curved bridge rather than forcing a sharp V-shaped cut. Hand-over-hand assistance should be used only when the child is comfortable with it; pre-cut shapes are a better choice when cutting creates frustration.
Prepare roughly 8 to 14 handprints, depending on the ring size and the size of the child’s hand. Fewer large shapes produce a bold, open design, while more small shapes create a fuller edge. Exact matching is unnecessary. Slight differences in finger position make the wreath recognizable as a child-made piece, and a torn fingertip can usually be hidden under the next layer. Before glue appears, write the child’s name and date on the back of the ring. That simple step avoids turning over a wet project later.
A useful check is to place two or three shapes on the base before cutting the full set. If most of the palm extends into the center opening, the handprints are too large or the ring is too narrow. If wide areas of cardboard remain exposed, add shapes, enlarge them, or plan a second layer. Testing early prevents the common failure of discovering that the chosen scale does not fit after every outline has been cut.
Arrange and Glue the Wreath in Layers
A dry arrangement gives preschoolers a chance to make visual decisions before glue limits their options. Place the ring flat and set each handprint with its fingers pointing outward. The palm should cover the ring, while the wrist end follows the circular path. Overlap each new wrist and part of the palm with the next shape so the base does not show through. This repeated placement turns separate outlines into a continuous wreath rather than a row of hands attached at random angles.
Begin at the top or bottom and work around the ring in one direction. For a simple color pattern, alternate two colors. For a mixed design, invite the child to distribute favorite colors without requiring a strict sequence. Rotating the handprints slightly creates movement, but pointing some fingers inward can obstruct the opening and make the center look crowded. If the child deliberately chooses an inward shape, preserve the choice when it does not weaken the construction; preschool art does not need adult-perfect symmetry.
Once the dry layout fits, move one handprint at a time, add glue to the part touching the base, and return it to the same position. Gluing the entire shape is unnecessary because the fingers are intended to extend beyond the ring. Press the palm area for several seconds, then continue. The final piece should tuck beneath the first one to disguise the join. If that is difficult for the child, leave a small gap and cover it later with a paper bow, a label, or another handprint.
A second layer adds fullness but also adds weight. Use it when the cardboard remains visible or when the color design calls for contrast, not simply because more decoration seems better. Offset the upper handprints so their fingers sit between those in the lower row. Apply glue only at the palm and wrist; gluing every finger flat removes the dimensional edge and increases drying time. For a classroom version of a Preschool wreath craft using handprint shapes, teachers can mark several light placement dots on each base while still leaving color order and overlap choices to each child.
Stop and correct the assembly if shapes slide when touched, the ring begins to buckle, or wet glue squeezes from the edges. Sliding indicates too much adhesive or insufficient pressing. Buckling suggests that the base is too thin or wet; transfer it carefully onto a flat tray and let it dry before adding anything else. A well-built wreath remains flat at the center, has most of its base covered, and can be lifted from beneath without loose handprints falling away.
Adapt the Activity for Different Abilities and Themes
The strongest adaptation changes the task rather than removing the child’s choices. A preschooler who cannot yet trace or cut can select paper, position prepared handprints, press glued areas, and add large drawn details. A child ready for a longer challenge can make a color pattern, count the shapes, compare hand sizes, or cut several outlines. This keeps the project accessible without making every finished wreath identical.
For a mixed-age group, prepare three levels of participation at the same table. Offer pre-cut handprints for children concentrating on placement, traced outlines for children practicing cutting, and blank paper for children ready to trace from the beginning. Adults should avoid presenting these as better and worse versions. The meaningful distinction is how much fine-motor demand each option adds. A successful choice lets the child work with attention and reasonable independence rather than spending the session waiting for an adult to repair difficult cuts.
The same construction can reflect different seasons by changing colors and a few large details. Green handprints with red paper circles suggest a winter evergreen wreath. Red, orange, yellow, and brown create an autumn version. Several shades of green with broad paper flowers fit spring, while a rainbow arrangement works without tying the project to a holiday. Keep additions flat and light. Large paper berries or flowers are easier to manage than beads, bells, or dense pom-poms, and they are less likely to distort the ring.
Names and messages can sit on a paper strip across the center, but the strip needs two attachment points on the base. Gluing it only to the tips of the handprint fingers creates a weak bridge. For a collaborative class wreath, trace one hand from each child and use a larger corrugated cardboard ring. Arrange the shapes before gluing so every child’s contribution remains visible. That group version requires more adult assembly because varied hand sizes leave irregular gaps, yet those differences are part of the shared result.
Watch for signs that the plan is asking too much: repeated tearing at finger spaces, glue covering the work surface, children abandoning the project midway, or adults completing nearly every decision. Simplify one demand at a time. Pre-cut the base, replace liquid glue with a glue stick, reduce the number of handprints, or divide tracing and assembly into separate sessions. A useful Preschool wreath craft using handprint shapes should preserve recognizable child participation even when adults handle the precision work.
Dry, Reinforce, and Display the Finished Wreath
Flat drying protects the circular shape while the adhesive gains strength. Place the wreath on a tray or clean sheet of cardboard and leave it undisturbed according to the glue product’s directions. If a handprint edge lifts, press it again while the adhesive is still workable. Do not stack wet wreaths; glue can transfer between projects, and raised fingers may become crushed or attached to the piece above.
Inspect the back before hanging. Loose palm areas need a small amount of additional glue, while minor gaps on the front can remain as evidence of the assembly process. If the base bends when held upright, attach a second cardboard ring to the back after the front is dry. This reinforcement is preferable to coating the project with extra glue, which adds moisture without addressing a weak base. Very large class wreaths may need corrugated cardboard from the beginning.
For a lightweight paper wreath, tape a short loop of wide ribbon or folded paper to the back at two points. A single thin string can cut into soft cardboard and cause the ring to tilt. Another option is to display the wreath flat on a wall or bulletin board with mounting appropriate for that surface. Adults should choose and install hanging hardware. Keep loops short and place the display where children cannot pull it down, particularly when the wreath includes pieces that could detach.
Use a quick finishing check before display:
- Dryness: No glue feels cool, wet, or tacky beneath overlapping palms.
- Strength: The ring holds its shape when supported at the top and bottom.
- Attachment: Each handprint is secured at the palm even if its fingers remain raised.
- Display safety: The hanger is short, light, and installed by an adult.
Preservation depends on how the wreath will be used. A classroom display may only need to last through a season, so simple paper construction is sufficient. A keepsake benefits from acid-free paper, a written date, and storage in a flat box after display. Lamination is usually a poor match for a layered wreath because raised fingers and overlapping edges can create air pockets. Photographing the finished piece offers a practical record without changing the texture that gives the project its character.
Frequently Asked Questions
How many handprint shapes are needed for a preschool wreath?
Plan on about 8 to 14 shapes for a 9- to 12-inch base. Test several handprints on the ring first because hand size, overlap, and the width of the base change the total.
Should preschoolers cut out their own handprints?
Children with developing scissor control can cut broad outer curves while an adult handles narrow finger spaces. Pre-cut outlines are appropriate when cutting would prevent the child from participating in placement and decoration.
Is a glue stick or liquid glue better?
A glue stick offers less mess and faster handling on smooth paper. Washable liquid school glue may hold textured cardboard more firmly, but it should be used sparingly to limit curling and drying time.
How can the wreath base be kept from bending?
Use poster board, heavyweight cardstock, or cereal-box cardboard, dry the project flat, and avoid heavy decorations. If bending remains, glue a second matching ring to the back after the front has dried.
Can one wreath include handprints from an entire preschool class?
Yes. Use a larger corrugated cardboard base, label each handprint on the back, and arrange every shape before gluing. Varied hand sizes may require extra overlap or small filler shapes.
Conclusion
Durable results come from matching the construction to preschool abilities: prepare a firm ring, choose paper children can manage, test the handprint scale, and arrange every shape before applying adhesive. Adults can handle the inner ring, difficult finger cuts, and hanging hardware while leaving meaningful decisions about color, order, overlap, and decoration to the child. Use a second layer only when it covers gaps or contributes to the design, since unnecessary weight can bend the base. Let the project dry flat, check every palm attachment, and reinforce the back rather than adding more wet glue. The finished wreath should look recognizably child-made, remain secure when lifted, and reflect the level of participation the child could comfortably sustain.
Now retrieving an image set.
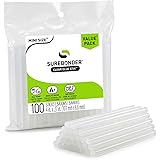
Surebonder Clear, All Purpose, All Temp., Mini Size Hot Glue Sticks 0.27 in. Diameter, 4 in. Length -100 Pack
$5.97 (as of September 18, 2026 22:40 GMT -04:00 - More infoProduct prices and availability are accurate as of the date/time indicated and are subject to change. Any price and availability information displayed on [relevant Amazon Site(s), as applicable] at the time of purchase will apply to the purchase of this product.)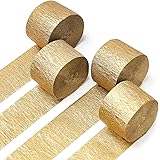
Now retrieving an image set.
PartyWoo Gold Crepe Paper Streamers 4pcs 328 FT Gold Streamers | Wedding Birthday Baby Shower Engagement Anniversary New Year Eve Graduation Bridal Shower Party Decorations
$6.99 (as of September 18, 2026 22:40 GMT -04:00 - More infoProduct prices and availability are accurate as of the date/time indicated and are subject to change. Any price and availability information displayed on [relevant Amazon Site(s), as applicable] at the time of purchase will apply to the purchase of this product.)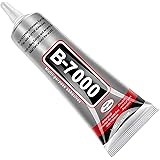
Now retrieving an image set.
B7000 Jewelry Glue for Making, FITTDYHE 1PCS 50ML/1.69 fl oz Clear Adhesive for Rhinestone, Fabric, Multipurpose Super B-7000 for Phone Repair, Nail Art, Wood, Glass, Charms
$5.99 (as of September 18, 2026 22:40 GMT -04:00 - More infoProduct prices and availability are accurate as of the date/time indicated and are subject to change. Any price and availability information displayed on [relevant Amazon Site(s), as applicable] at the time of purchase will apply to the purchase of this product.)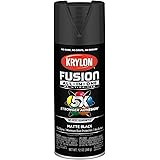
Now retrieving an image set.
Krylon Fusion All-In-One, Matte, Black, 12 oz
$6.98 (as of September 18, 2026 22:40 GMT -04:00 - More infoProduct prices and availability are accurate as of the date/time indicated and are subject to change. Any price and availability information displayed on [relevant Amazon Site(s), as applicable] at the time of purchase will apply to the purchase of this product.)
Now retrieving an image set.
Crayola Air Dry Clay (5lbs), Teacher Supplies, Natural White Modeling Clay for Kids, Sculpting Material, Bulk Craft Supplies for Art Classrooms
$11.24 (as of September 18, 2026 22:40 GMT -04:00 - More infoProduct prices and availability are accurate as of the date/time indicated and are subject to change. Any price and availability information displayed on [relevant Amazon Site(s), as applicable] at the time of purchase will apply to the purchase of this product.)
Now retrieving an image set.