
Preschool ornament crafts work best with lightweight materials such as cardstock, craft foam, corrugated cardboard, felt, and tissue paper because preschoolers can decorate them easily and finished designs will not pull down a branch or classroom display. Keep each ornament palm-sized, use broad glued surfaces instead of tiny attachments, and add the hanging loop through a reinforced hole near the top. Flat trees, layered stars, soft felt mittens, and tissue-paper wreaths are dependable designs. Adults should handle hole punching and cutting thick materials, while children can arrange shapes, apply washable glue, and add large decorations.
Choose Materials That Stay Light After Decorating
A suitable ornament base should be light before the activity and remain light after glue, paint, and decorations are added. Cardstock, thin corrugated cardboard, craft foam sheets, felt, coffee filters, tissue paper, and plain paper cups all meet that test when used in modest sizes. They are easier for young children to hold than rigid wood blanks, and they place less strain on tree branches, suction hooks, strings, or classroom display lines.
Material thickness affects both handling and durability. Ordinary construction paper is easy to cut but may curl when covered with watery paint or too much glue. Cardstock tolerates stamping and collage work better, while cereal-box cardboard offers a firm recycled base without the weight of thick chipboard. Craft foam resists creasing and accepts self-adhesive foam shapes, although some liquid glues take longer to grip its smooth surface. Felt is soft and forgiving, but adults generally need to cut it because preschool scissors may drag rather than make a clean edge.
Decorations can quietly turn a light base into a heavy ornament. Large buttons, multiple craft sticks, thick modeling compounds, and generous glue puddles add weight at the lowest point. That shifts the center of gravity downward and can make the ornament lean forward. Flat paper shapes, short yarn pieces, washable marker, small tissue squares, and thin foam stickers preserve the low weight more reliably. Loose glitter is a poor fit for this age because it spreads easily and contributes little structural value; glitter glue is easier to contain but should be applied sparingly so it dries within the available time.
Use a quick material test before preparing a whole group. Complete one sample with the same adhesive and decorations children will use, let it dry, and hang it from a thin branch or display cord. A successful sample hangs upright, does not fold around the hole, and can survive a gentle bump. If it tilts or bends, reduce the decoration load or use a slightly firmer base rather than doubling every layer. Readers comparing more preschool ornament craft ideas using lightweight materials should prioritize a stable base over an elaborate surface.
Seven Ornament Designs Suited to Preschool Hands
The most workable designs use one recognizable base and a few large additions. Preschoolers can then make genuine choices without having to align tiny parts precisely. Adults may prepare the outline and hanging hole, but color selection, placement, mark-making, and facial details can remain child-led.
Flat, Light Designs
1. Cardstock triangle tree: Cut a broad green triangle and let the child add paper circles, short yarn garlands, or marker dots. A small cardstock rectangle can become the trunk. Glue the trunk behind the triangle with a wide overlap; an edge-to-edge joint tears easily.
2. Layered star: Place a smaller paper star over a larger cardstock star. The second layer adds color and reinforces the center without making the ornament bulky. Keep gems and sequins optional and age-appropriate; marker lines or foil-paper patches create shine without loose parts.
3. Tissue-paper wreath: Start with a cardstock ring and attach crumpled tissue squares around the front. Small squares produce texture without appreciable weight. The center opening gives the ornament a clear wreath shape even when tissue placement is uneven.
4. Coffee-filter snowflake: Children can color a filter with washable markers while it is flat. An adult may fold and cut a few broad openings after the coloring is complete. Filters become fragile when saturated, so use a lightly damp brush or skip water blending entirely. Mounting the filter on a thin cardstock ring makes it more durable.
Soft and Dimensional Designs
5. Felt mitten: Use one pre-cut felt mitten rather than two sewn layers. Children can attach broad felt cuffs and large self-adhesive shapes. This option is quiet, flexible, and unlikely to crease in a take-home bag.
6. Paper-cup bell: Trim a small paper cup if needed, turn it upside down, and decorate the outside with markers or paper pieces. An adult can make the top hole. A short ribbon end may hang inside as a visual clapper, but beads or metal bells add unnecessary weight and may be unsuitable around children who mouth objects.
7. Corrugated-cardboard gingerbread figure: Cut a simple person silhouette from clean, thin packaging cardboard. White crayon, washable paint, or paper strips can suggest icing. Broad arms and legs hold up better than narrow limbs, especially when the ornament travels home.
Choose two designs for a group rather than offering all seven simultaneously. A flat tree or star suits a short session, while a wreath or cardboard figure gives children more time for collage. The common failure is increasing complexity to make every ornament look polished. Fewer, larger components produce more independent work and make each child’s decisions visible.
Build Strong Hanging Points Without Adding Bulk
The hanging point usually fails before the ornament base does. A hole placed too close to an edge can split under very little force, especially in construction paper or a damp collage. Position it far enough below the top edge to leave a complete band of material above it. On a pointed tree or star, move the hole slightly downward into a wider area rather than punching through the narrow tip.
Reinforcement does not require a heavy backing. Place a small square or circle of clear tape on the back, then punch through both the tape and base. A second cardstock patch works for cardboard ornaments, provided it is glued flat and allowed to dry before punching. Reinforcing only the top preserves flexibility elsewhere and avoids the stiffness and drying time created by laminating the entire project.
Ribbon, narrow fabric tape, and smooth yarn make practical loops. Create a loop large enough to pass over a branch or display peg, then secure it with a knot that cannot slip through the hole. An adult should tie and trim the loop, both for consistency and to prevent long trailing strands. Thin sewing thread may cut into paper and is difficult for small hands to see. Stiff metal ornament hooks are also a poor choice for preschool projects because their pointed ends can catch skin, clothing, or bags.
Balance matters as much as hole strength. Before the glue dries completely, lift the ornament temporarily from the proposed hanging point. If a paper-cup bell tips sideways, its hole may be off-center. If a flat figure rotates, a dense decoration may be pulling one side down. Shift an unattached piece, shorten a dangling element, or relocate the hole while correction is still simple. Adding a second loop rarely fixes an uneven design and makes hanging harder.
A compact assembly order prevents avoidable repairs:
- Cut the base and mark the intended top.
- Reinforce and punch the hanging area under adult supervision.
- Let the child decorate without covering the hole.
- Dry the ornament flat before adding the loop.
- Hang-test it and secure any lifting pieces.
This sequence differs from attaching ribbon first, which often drags through paint or becomes glued to the surface. For additional preschool ornament craft ideas using lightweight materials, use the same hang-test even when the design looks sturdy on a table.
Plan a Manageable Preschool Craft Session
A preschool ornament activity runs more smoothly when preparation removes waiting rather than removing children’s choices. Pre-cut any material that preschool scissors cannot handle reliably, punch holes, and divide decorations into shallow trays. Leave decisions such as color, arrangement, expression, and pattern to the child. A fully assembled demonstration can unintentionally become a copy target, so show the construction method while making it clear that finished ornaments may look different.
Limit each place setting to the supplies needed for the immediate step. For a tissue wreath, provide the ring, several tissue colors, and a modest amount of glue. Ribbon can appear later, after the ornament reaches the drying area. This reduces tangles and prevents children from treating the hanging loop as another collage material. Glue in small cups with short-handled brushes gives more even coverage than unrestricted squeezing, though glue sticks may be cleaner for flat paper layers.
Drying capacity should determine the number of wet materials offered. Twenty ornaments covered in paint and liquid glue need far more flat space than twenty marker-decorated foam shapes. If the project must go home the same day, favor markers, crayons, glue sticks, and self-adhesive pieces. Wet collage is better when shelves or trays are available overnight. Do not stack projects that feel dry on top but remain damp beneath raised tissue or felt.
A mixed-skill group benefits from a simple base with optional additions. One child may place three large shapes and finish, while another may make a repeating border. Both outcomes are complete. Requiring a fixed number of tiny decorations can turn a manageable activity into prolonged adult assistance. Similarly, correcting every crooked shape misses the developmental value of choosing and placing materials.
Signs the setup is working include children reaching supplies independently, glue staying mostly on the base, and finished ornaments moving to the drying area without pieces sliding off. Repeated requests for help with peeling, knotting, or aligning indicate that too many fine-motor demands have been combined. Adjust the next batch by enlarging components, loosening sticker backings in advance, or replacing several separate parts with one broad shape. A practical collection of preschool ornament craft ideas using lightweight materials should accommodate varied hand control without making adults complete the defining work.
Check Safety, Drying, and Display Readiness
Materials should be selected for the actual children and setting, not merely because a package labels them as craft supplies. Preschoolers who still mouth objects need larger decorative pieces and close supervision. Skip loose beads, tiny bells, straight pins, staples, and sharp wire hangers. Read product labels, follow stated age guidance, and use washable, child-appropriate adhesives and colorants as directed. Craft foam, ribbon, and felt scraps should still be treated as craft materials rather than toys for unsupervised play.
Adults should perform jobs that require force or sharp tools, including using a single-hole punch on thick cardboard, cutting dense felt, and trimming plastic-coated ribbon. Child scissors may be appropriate for paper strips when used with supervision, but they are not a substitute for adult preparation of intricate silhouettes. Hot glue is unnecessary for these lightweight projects. If ordinary school glue will not hold a smooth or heavy embellishment, changing the embellishment is usually safer and simpler than escalating to a hotter adhesive.
Inspect each dry ornament by lifting it from the loop and gently turning it over. Look for a widening hole, peeling corners, sticky paint, or decorations that fall with light handling. A slightly curled paper ornament can often be flattened under a clean book after it is fully dry. Do not press damp work, because trapped moisture can bond it to protective paper or smear the design. Pieces that repeatedly detach should be removed rather than returned with a fragile repair.
Display location changes the final decision. A lightweight ornament can hang well from an artificial tree, wall branch, garland, or classroom line, but it should not be placed near candles, heaters, fireplaces, or hot light sources. Paper and textile ornaments are decorative, not outdoor weatherproof items. A name and year can go on the back before the loop is attached, using marker rather than a heavy label.
Transport deserves its own check. Flat designs fit between two sheets of clean paper inside a folder, while cups and textured wreaths need a shallow box or loosely closed paper bag. Crushing a dimensional piece on the trip home defeats careful reinforcement. If immediate packing is unavoidable, choose flat cardstock or foam designs from the outset rather than expecting wet, raised collage to survive.
Frequently Asked Questions
What is the lightest durable material for a preschool ornament?
Cardstock offers a useful balance of low weight, easy decorating, and enough stiffness for a reinforced hanging hole. Thin craft foam is more crease-resistant but may require a compatible adhesive.
How large should a preschool ornament be?
A palm-sized design is usually manageable for decorating and hanging. Avoid very narrow points or limbs, which tear more easily than broad, compact silhouettes.
How can paper ornaments be kept from curling?
Use cardstock, apply thin adhesive layers, and balance wet decoration across the surface. Dry the ornament flat; once fully dry, gentle pressing under a clean book may reduce remaining curl.
What can replace loose glitter on preschool ornaments?
Try metallic paper pieces, foil stickers, washable shimmer crayons, or a small amount of glitter glue. These choices provide sparkle with less scattering and easier cleanup.
Should the hanging loop be attached before decorating?
Punch and reinforce the hole first, but add the loop after decorating and drying. This keeps ribbon out of glue and paint while preserving the intended hanging point.
Conclusion
Successful preschool ornaments combine a light, broad base with decorations that do not overwhelm the hanging point. Cardstock, thin cardboard, foam, felt, filters, and tissue offer different balances of stiffness, texture, drying time, and cutting difficulty. Match the design to the session: choose flat marker-and-paper projects for same-day transport, or reserve textured collage for settings with overnight drying space.
Prepare sharp-tool tasks and reinforcement in advance, then preserve meaningful choices for the children. Before displaying or packing each ornament, test its loop, check for loose pieces, and confirm that the surface is fully dry. If a sample bends, tips, or sheds decorations, simplify the load rather than adding heavier supports. That final restraint produces ornaments preschoolers can handle, recognize as their own work, and hang without pulling down the display.

Now retrieving an image set.
Rust-Oleum Stops Rust Spray Paint, Semi-Gloss Black | Rust Resistant, Indoor and Outdoor, Beautiful Finish on Metal, Wood and More, Sprays from Any Angle, 12 oz
$6.48 (as of September 18, 2026 22:40 GMT -04:00 - More infoProduct prices and availability are accurate as of the date/time indicated and are subject to change. Any price and availability information displayed on [relevant Amazon Site(s), as applicable] at the time of purchase will apply to the purchase of this product.)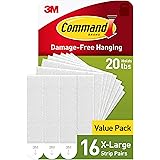
Now retrieving an image set.
Command 20 lb X-Large Picture Hanging Strips, 16 Pairs White Command Strips Heavy Duty Picture Hanger
$9.75 (as of September 18, 2026 22:40 GMT -04:00 - More infoProduct prices and availability are accurate as of the date/time indicated and are subject to change. Any price and availability information displayed on [relevant Amazon Site(s), as applicable] at the time of purchase will apply to the purchase of this product.)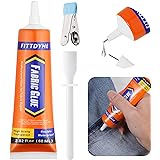
Now retrieving an image set.
FITTDYHE Fabric Glue Permanent, 60 ML Washable Clear Clothing Glue, Super Fabric Glue for Rhinestones, Patches, Clothes, Denim, Leather, Polyester, Fabrics, Doll Repair, Flannel, Cotton
$9.99 (as of September 18, 2026 22:40 GMT -04:00 - More infoProduct prices and availability are accurate as of the date/time indicated and are subject to change. Any price and availability information displayed on [relevant Amazon Site(s), as applicable] at the time of purchase will apply to the purchase of this product.)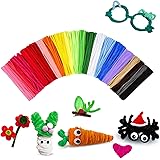
Now retrieving an image set.
200 Pcs Pipe Cleaners Craft Bulk, 20 Colors Pipe Cleaner, Chenille Stems | Kids Toys & Games Gifts for Ages 5-7, Craft Supplies for Projects Creative DIY Room Decor, Halloween Christmas Decorations
$5.99 (as of September 18, 2026 22:40 GMT -04:00 - More infoProduct prices and availability are accurate as of the date/time indicated and are subject to change. Any price and availability information displayed on [relevant Amazon Site(s), as applicable] at the time of purchase will apply to the purchase of this product.)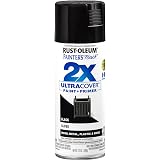
Now retrieving an image set.
Rust-Oleum Painter's Touch 2X Ultra Cover Spray Paint, Gloss Black | Indoor and Outdoor Surfaces (Metal, Wood, Plastic), Fast Dry, Durable, Sprays from Any Angle, Comfort Tip, Oil Based
$5.98 (as of September 18, 2026 22:40 GMT -04:00 - More infoProduct prices and availability are accurate as of the date/time indicated and are subject to change. Any price and availability information displayed on [relevant Amazon Site(s), as applicable] at the time of purchase will apply to the purchase of this product.)
Now retrieving an image set.