
An All About Me craft for two-year-olds works best as a five-part toddler portrait assembled from a large face shape, hair, eyes, clothing, and one favorite-object picture. An adult should cut the pieces beforehand, while the child chooses colors, places facial features, makes broad crayon marks, and presses down large adhesive-backed shapes. Use washable, nontoxic supplies and pieces too large to fit inside a young child’s mouth. The portrait may look unconventional, but preserving the toddler’s choices makes it a more meaningful record of identity than correcting every feature or completing the picture for them.
Choose Five Portrait Parts a Two-Year-Old Can Manage
A five-part portrait gives a two-year-old enough choices to express individuality without turning the activity into a long assembly task. Use one large head, a simple hair piece, two oversized eyes treated as one portrait stage, a shirt or clothing shape, and a picture representing something the child likes. The finished page communicates “this is me” even when the facial features are not placed where an adult expects.
At this age, participation matters more than anatomical accuracy. A toddler may put both eyes near the chin, choose green hair, or cover the shirt with crayon loops. Those decisions show color preferences, emerging body awareness, and control over the page. Moving the pieces back to conventional positions would produce a tidier portrait, but it would replace the child’s work with an adult’s interpretation.
Scale determines whether the activity feels manageable. A head cut from letter-size cardstock can occupy most of the page, while each loose feature should be easy to grasp with the whole hand or a developing pincer grip. Tiny pupils, eyelashes, earrings, buttons, and narrow hair strands add visual detail for adults but introduce unnecessary handling difficulty and possible mouthing hazards. Broad shapes are easier to pick up, orient, press, and find if dropped.
Choose between a face-only portrait and a full-body figure according to attention span. A face-only version usually suits a child who enjoys short table activities or becomes frustrated by several instructions. A full-body outline offers more room for clothing, shoes, and movement, but adults will need to prepare more parts. For a first All About Me craft for two-year-olds, the large face is the clearer option because every choice remains visible and the project can stop after any stage without looking unfinished.
A useful five-part plan is:
- Face: one large oval or circle already attached to the backing.
- Hair: one broad shape in a child-selected color.
- Eyes: two large matching or intentionally different shapes.
- Clothing: one shirt shape the child can mark or decorate.
- Favorite item: one adult-prepared picture chosen from two or three familiar options.
The plan is working when the child reaches for pieces, makes choices, or returns attention after a brief pause. Repeatedly pushing materials away, leaving the table, or becoming upset signals that the portrait has too many parts or that the session has lasted long enough. Saving unused pieces for another day is more appropriate than insisting on completion.
Prepare Toddler-Safe Supplies and the Work Area
Supply preparation should remove cutting, small loose decorations, and complicated glue control from the toddler’s role. The child can still make meaningful decisions while an adult handles tasks that require sharper tools or more precise coordination. Prepare every cutout before inviting the child to the table so scissors do not compete with the portrait for attention.
Use sturdy cardstock or heavyweight construction paper for the backing and portrait pieces. Thin paper tends to fold under a toddler’s grip, while very thick cardboard may be difficult to press onto adhesive. Washable, nontoxic crayons or broad markers allow spontaneous marks without requiring a mature pencil grasp. Check the manufacturer’s age guidance and inspect supplies for broken caps, cracked barrels, or detachable pieces before use.
Adhesive choice affects both independence and cleanup. Large self-adhesive shapes or short pieces of double-sided tape placed by an adult let a child position and press each part. A glue stick can work with close help, although some two-year-olds will twist it too far, rub it on their hands, or lose interest while covering a shape. Liquid glue is harder to control and can soak thin paper. If it is used, an adult can place a few dots rather than handing over an open bottle.
Avoid loose sequins, beads, pom-poms, googly eyes, gems, and similarly small embellishments. Even when sold as craft decorations, they may be tempting to mouth and are not necessary for a recognizable self-portrait. Replace them with large paper circles, drawn details, or features cut from a child’s photo. Active adult supervision remains necessary throughout the activity; “nontoxic” does not mean edible or suitable for unsupervised use.
Set out only the materials needed for the current step. For example, offer two hair colors first, remove the unchosen one, and then present the eyes. A tray or rimmed baking sheet can keep large pieces from sliding onto the floor. Cover the table with a reusable mat, place a damp cloth nearby, and seat the child where the adult can reach every supply. This arrangement is more effective than displaying a crowded bin that encourages dumping rather than choosing.
The safest setup can still fail if the adult assumes the activity must happen at a table. A child who resists sitting may work more comfortably on a washable floor mat or at a low easel with the backing secured. Whatever the location, check that the child is alert rather than hungry or overtired. Ten engaged minutes produce a more authentic portrait than a longer session shaped by repeated redirection.
Build the Portrait Without Taking Over
The adult’s role is to present one decision at a time, describe what the child does, and provide physical help only when requested or needed for safety. Begin with the large face already secured to the backing. This gives the child a stable surface and avoids making the first task the hardest one.
Offer two hair shapes and ask, “Which hair goes on your picture?” After the child chooses, peel the adhesive backing or apply the glue, then return the piece for placement. Continue with the eyes and shirt. Questions tied to visible objects are easier to answer than broad prompts such as “What do you want your portrait to look like?” A child may answer by pointing, touching, vocalizing, or simply picking up a piece; spoken words are not required for genuine participation.
Use neutral narration instead of correcting. “You put one eye beside the hair” recognizes the action without suggesting it is wrong. If a piece lands partly off the page, ask whether the child wants help before moving it. The exception is a loose part that has become unsafe or will not adhere at all. In that situation, explain the practical problem briefly and offer a limited repair: “It is falling. Press it here or I can add tape.”
Hand-over-hand guidance can finish a neat product, but it often turns the child into a passenger. A lighter alternative is to stabilize the paper, start peeling a sticker edge, or point to an open area while leaving the final motion to the toddler. Compare the two outcomes: an adult-directed portrait may have aligned features, whereas a child-led portrait records placement decisions and motor attempts. For an identity activity, the second outcome carries more meaning.
Pause before adding marks to the clothing. Give the child one or two crayons and allow broad scribbles, dots, or lines. Scribbling is an appropriate contribution, not an unfinished version of coloring inside a shape. If the child marks the face or background instead, keep the marks unless they obscure a part the child wants to see. Protecting the furniture is the adult’s job; restricting every mark undermines the available creative choice.
Finish when attention fades rather than after every prepared piece is used. A successful session may end with hair, one eye, and several crayon marks. Write the child’s name, age, and words about the picture on the back, not across the artwork. Readers planning a similar All About Me craft for two-year-olds can treat stopping calmly as part of the method rather than evidence that the activity failed.
Add Personal Details Through Simple Choices
Personal meaning comes from decisions the toddler can recognize now, not from a long adult-written profile. Add one favorite-object image, a familiar color, and a short statement captured in the child’s own words or gestures. These details distinguish the portrait from a generic face while keeping the activity within a two-year-old’s attention and communication range.
Prepare two or three large pictures of familiar options, such as a ball, banana, toy truck, family pet, or bedtime book. Ask the child to choose one for the portrait page. The options should reflect the child’s actual routines rather than categories chosen for decorative appeal. If the toddler selects a banana today despite usually preferring strawberries, record today’s answer. Preferences at this age can change, and the page is a snapshot rather than a permanent personal record.
A mirror can support recognition before the pieces are attached. Let the child look briefly and point to hair, eyes, or a shirt, but do not require matching colors or features exactly. A printed photo is another option, especially for a toddler who does not yet connect an abstract paper oval with a face. Adults can cut a large photo outline and let the child add clothing and favorite-item pictures around it. The photo version is more immediately recognizable; the shape portrait allows more independent placement and mark-making.
Language should remain concrete. Try prompts such as “Show me your eyes,” “Which shirt color do you want?” or “Where should the ball go?” Avoid quizzing the child about full names, addresses, complex emotions, or multiple favorites in one sitting. Those questions shift the activity toward performance and may invite adults to supply answers. If the child says a word, makes a sound, or points decisively, write a short note on the back: “Chose the blue shirt” or “Called the dog ‘Woof.’”
Families and group settings may need different versions. At home, a caregiver can include a family photo or an image of a familiar comfort item. In a toddler classroom, using the same number and size of choices for each child makes preparation manageable, but the finished portraits should not be made identical. Displaying them at the children’s eye level can encourage recognition and conversation, provided names and images are shared according to the setting’s privacy practices.
The detail stage is failing when adults add decorative elements after the child leaves, rewrite the child’s choices, or compare portraits for neatness. Keep the page as the child left it, apart from securing loose pieces and adding a discreet date. That restraint preserves the strongest feature of the project: a visible record of what this particular two-year-old noticed, selected, and made.
Frequently Asked Questions
How long should this portrait activity take?
Plan for about five to fifteen minutes, but follow the child’s attention rather than a timer. The portrait can be completed across two short sessions if the toddler leaves or pushes the supplies away.
Can a two-year-old use glue for the craft?
A glue stick may be used with close adult help and manufacturer age guidance. Self-adhesive shapes or adult-applied double-sided tape usually give a toddler more control with less mess.
What if the child puts the facial features in unusual places?
Leave the features where the child placed them unless a piece is falling off or creates a safety issue. Unconventional placement reflects the toddler’s current choices and coordination, not a failed portrait.
Are googly eyes suitable for a two-year-old’s portrait?
Small googly eyes can present a mouthing or choking concern and are unnecessary. Use large paper circles, drawn eyes, or oversized adhesive shapes under active adult supervision.
How can a nonverbal toddler personalize the page?
Offer two visible choices at a time and accept pointing, reaching, looking, or touching as an answer. Record the chosen colors, objects, and placements instead of requiring spoken responses.
Conclusion
A worthwhile toddler portrait preserves the child’s decisions while keeping difficult preparation in adult hands. Cut large pieces beforehand, remove small embellishments, limit each prompt to two or three visible choices, and supervise every stage. Let the toddler place features, select colors, decorate the shirt, and choose one familiar object without correcting the picture into an adult-designed face.
Watch behavior more closely than the clock. Reaching, marking, pointing, and returning to the page show productive involvement; persistent avoidance or distress means it is time to pause. Secure loose parts, note the date and the child’s comments on the back, and leave the front as the child made it. The resulting portrait may be brief and uneven, but it will document real preferences and emerging independence.
Now retrieving an image set.
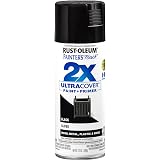
Rust-Oleum Painter's Touch 2X Ultra Cover Spray Paint, Gloss Black | Indoor and Outdoor Surfaces (Metal, Wood, Plastic), Fast Dry, Durable, Sprays from Any Angle, Comfort Tip, Oil Based
$5.98 (as of September 18, 2026 22:40 GMT -04:00 - More infoProduct prices and availability are accurate as of the date/time indicated and are subject to change. Any price and availability information displayed on [relevant Amazon Site(s), as applicable] at the time of purchase will apply to the purchase of this product.)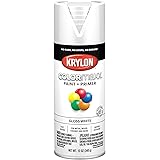
Now retrieving an image set.
Krylon ColorMaxx 12 Oz. Gloss Spray Paint, White - 1 Each
$4.48 (as of September 18, 2026 22:40 GMT -04:00 - More infoProduct prices and availability are accurate as of the date/time indicated and are subject to change. Any price and availability information displayed on [relevant Amazon Site(s), as applicable] at the time of purchase will apply to the purchase of this product.)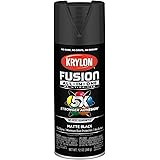
Now retrieving an image set.
Krylon Fusion All-In-One, Matte, Black, 12 oz
$6.98 (as of September 18, 2026 22:40 GMT -04:00 - More infoProduct prices and availability are accurate as of the date/time indicated and are subject to change. Any price and availability information displayed on [relevant Amazon Site(s), as applicable] at the time of purchase will apply to the purchase of this product.)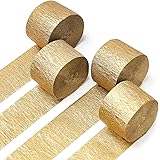
Now retrieving an image set.
PartyWoo Gold Crepe Paper Streamers 4pcs 328 FT Gold Streamers | Wedding Birthday Baby Shower Engagement Anniversary New Year Eve Graduation Bridal Shower Party Decorations
$6.99 (as of September 18, 2026 22:40 GMT -04:00 - More infoProduct prices and availability are accurate as of the date/time indicated and are subject to change. Any price and availability information displayed on [relevant Amazon Site(s), as applicable] at the time of purchase will apply to the purchase of this product.)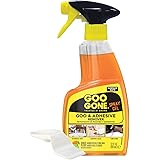
Now retrieving an image set.
Goo Gone Adhesive Remover Spray Gel 12 Oz with Scraper, Surface Safe | Citrus Cleaning Power for Hard Surfaces, Carpet & Fabric, Removes Glue, Stickers, Tape Residue, Grease, Gum & Wax, Drip Free
$17.98 (as of September 18, 2026 22:40 GMT -04:00 - More infoProduct prices and availability are accurate as of the date/time indicated and are subject to change. Any price and availability information displayed on [relevant Amazon Site(s), as applicable] at the time of purchase will apply to the purchase of this product.)
Now retrieving an image set.