
Arts and crafts using construction paper scraps work best when the offcuts are sorted by size, color, and shape before children begin designing. Large rectangles can become cards or backgrounds, medium pieces suit animals and buildings, and narrow strips or tiny shapes add borders, mosaics, and details. Use glue sticks for flat pieces, liquid glue sparingly for layered work, and age-appropriate scissors under adult supervision. A simple scrap tray limits waste and encourages children to plan with available shapes, while discarding wet, dirty, heavily crumpled, or extremely small pieces keeps the activity manageable and safer.
Sort Scraps Before Choosing a Project
A useful scrap collection needs boundaries. Saving every construction paper fragment creates a crowded bin in which usable sheets become bent, tiny pieces migrate to the bottom, and children spend more time searching than making. Keep clean, dry offcuts that are large enough to hold comfortably, and recycle pieces that are sticky, torn into fibers, painted through, or too small for the intended age group.
Sort by physical usefulness rather than trying to preserve every color separately. One shallow container can hold pieces roughly palm-sized or larger, another can hold strips and medium offcuts, and a small tray can hold circles, triangles, squares, and other cut shapes. This arrangement gives children visible choices without requiring an elaborate filing system. If storage space is limited, place all colors together within each size category; size usually affects project choice more than color does.
The size groups serve different jobs. Large remnants make sturdy backgrounds, folded cards, masks, crowns, and broad landscape forms. Medium pieces are easier to turn into roofs, tree canopies, fish, vehicles, and clothing. Long strips work well for weaving, paper chains, frames, stems, and patterned lines. Small shapes are suited to mosaics and facial details, but they demand more precise finger control and can be frustrating for children who are still learning to position and glue paper.
A quick project check prevents waste. Look at the available pieces before promising a specific result. A bin filled mainly with strips is better for a woven mat or loop sculpture than for a large collage scene. A collection dominated by irregular chunks suits torn-paper animals, abstract designs, or layered landscapes. The goal is to select a format that accepts variation instead of trimming every remnant into standardized parts.
Invite children to choose a few pieces and turn or combine them before reaching for scissors. A green triangle may suggest a tree, a reptile head, or a roof depending on its orientation. That pause makes the existing shape part of the design process. For more ways to organize Arts and crafts using construction paper scraps, keep a small sample envelope of especially useful shapes near the main supply rather than mixing them with full sheets.
Match Scrap Shapes to Useful Techniques
Construction paper scraps become easier to use when the technique follows the shape already present. Constantly recutting leftovers into perfect templates wastes material and reduces the creative value of working with remnants. Folding, tearing, layering, weaving, and arranging all accommodate irregular edges differently, so the best method depends on the pieces in the tray and the child’s current hand skills.
Tearing is the most forgiving choice for rounded or textured subjects. Overlapping torn green pieces can form a tree canopy, while blues and whites can become water, clouds, or snow. The exposed fibers create softer edges than scissors. Tearing across a large piece may be difficult for young hands, however, so start a short split at the edge or provide narrow sections that can be pulled apart more easily.
Scissor cutting is more suitable when recognizable geometry matters. Rectangles and triangles can form houses, robots, trains, or patterned borders. Children who are developing cutting control generally manage short straight cuts before tight curves or tiny notches. Thick stacks may seem like a shortcut, but they can slide and require more force. Cutting one layer at a time offers better control and produces shapes that are easier to revise.
Layering turns mismatched sizes into deliberate depth. A large oval can sit behind two smaller circles to make an animal face, or overlapping strips can create feathers and scales. Apply adhesive near the outer edges of larger components so corners do not lift. For tiny details, touch the back of the piece to a lightly coated glue sponge or use a glue stick; a puddle of liquid glue can soak construction paper, dull its color, and cause the finished work to buckle.
Weaving makes the best use of long strips but requires a stable base. Cut parallel slots into a larger paper remnant while leaving an uncut border around the outside. Thread contrasting strips over and under the openings, then secure only their ends. If the base is too narrow or the slots reach its edges, it may tear during threading. Beginners can use wide strips and three or four slots, while children with stronger control can work with narrower spacing.
Arrangement without immediate gluing is valuable for every technique. Ask the child to build the picture loosely, then move pieces until important parts fit. A working arrangement has visible relationships between pieces and enough background around the subject. Warning signs include critical shapes hanging off the base, details disappearing beneath larger layers, or so many fragments being used that the main image becomes difficult to recognize.
Projects That Work With Uneven Leftovers
The strongest scrap projects are flexible enough to succeed without identical components. Open-ended pictures, mosaics, cards, and dimensional builds allow colors and proportions to vary. Highly prescribed projects that require twenty matching petals or precisely sized strips are a poor match unless those pieces are already available, because preparing replacements defeats the purpose of using leftovers.
Shape-Built Creatures
Begin with one medium piece as a body and add smaller scraps as wings, ears, fins, legs, or facial features. A half-circle can become a turtle shell, a jagged piece can suggest a dinosaur back, and two narrow strips can become insect antennae. Children can draw pupils, texture, or other very small details with a washable marker instead of cutting pieces too tiny to handle. The result does not need to copy a sample; the available shapes should influence the creature.
Layered Landscape Cards
Fold a substantial rectangular remnant into a card or glue a smaller background onto reused cardstock. Add a torn strip for the ground, overlapping blue pieces for water, and triangles or irregular blocks for trees and buildings. This project works especially well when the scrap supply includes broad horizontal pieces. Keep folded bases separate from loose fragments so they remain flat and presentable.
Color and Shape Mosaics
Draw a broad outline on a backing sheet, then fill it with small pieces placed close together. A simple apple, leaf, sun, fish, or initial gives children a clear boundary without requiring exact placement. For younger makers, use pieces at least large enough to pick up with a comfortable pinch. Older children can create color gradients or repeating patterns. A mosaic begins to fail when glue covers the whole base before the arrangement is ready; work in small sections so the adhesive remains tacky and exposed areas do not collect stray scraps.
Strip Loops and Standing Sculptures
Long strips can be curled into loops, folded into zigzags, or bent into arches attached to a cardstock base. Combining upright loops with flat shapes creates flowers, caterpillars, playgrounds, or abstract sculptures. Glue sticks may not hold paper under tension, so use a small amount of liquid school glue at the overlapping ends and hold them briefly. If a loop repeatedly opens, reduce its diameter or overlap more paper rather than adding a large blob of glue.
A compact selection process keeps the activity focused:
- Choose the dominant scrap type: broad pieces, strips, or small shapes.
- Select a compatible format: collage, weaving, mosaic, card, or sculpture.
- Test the arrangement dry: confirm that the main forms fit on the base.
- Add adhesive in stages: secure large components before delicate details.
- Stop before the surface is crowded: leave enough open space to distinguish the design.
These examples can be adapted without turning the activity into a template exercise. A shared table may offer one broad theme, such as “things that move,” while each child selects different remnants. That approach makes limited supplies less noticeable and avoids competition for a particular color or shape.
Control Glue, Clutter, and Cutting Risks
A controlled workspace makes scrap-based projects easier to finish and easier to clean up. Put only a modest selection of paper on the table, keep the reserve bin elsewhere, and give each child a tray or placemat that defines the active area. When every saved fragment is poured out at once, useful pieces get buried, glue transfers to unused paper, and children may treat the supply as confetti rather than material.
Choose adhesive according to the construction. A glue stick is usually the cleanest option for flat collage pieces because it lays down a thin coat and allows immediate placement. Liquid school glue is more useful for loops, folded tabs, thick layers, and textured elements that pull away from the backing. Dispense it into a small cup or provide a narrow-tip bottle. A shiny pool around the paper is a sign that too much was applied; blot excess gently and let the work dry flat.
Scissors should match the child and task. Blunt-tip child scissors are appropriate for routine paper cutting when used with supervision, while decorative-edge scissors may require more hand strength and can snag thin remnants. Pre-cutting is sensible when a project needs slots, interior openings, or shapes beyond the child’s current control. It should not replace every cutting opportunity, because straight snips and broad curves are useful parts of the activity. Adults should handle craft knives, paper trimmers, and any tool intended to cut heavy stacks.
Very small scraps need judgment. They may suit an older child’s detailed mosaic but are a poor choice for a child who still mouths materials or cannot reliably keep pieces away from the face. Construction paper, adhesive, markers, fasteners, and decorations should be selected for the child’s age and used according to their product labels. Staples, wire, sequins, and loose craft embellishments are unnecessary for most scrap-paper projects and can introduce sharper edges or smaller components.
Drying affects whether layered work survives. Move finished pieces to a flat surface rather than stacking them immediately. If liquid glue was used, allow airflow and wait until cloudy wet areas become clear and the backing no longer feels cool or flexible. Warping can be reduced by using less glue and attaching paper to a firmer backing. Pressing wet work under a heavy object is not a good shortcut because adhesive may transfer and the layers may shift.
End with a sorting decision rather than sweeping everything back into storage. Return clean, usable offcuts to the correct container; recycle fragments that are creased beyond use or contaminated with adhesive. This reset keeps the next session workable. A more detailed supply routine for Arts and crafts using construction paper scraps should prioritize accessible pieces, limited choices, and a clean stopping point over saving every last sliver.
Frequently Asked Questions
What size construction paper scraps are worth saving?
Save pieces large enough for a child to grasp and place without excessive frustration. Palm-sized remnants, strips, and recognizable cut shapes are usually more useful than tiny slivers.
How should construction paper leftovers be stored?
Use shallow containers or envelopes divided into large pieces, strips, and small shapes. Store them flat and discard anything wet, sticky, dirty, or badly crushed.
Which glue works best for scrap-paper collages?
A glue stick suits most flat collages because it limits moisture and mess. Use small amounts of liquid school glue for loops, folded tabs, or layered parts under tension.
What can children make when most scraps are narrow strips?
Narrow strips work well for woven mats, paper loops, frames, stems, rays, zigzag folds, and layered feathers. Choose a project built around strips instead of cutting new broad shapes.
How can adults keep a scrap activity from becoming cluttered?
Offer one tray of selected pieces, keep the main reserve off the table, and give each child a defined work surface. Return only clean, usable remnants after the project.
Conclusion
Construction paper leftovers are most useful when storage and project choice reflect the pieces actually available. Separate broad remnants, strips, and smaller shapes; then choose collage, weaving, mosaic, card-making, or sculpture according to the dominant category. Let children test an arrangement before gluing, attach large forms first, and reserve tiny details for makers who can handle them comfortably. Thin adhesive layers, age-appropriate scissors, a limited tabletop selection, and flat drying prevent the failures that commonly turn a simple activity into a sticky pile. Afterward, keep only clean pieces with a realistic future use. That small reset preserves the value of the scrap collection without allowing it to overwhelm the full sheets and other supplies needed for the next project.
Now retrieving an image set.
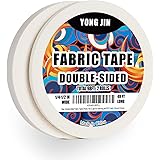
Double-Sided Fabric Tape,Hem Tape No Sew No Iron,1/4"+1/2" (2 Rolls) | No Sewing or Ironing Required, Quick Clothing Repairs, Fabric Bonding, For Hemming and DIY Crafts
$7.99 (as of September 18, 2026 22:40 GMT -04:00 - More infoProduct prices and availability are accurate as of the date/time indicated and are subject to change. Any price and availability information displayed on [relevant Amazon Site(s), as applicable] at the time of purchase will apply to the purchase of this product.)
Now retrieving an image set.
100% Pure Tea Tree Essential Oil for Skin & Diffuser - 4 Fl Oz | 100% Pure Tea Tree Oil for Blemish-Prone Skin & Flaky Scalp, suits Oily & Combination Skin, Daily Face Wash & Scalp Care
$9.99 (as of September 18, 2026 22:40 GMT -04:00 - More infoProduct prices and availability are accurate as of the date/time indicated and are subject to change. Any price and availability information displayed on [relevant Amazon Site(s), as applicable] at the time of purchase will apply to the purchase of this product.)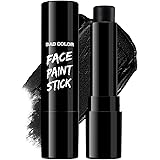
Now retrieving an image set.
BADCOLOR Black Cream-Blendable Face Body Paint Stick for Adults Children Eye Black Softball Football Baseball Sports , Non-Toxic Hypoallergenic for Halloween SFX Makeup Cosplay Joker Costume Parties
$5.99 (as of September 18, 2026 22:40 GMT -04:00 - More infoProduct prices and availability are accurate as of the date/time indicated and are subject to change. Any price and availability information displayed on [relevant Amazon Site(s), as applicable] at the time of purchase will apply to the purchase of this product.)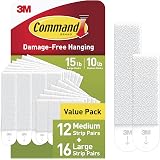
Now retrieving an image set.
Command 15 & 10 lb Assorted Picture Hanging Strips, 28 Pairs, SIOC | White Picture Hanging Strips, Damage-Free Wall Hangers for Frames, No Tools Required, Ideal for Decorating Apartments, Dorms
$13.99 (as of September 18, 2026 22:40 GMT -04:00 - More infoProduct prices and availability are accurate as of the date/time indicated and are subject to change. Any price and availability information displayed on [relevant Amazon Site(s), as applicable] at the time of purchase will apply to the purchase of this product.)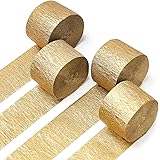
Now retrieving an image set.
PartyWoo Gold Crepe Paper Streamers 4pcs 328 FT Gold Streamers | Wedding Birthday Baby Shower Engagement Anniversary New Year Eve Graduation Bridal Shower Party Decorations
$6.99 (as of September 18, 2026 22:40 GMT -04:00 - More infoProduct prices and availability are accurate as of the date/time indicated and are subject to change. Any price and availability information displayed on [relevant Amazon Site(s), as applicable] at the time of purchase will apply to the purchase of this product.)
Now retrieving an image set.