
Mini craft sticks work best for small-scale building projects when their dimensions match the model, overlapping joints spread loads, and assemblies dry flat before weight is added. Choose straight, similarly sized sticks; use tacky craft glue for most wood-to-wood connections; and reinforce corners with short crosspieces or triangular braces. A square wall frame, layered beam, or truss is stronger than a single unsupported row of sticks. Test the building method with a small sample joint first, because excess glue, warped pieces, rushed drying, and unsupported long spans commonly produce crooked or fragile models.
Choosing Sticks That Match the Model
Scale becomes easier to control when one stick serves as a repeatable unit rather than an approximate piece of lumber. Before cutting or gluing, decide what a full stick represents in the model. It might equal one wall panel, one bridge span, or two floorboards. That decision prevents doors, roofs, and supports from being sized independently and looking mismatched when assembled.
Mini sticks are particularly useful where standard craft sticks would dominate the finished structure. Their shorter length makes them suitable for tabletop houses, tiny fences, compact bridges, doll-sized furnishings, and architectural mock-ups with several visible components. Smaller pieces also reduce long unsupported spans, although they create more joints. A model made with many sound overlaps is usually more dependable than one relying on a few long pieces connected only at their tips.
Sort the supply before building. Place visibly curved sticks aside for roof contours, decorative rails, or parts that will not determine alignment. Reserve the straightest pieces for base edges, upright posts, beams, and door frames. Match widths where several sticks will sit side by side; even slight differences can make a floor ripple or push a wall out of square. Splintered ends should be discarded or trimmed by an adult with an appropriate tool, since a rough end gives less predictable contact and may be uncomfortable for children to handle.
A quick dry layout reveals scale problems without wasting adhesive. Arrange the base, place two sample walls around it, and compare openings with the objects meant to fit inside. For example, a miniature garage should be checked against its toy vehicle before the roof is added. A fence should be tested beside the figure or landscape it accompanies. If an opening looks too narrow during the dry layout, it will be harder to correct after reinforcing pieces have been attached.
Colored sticks offer immediate decoration but may show pale wood at cut ends. Natural wood accepts paint and marker more consistently after assembly, although water-heavy paint can encourage thin pieces to bend. Applying light coats to both exposed sides and allowing them to dry flat reduces uneven moisture. Readers comparing sizes and finishes for Mini craft sticks for small-scale building projects should prioritize straightness and dimensional consistency over the number of colors in a package.
The common mistake is assuming every piece from one package is interchangeable. Small variations accumulate across a narrow model. Check the components that establish the outline first, then use less uniform sticks for cladding and decoration. A sound selection process produces square corners, even floors, and openings that remain usable after assembly.
Reliable Joint Methods and Adhesive Control
Strong miniature construction depends more on contact area than on a large amount of glue. An end-to-end connection exposes very little wood and can pivot or separate easily. Overlapping two pieces, placing a short splice across a seam, or sandwiching a joint between reinforcing strips creates a broader bonded surface and limits movement in several directions.
Tacky craft glue is a practical choice for most supervised children’s projects because it grips porous wood and gives the builder time to correct alignment. Apply a small bead or dots within the contact area, press the pieces together, and remove squeeze-out before it hardens. A glossy pool surrounding the joint is not evidence of extra strength; it adds drying time, can make a component slide, and leaves raised areas that interfere with the next layer.
White school glue can work for lightweight display models, but its thinner consistency may allow parts to drift while drying. Hot glue sets quickly and fills gaps, yet its bulky seams can distort miniature proportions. It also introduces burn risk and should be reserved for an adult or another responsible operator following the tool manufacturer’s instructions. Double-sided tape is useful for temporary positioning or paper details, not for structural joints expected to carry weight.
Three Useful Connection Patterns
- Lap joint: Overlap two sticks where the extra thickness will not interfere with another component.
- Backed seam: Place two edges together and glue a short stick across the back, much like a repair plate.
- Corner block: Join wall edges around an internal upright so both walls receive a broad gluing surface.
Build subassemblies flat whenever possible. A wall panel made on a protected work surface is easier to keep square than individual uprights glued vertically onto a base. Place a simple right-angle template beneath clear waxed paper or another suitable nonstick cover, align the pieces over it, and leave the panel undisturbed. Only join the completed walls after their individual seams have set. The exact drying period varies with adhesive amount, room conditions, and product instructions, so surface dryness alone should not be treated as full strength.
Clamping pressure should be gentle and evenly distributed. Clothespins can hold layered beams, while a flat object placed over a protected panel can discourage curling. Heavy pressure may force out too much adhesive or dent soft wood. A successful sample joint stays aligned when lifted and tolerates light handling without flexing at the seam. A failing joint remains rubbery, twists easily, or separates with visible dry patches.
Rushing from one connection to the next is the most frequent source of crooked assemblies. Mark mating surfaces, complete one stable subassembly, and test its fit before adding another. The joint methods used for Mini craft sticks for small-scale building projects should support the design rather than create thick, conspicuous knots at every corner.
Building Frames, Floors, and Load-Bearing Shapes
A miniature structure becomes more rigid when its members form closed shapes and resist sideways distortion. Four sticks arranged as a rectangle can lean into a parallelogram even when the corners remain connected. Add a diagonal brace, a triangular corner piece, or a firmly bonded panel across the frame, and the same rectangle becomes much harder to rack.
Begin with a flat base that establishes the footprint. Side-by-side sticks can form a floor, but they need two or more crosspieces underneath so individual boards do not separate. Keep those crosspieces inset from the perimeter if walls must sit directly on the base. For a lightweight open frame, a rectangular border with one central crossmember may use fewer pieces while still providing reliable reference edges.
Wall panels benefit from a perimeter frame and at least one cross brace. If appearance calls for vertical siding, assemble the structural frame first and add the visible sticks as a second layer. Trying to make decorative siding serve simultaneously as the frame often leaves the panel dependent on narrow edge bonds. Where a door or window interrupts the wall, frame the opening with full contact at the sides rather than cutting an opening through an already fragile panel.
Long beams can be strengthened by laminating two sticks face to face or by creating a shallow built-up beam with separated layers and connecting webs. Lamination is simpler and compact, but it adds weight. A truss uses more joints and requires careful symmetry, yet its triangles can bridge a wider opening with less solid material. For a child’s first bridge, two matching side trusses joined by floor crosspieces are easier to inspect than an elaborate overhead design.
Roof design introduces a different tradeoff. A flat roof is simple but may expose any uneven wall height. A pitched roof hides minor variation at the top edges, though both slopes must match and the ridge requires support. Construct two identical roof panels flat, test them over the walls, and add a ridge connection only after the angle is confirmed. Decorative shingles should go on after the roof fits; adding them earlier may warp a thin panel or conceal alignment marks.
Use a short stability check before decoration:
- Set the model on a flat surface and check whether all base edges sit down.
- View the walls from the front and side for leaning or twisting.
- Press lightly near joints and watch for movement rather than testing to destruction.
- Inspect long spans for sagging and add a post, laminated beam, or triangular brace if needed.
- Confirm that doors, ramps, or removable parts still have clearance.
Adding more sticks everywhere is not the best correction for instability. Extra layers can shift the center of gravity and hide the joint that actually needs attention. Reinforce the direction in which the structure moves: diagonals address sideways racking, crosspieces hold parallel boards together, and posts shorten a sagging span. That targeted approach keeps the model light and the construction logic visible.
Six Small-Scale Builds and What They Teach
Useful starter builds isolate one construction problem at a time. A project should be small enough to finish without handling partially set sections, yet complex enough to demonstrate alignment, bracing, or load paths. The following examples can be simplified for younger builders or expanded with measured components for older children.
1. Platform and Ramp
Make a deck from parallel sticks supported by crosspieces, then attach a short sloped ramp. This build teaches spacing and support placement. If the ramp flexes, shorten its unsupported length or add runners beneath it rather than covering the top with another layer. Test it with the intended toy before fixing the final angle.
2. Four-Wall Mini House
Assemble each wall flat around a rectangular frame, leaving a framed doorway in one panel. Join walls around internal corner posts and add the roof only after the shell stands square. This separates structural work from decoration and shows why a doorway must be planned rather than cut through critical members later.
3. Fence With a Working Gate
Use two horizontal rails to align short pickets, then leave a measured gap for the gate. A paper fastener, cord loop, or flexible tape hinge can permit movement, depending on the intended use and required adult assistance. The gate should clear the ground and posts during a dry test. Paint buildup near the hinge can reduce movement, so finish coats should remain thin there.
4. Triangular Truss Bridge
Build two side frames over the same paper pattern so their triangles match. Connect them with evenly spaced floor pieces and cross bracing. A bridge that twists usually has uneven side frames or insufficient links between them. Use only light test objects and increase weight gradually; a classroom model is an exploration of structure, not certified load-bearing equipment.
5. Market Stall or Display Stand
A flat counter, four posts, and a small canopy demonstrate vertical alignment. Temporary spacing blocks can hold opposite posts the same distance apart while glue sets. Compared with a solid house, the open sides make leaning easy to see and correct. Diagonal braces under the counter provide support without closing the display area.
6. Mini Chair or Bench
A bench introduces paired legs, a supported seat, and a backrest at a controlled angle. Build the two leg frames first and connect them with seat rails. Attaching four individual legs directly to a finished seat is faster, but small alignment errors make the bench wobble. Matching side frames provide repeatable geometry and broader connections.
Choose the example according to the skill being practiced. Platforms suit beginners learning neat adhesive use; houses require several panels to meet accurately; bridges emphasize symmetry and bracing; furniture demands precise matching at a very small scale. Signs of progress include flatter subassemblies, cleaner joints, and fewer corrections during final assembly. If parts repeatedly slide, twist, or separate, reduce the number of simultaneous joints and allow each stage more undisturbed drying time.
Frequently Asked Questions
What glue works well on mini wooden craft sticks?
Tacky craft glue provides good control and wood-to-wood contact for most supervised projects. Use a thin application, hold the joint in alignment, and follow the adhesive label for drying and handling.
How can children keep a small stick building square?
Assemble wall frames flat over a right-angle paper template, check opposite sides for equal spacing, and let each panel set before joining it to the base.
Why do mini craft stick walls warp?
Warping commonly follows uneven moisture, curved sticks, excess glue, or drying without flat support. Sort pieces first, apply adhesive sparingly, and dry panels on a level protected surface.
Can mini craft sticks be cut for detailed models?
They can be shortened, but cutting tools require appropriate adult handling and eye protection based on the tool instructions. Sand or cover rough ends before children continue assembling the model.
How do you strengthen a miniature craft-stick bridge?
Add matching triangular side frames, connect them with evenly spaced crosspieces, reinforce weak seams with small backing pieces, and shorten unsupported spans where sagging appears.
Conclusion
Successful miniature construction comes from controlling scale, contact area, alignment, and drying sequence before adding decorative detail. Sort straight pieces for structural edges, establish dimensions with a dry layout, and assemble flat frames that can be checked before they become part of the model. Use overlapping joints, backing pieces, or corner posts instead of relying on fragile end bonds.
Start with a platform, fence, or bench if clean alignment is the immediate goal. Move to houses and truss bridges when the builder is ready to coordinate matching panels and braces. If a model leans or flexes, identify the direction of movement and reinforce that path rather than covering the entire structure with more wood. A small test joint and a staged build will reveal problems early, when they are still easy to correct.
Now retrieving an image set.
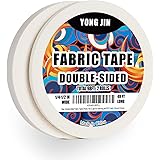
Double-Sided Fabric Tape,Hem Tape No Sew No Iron,1/4"+1/2" (2 Rolls) | No Sewing or Ironing Required, Quick Clothing Repairs, Fabric Bonding, For Hemming and DIY Crafts
$7.99 (as of October 4, 2026 22:58 GMT -04:00 - More infoProduct prices and availability are accurate as of the date/time indicated and are subject to change. Any price and availability information displayed on [relevant Amazon Site(s), as applicable] at the time of purchase will apply to the purchase of this product.)
Now retrieving an image set.
Mod Podge Matte Sealer, Glue & Finish: All-in-One Craft Solution- Quick Dry, Easy Clean, for Wood, Paper, Fabric & More. Non-Toxic - Craft with Confidence, Made in USA, 8 oz., Pack of 1
$3.99 (as of October 4, 2026 22:58 GMT -04:00 - More infoProduct prices and availability are accurate as of the date/time indicated and are subject to change. Any price and availability information displayed on [relevant Amazon Site(s), as applicable] at the time of purchase will apply to the purchase of this product.)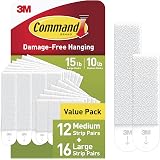
Now retrieving an image set.
Command 15 & 10 lb Assorted Picture Hanging Strips, 28 Pairs, SIOC | White Picture Hanging Strips, Damage-Free Wall Hangers for Frames, No Tools Required, Ideal for Decorating Apartments, Dorms
$13.99 (as of October 4, 2026 22:58 GMT -04:00 - More infoProduct prices and availability are accurate as of the date/time indicated and are subject to change. Any price and availability information displayed on [relevant Amazon Site(s), as applicable] at the time of purchase will apply to the purchase of this product.)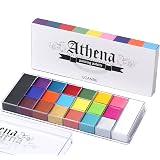
Now retrieving an image set.
UCANBE Athena Face Body Paint Oil Palette, 20 Colors Large Black White Professional Flash Tattoo Halloween SFX Party Artist Costume Festival Stage Cosplay Full Size Makeup Painting Kit 168g
$19.99 (as of October 4, 2026 22:58 GMT -04:00 - More infoProduct prices and availability are accurate as of the date/time indicated and are subject to change. Any price and availability information displayed on [relevant Amazon Site(s), as applicable] at the time of purchase will apply to the purchase of this product.)
Now retrieving an image set.
Crayola Air Dry Clay (5lbs), Teacher Supplies, Natural White Modeling Clay for Kids, Sculpting Material, Bulk Craft Supplies for Art Classrooms
$13.58 (as of October 4, 2026 22:58 GMT -04:00 - More infoProduct prices and availability are accurate as of the date/time indicated and are subject to change. Any price and availability information displayed on [relevant Amazon Site(s), as applicable] at the time of purchase will apply to the purchase of this product.)
Now retrieving an image set.