
Craft ideas for nine-year-olds using hand tools work best as small builds that pair a visible result with one manageable skill, such as measuring wood, cutting soft material, tightening a screw, or smoothing an edge. Suitable projects include a cardboard loom, cork nameplate, craft-stick tool caddy, soft-wood picture holder, string-art board, leather-look wrist cuff, and simple hinged box. An adult should inspect materials, secure each workpiece with a clamp, demonstrate the tool away from the child’s body, and supervise every cut or drilled hole. Success means controlled movements and sound joints, not adult-level speed or perfectly straight edges.
Match the Build to the Child and the Tool
A suitable hand-tool project gives a nine-year-old a real construction job without asking for strength, reach, or judgment that the child has not yet developed. Age alone is not enough to determine readiness. Watch how the child follows a demonstration, keeps a workpiece still, notices where both hands are, and stops when something feels wrong. A child who rushes through familiar scissors may need a slower starting task than a patient beginner.
Begin with materials that respond predictably. Corrugated cardboard, cork sheet, craft sticks, thin leather-look craft material, and pre-cut soft wood are easier to control than hardwood, brittle plastic, sheet metal, or thick dowels. Material choice changes the risk and effort of the same tool. A hand drill may turn smoothly through cork yet bind or skid on dense wood. A small saw may cut thin pine with modest pressure but tempt a child to force the blade through a knot.
Choose one primary skill for the build. A cardboard loom emphasizes marking and notching. A small wooden photo holder can emphasize clamping and sanding if an adult makes the saw cut. A string-art board can focus on measuring a grid and starting short nails, with the adult finishing any nail that bends. Projects become confusing when every stage introduces a different unfamiliar tool.
A useful readiness sequence is:
- Observe: The adult demonstrates the complete motion and names the stopping point.
- Rehearse: The child practices the movement without a blade, point, or fastener touching the material.
- Try one operation: The child performs a single cut, hole, or joint while the adult stays within immediate reach.
- Review: Both inspect the result before repeating the operation.
The common mistake is selecting a striking finished object and then trying to make its construction child-friendly. Reverse that logic: select the safe, teachable operation first, then design a modest object around it. Readers comparing Craft ideas for nine-year-olds using hand tools should favor builds with short work periods, easy-to-see layout lines, and parts that can be replaced cheaply after an inaccurate cut.
Set Up a Work Area That Controls the Main Risks
A stable setup does more to improve control than repeated reminders to “be careful.” Use a table at a comfortable working height, bright light, and enough clear space for the child’s elbow to move without contacting cups, cords, or loose parts. Tie back long hair and avoid dangling sleeves or jewelry. Eye protection is appropriate whenever chips, clipped wire, struck fasteners, or broken material could travel toward the face.
Secure the work before introducing a cutting, boring, or striking tool. A clamp or bench hook prevents the child from using one hand as a substitute vise. Place scrap wood beneath anything being drilled or pierced so the tool does not break through into the table. The child’s supporting hand should remain outside the projected tool path, including the area beyond the material where a blade or awl could emerge.
Tool size matters. A lightweight hammer with a comfortable handle is easier to stop than a full-size framing hammer. A short ruler is less awkward on a small component than a long tape measure. Choose hand drills, screwdrivers, files, and saws that can be held securely without stretching the fingers. A dull or damaged tool is not automatically safer: it may require excessive force, slip unexpectedly, or tear the material. Adults should check handles, blades, tips, and moving parts before the session.
Separate child-led work from adult-only preparation. An adult can cut stock to rough length, drill difficult pilot holes, or handle a utility knife, while the child measures, clamps, sands, assembles, and decorates. This division preserves authentic ownership without pretending every operation has equal risk. Power tools, hot glue guns, large sharp knives, and tools that produce substantial dust or flying debris should not be treated as ordinary substitutes for the hand tools named in a child-level plan.
Stop the activity if the child repeatedly reaches across a blade, holds material in the cutting path, forces a stuck tool, or continues after being told to pause. Fatigue often appears as harder striking, sloppier measuring, and impatience with clamps. A shorter second session is preferable to completing the object while control is deteriorating. The weak assumption is that close supervision can compensate for an unstable setup; supervision works far better when the bench, workpiece, tool, and task already limit predictable errors.
Seven Builds With Genuine Hand-Tool Jobs
Strong projects make the tool operation necessary to the object rather than adding a token adult-style step. Each of the following builds can be adjusted by changing the material thickness, providing pre-cut parts, or assigning one operation to the adult. Test paints, adhesives, finishes, and craft materials for suitability according to their labels, and allow any finish to cure as directed before the object is handled or used.
Cardboard Loom and Woven Panel
Mark evenly spaced notches along two opposite edges of heavy corrugated cardboard. The child uses a ruler and pencil for layout, then cuts shallow notches with age-appropriate scissors while the board lies flat. Wrap yarn between the notches and weave across it. If the cardboard bends, the notches are probably too deep or too close together; doubling the base is better than adding force.
Cork Nameplate
Draw a rectangular border on thick cork, press shallow decorative lines with a blunt modeling tool, and make attachment holes with a supervised hand punch intended for the material. Lettering can be added with paint markers. Cork is forgiving, but thin sheets tear around holes, so leave generous margins and avoid hanging a heavy object from the finished plate.
Craft-Stick Tool Caddy
Build a shallow tray from wide craft sticks and pre-cut wood strips. A small square helps check corners, while spring clamps hold glued joints as they dry. This project teaches that clamping pressure should close a joint rather than crush or bow it. Use the caddy for lightweight pencils and brushes, not sharp or heavy workshop tools.
Soft-Wood Picture Holder
Provide a sanded block of soft wood with an adult-made slot across the top. The child marks the center, rounds the corners with sandpaper wrapped around a block, and checks for rough fibers by looking across the surface under light. Sanding directly with fingertips can create uneven hollows; a block produces flatter faces and keeps fingers farther from splinters.
Small String-Art Board
On a pre-cut, inspected wood board, the child lays out a simple geometric pattern with a ruler. An adult starts pilot points or holes where appropriate, and the child taps in short fasteners using light strokes before wrapping yarn around them. Bent fasteners signal off-center blows or overly hard striking. Remove and replace them rather than straightening them repeatedly beside the child’s fingers.
Leather-Look Wrist Cuff
Use a flexible craft material designed for cutting and punching, not salvaged upholstery of unknown composition. The child measures wrist length loosely, marks rounded ends from a template, cuts with suitable scissors, and uses a hand punch for a cord closure. Confirm the finished cuff is not tight and remove it if it catches during active play.
Simple Hinged Keepsake Box
Assemble pre-cut thin wood panels with glue, clamps, and small screws placed in adult-made pilot holes. The child can align a small hinge and turn a screwdriver while the adult stabilizes the box. If a screw becomes hard to turn, stop; forcing it can split thin wood or strip the head. Among Craft ideas for nine-year-olds using hand tools, this is the more demanding option because alignment affects whether the lid closes cleanly.
Teach Accuracy Without Taking Over the Project
Accuracy improves when errors remain visible, understandable, and repairable. Give the child a sample piece for the first line, hole, nail, or joint. Mark waste areas with an X and use a bold line where the tool should travel. For measurements, ask the child to point to the starting mark and final mark before drawing; this catches the common error of beginning at the ruler’s physical edge when its zero mark is inset.
Demonstrate pressure as well as position. Sawing works through repeated guided strokes rather than pushing down hard. Sanding removes material gradually and should be checked between passes. A screw follows a pilot hole more cleanly when the screwdriver stays aligned with the screw shaft. These cause-and-effect explanations are more useful than telling a child to be precise without showing what controls the result.
Let cosmetic imperfections remain when they do not weaken the object or create a hazard. A slightly uneven woven edge or off-center painted letter records the child’s decisions. Intervene when an error compromises the structure, exposes a sharp point, loosens a fastener, or makes the tool harder to control. The practical distinction is between appearance and function: uneven color can stay, while a cracked hinge area needs a new panel.
Use checkpoints instead of constant correction. After measuring, compare paired parts. After cutting, place edges together. After gluing, inspect whether the joint is fully seated before clamping. After sanding, examine corners and wipe away dust according to the material and finish instructions. A project is progressing well when the child pauses independently, keeps the work secured, and can explain the next operation. It is failing when speed increases while accuracy falls, tools are used for unintended jobs, or repeated repairs make the material weaker.
Adults sometimes improve every line and joint after the child finishes, producing a polished object but reducing the learning value. Offer bounded choices instead: trim the uneven edge, add a border that incorporates it, or leave it as made. Record difficult measurements or successful settings on a small project card so a later build starts from remembered evidence rather than guesswork. More Craft ideas for nine-year-olds using hand tools become manageable once the child can reliably clamp, mark, complete one controlled operation, and inspect the result before proceeding.
Frequently Asked Questions
Which hand tools are reasonable for a nine-year-old to try?
Depending on readiness and direct adult supervision, options may include a ruler, small square, sanding block, screwdriver, lightweight hammer, hand drill, material-appropriate punch, clamps, and a small saw used in a controlled setup. Introduce one unfamiliar tool at a time.
Should a child wear gloves while using hand tools?
Gloves are not a universal solution and can reduce grip or catch around some moving tools. Prioritize a secured workpiece, correctly sized tools, eye protection where debris is possible, and hands kept outside the tool path.
What wood is easiest for a child-level build?
Clear, pre-inspected soft wood is generally easier to sand and work than dense hardwood. Avoid pieces with protruding splinters, cracks, embedded hardware, heavy warping, or knots where a cut or fastener must go.
How long should a hand-tool craft session last?
Use the child’s concentration and control rather than a fixed duration. End or pause when measuring becomes careless, striking grows harder, the child stops securing the work, or frustration replaces attention.
When should an adult complete part of the project?
The adult should take over any operation beyond the child’s demonstrated control, including difficult stock cutting, stubborn fasteners, damaged-tool handling, and steps requiring power tools or sharp utility knives. The child can retain ownership through layout, assembly, sanding, and finishing.
Conclusion
A successful hand-tool build for a nine-year-old is defined by controlled participation rather than by how many operations the child performs alone. Select forgiving material, make the workpiece immovable, and center the project on one skill that can be demonstrated and checked. Cardboard looms and cork signs suit first sessions, while string art and a pre-cut hinged box require steadier alignment and closer supervision.
Before beginning, inspect every tool and material, decide which operations belong to the adult, and prepare a scrap piece for practice. During the build, watch hand position, pressure, pace, and the child’s willingness to stop. Preserve harmless imperfections, but correct loose joints, cracks, sharp edges, and unstable fasteners. The next project should add complexity only after the child can secure the work, perform the current operation calmly, and inspect the result without prompting.
Now retrieving an image set.
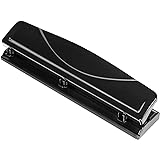
Amazon Basics 3 Hole Punch, 10 Sheet Capacity, Black, Easy-Clean Tray
$9.48 (as of September 26, 2026 22:43 GMT -04:00 - More infoProduct prices and availability are accurate as of the date/time indicated and are subject to change. Any price and availability information displayed on [relevant Amazon Site(s), as applicable] at the time of purchase will apply to the purchase of this product.)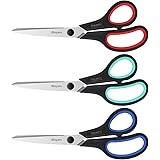
Now retrieving an image set.
iBayam 8.5" Heavy Duty Scissors All Purpose for Office School Crafts Sewing | 3-Pack, Ultra-Sharp 2.5mm Stainless Blades, Comfort Grip Handles, Left & Right Handed – Teacher Desk & Classroom Must-Have
$9.99 (as of September 26, 2026 22:43 GMT -04:00 - More infoProduct prices and availability are accurate as of the date/time indicated and are subject to change. Any price and availability information displayed on [relevant Amazon Site(s), as applicable] at the time of purchase will apply to the purchase of this product.)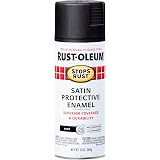
Now retrieving an image set.
Rust-Oleum 7777830 Stops Rust Spray Paint, 12 oz, Satin Black
$6.48 (as of September 26, 2026 22:43 GMT -04:00 - More infoProduct prices and availability are accurate as of the date/time indicated and are subject to change. Any price and availability information displayed on [relevant Amazon Site(s), as applicable] at the time of purchase will apply to the purchase of this product.)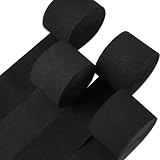
Now retrieving an image set.
PartyWoo Black Crepe Paper Streamers 4pcs 328 FT Black Streamers | Graduation Halloween New Year Anniversary Birthday Wedding Baby Shower Bridal Shower Engagement Party Decorations
$5.99 (as of September 26, 2026 22:43 GMT -04:00 - More infoProduct prices and availability are accurate as of the date/time indicated and are subject to change. Any price and availability information displayed on [relevant Amazon Site(s), as applicable] at the time of purchase will apply to the purchase of this product.)
Now retrieving an image set.
Goo Gone Adhesive Remover Spray Gel 12 Oz with Scraper, Surface Safe | Citrus Cleaning Power for Hard Surfaces, Carpet & Fabric, Removes Glue, Stickers, Tape Residue, Grease, Gum & Wax, Drip Free
$17.98 (as of September 26, 2026 22:43 GMT -04:00 - More infoProduct prices and availability are accurate as of the date/time indicated and are subject to change. Any price and availability information displayed on [relevant Amazon Site(s), as applicable] at the time of purchase will apply to the purchase of this product.)
Now retrieving an image set.