
Cut-it-out scrapbook supplies for children’s collages work best as a curated mix of child-manageable images, sturdy backing sheets, blunt-tip scissors, and washable adhesive arranged in clearly labeled trays. Choose pictures with visible outlines and enough blank space around them for developing cutters, then separate easy shapes from detailed pieces. Paper thickness matters: thin magazine pages may wrinkle under wet glue, while heavy cardstock can be tiring to cut. Pre-check decorative items for loose glitter, sharp edges, and small detachable parts, and match them to the child’s age and supervision needs. A limited, well-sorted selection usually produces more intentional collages than an overflowing supply bin.
Choose Images and Papers Children Can Cut Successfully
Successful collage materials match the child’s current cutting control rather than the visual appeal of the scrapbook collection. A large flower with a clear outer edge is easier to isolate than a cluster of narrow leaves, even if both appear on the same printed sheet. Beginning cutters benefit from bold silhouettes, generous margins, and shapes that can be separated with a few broad turns. Children with steadier control can work toward scalloped borders, internal corners, and layered illustrations.
The paper itself changes how a child handles the scissors. Standard scrapbook sheets are usually easier to guide than limp catalog pages because they hold their position without folding around the blades. Very thick cardstock offers durability but creates more resistance, especially during tight curves. Glossy pages can slide between small fingers, while textured stock may hide a faint printed outline. Before presenting a full set, cut one sample with the scissors the child will use. If an adult has to squeeze hard or repeatedly reposition the sheet, it is not a good independent-cutting material.
Image scale should fit both the child’s hands and the finished backing. On a letter-size collage base, several pieces measuring roughly the width of a child’s palm leave room for arrangement without demanding tiny cuts. A useful preparation method is to divide a large printed sheet into loose rectangles around individual pictures. The child still performs the meaningful outline cutting, but does not have to wrestle with an entire sheet or accidentally slice through neighboring images.
Do not assume every item sold for scrapbooking belongs at a children’s table. Metal charms, pins, wire decorations, loose glitter, and tiny adhesive gems introduce sharp, messy, or swallowable components. Raised foam stickers can be suitable for some supervised children, but their release liners and small punched centers need prompt cleanup. Product age labels and the child’s tendency to mouth objects matter more than the item’s location in a hobby aisle.
A quick trial reveals whether the selection is working. Watch for smooth forward snips, manageable paper turning, and pieces that remain recognizable after cutting. Repeated tearing, hand fatigue, or frustration around intricate edges signals that the outlines or stock are too demanding. Replace those pieces with simpler motifs rather than taking over the cutting. The goal of Cut-it-out scrapbook supplies for children’s collages is to preserve the child’s decisions while keeping the physical task achievable.
Build a Practical Collage Materials Checklist
A useful supply set contains fewer categories than a fully stocked scrapbook cabinet. Children need material to cut, a surface to build on, a controlled way to attach pieces, and simple tools for handling scraps. Extra embellishments should add a distinct texture or visual function, not merely increase the quantity on the table.
Start with printed sources such as single-sided scrapbook sheets, discontinued calendars, clean greeting-card fronts, or adult-prepared copies of child-created drawings. Confirm that reused material is appropriate to cut and does not contain private information, unsuitable advertising, staples, or damaged edges. If preserving photographs matters, use duplicates rather than original family prints. Children often change their minds while trimming, and an irreplaceable image creates unnecessary pressure.
- Cutting material: outlined pictures, patterned strips, colored shapes, letters, and a small selection of contrasting textures.
- Backing: medium-weight cardstock, poster board, or another sheet firm enough to stay flat under adhesive.
- Tools: properly sized blunt-tip scissors, a scrap bowl, and optional child-safe tweezers for larger pieces.
- Adhesive: washable glue sticks for low-moisture attachment or washable liquid glue in a controlled applicator.
- Finishing items: broad markers, large stickers, or pre-cut labels that suit the child’s age and the project.
Glue sticks suit thin printed pieces because they add little moisture and allow edge-to-edge coverage. Their weakness is visibility: a child may swipe the center once and leave the corners unsecured. Washable liquid glue makes coverage easier to see, but excess glue can curl thin paper and lengthen drying time. A small puddle applied with a short-handled brush offers more control than an open bottle when several children share the table. Double-sided adhesive may give a clean finish, although removing liners can become the hardest part of the activity.
The backing should be chosen after the adhesive and cutouts, not as an afterthought. Lightweight printer stock can buckle beneath layered pieces. Heavy board remains flat but may be awkward to rotate or carry to a drying area. Medium-weight cardstock is a practical middle choice for a tabletop collage. If children will create a large shared scene, tape the backing to the work surface temporarily so it does not shift while multiple hands arrange pieces.
A common purchasing mistake is choosing coordinated packs in which every pattern has similar color and scale. A child can arrange them correctly, yet the shapes disappear into one another. Include light and dark values, plain and patterned areas, and at least one calm background. Contrast makes overlapping visible and lets children judge spacing before glue is introduced.
Sort Supplies by Cutting Difficulty and Theme
Sorting should reduce decision overload without predetermining the finished picture. An open bin filled with hundreds of scraps looks generous, but children often spend the session searching, dumping, and abandoning pieces. Shallow trays expose the available choices, keep delicate pages from crumpling, and make it easier to return unused images.
Separate cutting difficulty before separating color. An “easy outline” tray might hold circles, houses, balloons, large animals, or rectangular word labels. A second tray can contain shapes with moderate curves and a few corners. Detailed foliage, narrow lettering, and images with enclosed spaces belong in an advanced tray or can be prepared partly by an adult. Avoid labeling the levels with ability judgments. A simple dot or picture symbol lets children choose a comfortable challenge and move between trays without feeling ranked.
Theme sorting is useful when the collage has a clear purpose. For an imagined garden, trays might contain plants, insects, weather symbols, border strips, and open-ended patterned scraps. The patterned tray matters because it permits invention: a green triangle can become a leaf, roof, or wing rather than forcing the child to select a finished illustration. For a memory collage, sort duplicated photographs separately from captions and decorative frames so meaningful images are not buried under ornament.
Color-only sorting is faster for abstract work but less effective for narrative scenes. A child building an ocean may know that a fish is wanted without knowing which color tray contains it. Conversely, subject-only sorting can produce a collage with little visual contrast. A hybrid system works well: group recognizable images by theme, then arrange plain scraps and border pieces by broad color family.
Use no more containers than the workspace can support. At a small table, four shallow trays and one scrap bowl are often more functional than a complex drawer system. Rotate reserve materials into the trays between sessions instead of displaying everything. The selection is sufficient when children can locate a usable piece quickly but still have room to compare alternatives.
Storage should preserve the work already invested in preparation. Keep large images flat in envelopes or divided document boxes; narrow strips can stand in short cups during use but should lie flat afterward. Remove pieces contaminated with wet glue before returning supplies to storage. For a reusable collage supply collection, label containers with both words and sample pictures so children can help reset the materials independently.
Plan a Cut, Arrange, and Glue Work Sequence
A three-stage workflow—cut first, arrange second, attach last—protects children’s ability to revise. Gluing every piece immediately tends to create crowding because the child cannot test overlap, orientation, or background space. It also turns each new choice into a permanent correction problem. Keep adhesive closed until several usable pieces have been cut and placed loosely on the backing.
Prepare the work area with scissors on the child’s dominant side, image trays within comfortable reach, and a scrap bowl near the cutting hand. Place the backing slightly beyond the cutting zone so fragments do not cover the developing composition. For a group, provide more than one scrap container; children are less likely to sweep scraps onto the floor when disposal is reachable.
- Select and rough-cut: Choose a picture and separate it from the surrounding sheet with a wide margin.
- Trim the outline: Turn the paper with the assisting hand while the scissors continue in controlled forward snips.
- Test the arrangement: Place several pieces on the backing and compare spacing, overlap, and direction.
- Attach in layers: Secure background pieces first, then foreground images and durable embellishments.
- Check and dry: Press loose corners, add a name if desired, and move the collage flat to a protected area.
Adults can demonstrate paper turning without recutting the child’s piece. If a white border remains, treat it as part of the design unless the child wants another attempt. Insisting on exact edge cutting shifts attention from composition to perfection and may weaken narrow details. A recognizable, independently cut image generally contributes more to the activity than an adult-finished silhouette.
Layer order deserves a pause before gluing. In a street scene, a building belongs behind a tree, while a small vehicle may overlap the building’s lower edge. Ask the child to lift and move pieces rather than explaining where everything should go. If the layout keeps sliding, take a quick reference photo for the child or move one piece at a time to a nearby holding area while adhesive is applied.
Signs of a sound process include children changing arrangements before attachment, selecting pieces for a stated reason, and completing cuts without prolonged struggle. Warning signs include glue spreading across the table, every image being used simply because it is available, or adults repeatedly rescuing detailed shapes. Adjust the environment first: reduce the selection, simplify the outlines, switch adhesive, or enlarge the backing. These changes preserve choice while addressing the actual source of difficulty.
Frequently Asked Questions
What scrapbook paper is easiest for children to cut?
Medium-weight, non-glossy paper with clear outlines is usually easiest to control. Avoid extremely thin pages that fold around the blades and thick stock that makes tight turns tiring.
Should adults pre-cut collage pictures?
Adults can separate crowded sheets into rough rectangles, but children should trim the final outlines when their skills allow. Pre-cut intricate pieces only when the detail would block participation.
Is a glue stick or liquid glue better for scrapbook cutouts?
Glue sticks minimize curling on thin pieces, while washable liquid glue provides visible coverage for heavier layers. Use a small amount and check the corners before drying.
How many collage choices should be placed on the table?
Offer enough variety for comparison without filling the entire workspace. Four shallow trays organized by theme or difficulty are often more manageable than one deep mixed bin.
How can scrapbook supplies be made safer for younger children?
Follow product age guidance, supervise cutting and gluing, and exclude sharp metal parts, loose glitter, and small detachable decorations. Choose appropriately sized blunt-tip scissors and washable adhesive.
Conclusion
A productive collage station depends on fit rather than abundance. Select printed images with readable edges, test whether the stock cuts comfortably, and reserve intricate or tiny decorations for children who can manage them safely. Pair those materials with a firm backing, an adhesive suited to the paper weight, and shallow trays that make choices visible.
Before the next session, prepare a small range of easy and moderately detailed cutouts, divide crowded sheets into workable rectangles, and establish separate cutting and gluing zones. Watch the process for evidence rather than judging the finished picture alone: manageable snips, purposeful rearrangement, secure edges, and independent cleanup show that the setup is doing its job. If children become overwhelmed or materials fail, simplify the outlines, reduce the displayed selection, or change the glue before providing more adult intervention.
Now retrieving an image set.
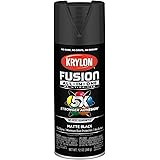
Krylon Fusion All-In-One, Matte, Black, 12 oz
$6.98 (as of September 18, 2026 22:40 GMT -04:00 - More infoProduct prices and availability are accurate as of the date/time indicated and are subject to change. Any price and availability information displayed on [relevant Amazon Site(s), as applicable] at the time of purchase will apply to the purchase of this product.)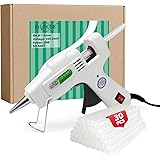
Now retrieving an image set.
Krightlink Mini Hot Glue Gun Kit with 30 Glue Sticks 20w Fast Preheating | 20w Hot Melt High Temp hot glue gun, Anti-Drop Precision Nozzle, for School Crafts DIY Arts, Quick Home Repairs-White
$8.54 (as of September 18, 2026 22:40 GMT -04:00 - More infoProduct prices and availability are accurate as of the date/time indicated and are subject to change. Any price and availability information displayed on [relevant Amazon Site(s), as applicable] at the time of purchase will apply to the purchase of this product.)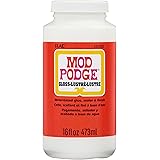
Now retrieving an image set.
Mod Podge Gloss Sealer, Glue & Finish: All-in-One Craft Solution- Quick Dry, Easy Clean, for Wood, Paper, Fabric & More. Non-Toxic - Craft with Confidence, Made in USA, 16 oz., Pack of 1
$7.99 (as of September 18, 2026 22:40 GMT -04:00 - More infoProduct prices and availability are accurate as of the date/time indicated and are subject to change. Any price and availability information displayed on [relevant Amazon Site(s), as applicable] at the time of purchase will apply to the purchase of this product.)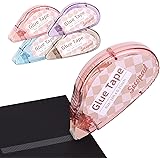
Now retrieving an image set.
Secopad Scrapbook Tape, Glue Tape for Crafts, 4 Pack, Light-Colored Shell | 0.3IN x 26FT, Sticky & Safe, Double Sided Tape for Crafts, Scrapbooking Junk Journaling Supplies, For School Office Teachers
$6.99 (as of September 18, 2026 22:40 GMT -04:00 - More infoProduct prices and availability are accurate as of the date/time indicated and are subject to change. Any price and availability information displayed on [relevant Amazon Site(s), as applicable] at the time of purchase will apply to the purchase of this product.)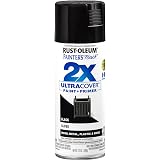
Now retrieving an image set.
Rust-Oleum Painter's Touch 2X Ultra Cover Spray Paint, Gloss Black | Indoor and Outdoor Surfaces (Metal, Wood, Plastic), Fast Dry, Durable, Sprays from Any Angle, Comfort Tip, Oil Based
$5.98 (as of September 18, 2026 22:40 GMT -04:00 - More infoProduct prices and availability are accurate as of the date/time indicated and are subject to change. Any price and availability information displayed on [relevant Amazon Site(s), as applicable] at the time of purchase will apply to the purchase of this product.)
Now retrieving an image set.