
Choose Materials That Hold Their Shape
The plate and feather material determine whether the turkey stays flat, stands upright, or begins to sag before it reaches the display area. A plain, uncoated paper plate accepts tempera paint, crayons, and school glue more readily than a glossy or wax-coated plate. A plate with a defined rim also gives the body more stiffness. Thin disposable plates are usable for wall displays, but they may need a second plate glued behind them if the design includes many feathers or raised decorations.
Cardstock is the most dependable choice for the tail because it holds a feather silhouette without requiring a complicated support. Construction paper is easier for young children to cut, although long feathers made from it can bend at the narrow ends. For a tabletop turkey, use cardstock for at least the rear feather layer and reserve lighter paper for decorative pieces placed on top. Real craft feathers add texture, but their narrow shafts provide small gluing surfaces and can shift while drying. Paper versions are usually easier to space evenly and personalize.
A practical supply set includes a paper plate, brown paint or brown paper, red, orange, yellow, and brown cardstock, school glue, scissors, a black marker, and scrap paper for the beak, eyes, feet, and wattle. Googly eyes are optional rather than necessary. Small loose components require close supervision with children who may put objects in their mouths. Adults should also handle hot glue, craft knives, and any cutting through doubled plates. Ordinary school glue is sufficient when pieces overlap the plate by about an inch and receive time to dry.
Choose the adhesive according to the display plan. A glue stick keeps flat facial details neat but may not hold heavy feathers for an extended display. Liquid school glue creates a stronger paper-to-paper bond, though excess moisture can buckle thin plates. Apply short lines or small dots instead of coating the entire back of each piece. Double-sided tape offers immediate attachment for a short event, but children lose the opportunity to reposition uneven feathers.
Before work begins, make one material decision based on placement: lightweight components for a wall, stiffer components for a table, and reinforced plates for hanging rows in a classroom or hallway. The related Paper plate turkey craft for Thanksgiving displays supply plan can be adjusted without changing the basic assembly method. The common mistake is combining the thinnest plate with the heaviest decorations; reinforcement is more effective than adding extra glue after the plate has already bent.
Build the Turkey in a Reliable Order
A clean assembly sequence separates wet work from structural work. Paint the front of the plate brown first, keeping the layer thin enough that the plate does not become saturated. If drying time is limited, trace the plate onto brown paper, cut out the circle, and glue it over the front instead. The paper-cover method is less messy and produces predictable color, while painting gives children more direct involvement and natural variations in the finish.
While the body dries, cut seven to nine feather shapes. A simple feather can be a long oval with one end trimmed to a point and the opposite end left broad for gluing. Arrange the pieces behind the plate without adhesive to check the fan. Begin with the center feather, add matching pieces on the left and right, and keep the lower ends inside the plate boundary. This center-out arrangement prevents one side from becoming crowded before the other side is built.
- Finish the body surface: Paint or cover the plate and let it become dry to the touch.
- Test the feather fan: Place the feathers behind the plate, checking height and side-to-side balance.
- Secure the rear layer: Turn the plate over, glue the broad feather ends to the back, and allow the bond to set.
- Add the face: Attach eyes, a triangular beak, and a red wattle to the front.
- Install the display support: Add feet, a stand, or a hanging loop only after the main structure is firm.
The face reads most clearly when its pieces are scaled to the plate. On a standard dinner-size plate, tiny eyes can disappear visually, especially when the turkey is viewed from across a room. Draw larger white eye shapes with black pupils or mount small eyes on white paper circles. Place the orange beak below the eyes and let the red wattle extend from one side of the beak. Symmetry is not required; a slightly angled beak can give the turkey an expressive look without adding more components.
Press glued parts beneath a clean scrap of paper to distribute pressure without smearing paint. If the feather fan slides, the glue is either too wet, too abundant, or supporting too much weight at once. Remove the moving piece, wipe away excess glue, and reattach it after the plate and feather are dry. Adding more liquid glue to a slipping joint usually makes the problem worse.
For group work, divide construction into two sessions: body color and feather decoration first, assembly and display preparation second. That schedule reduces bottlenecks around shared scissors and prevents wet turkeys from being carried immediately to a bulletin board. A successful build lies flat without twisting, has feathers attached over a generous area, and can be lifted by the plate rather than by a decorative part.
Design Feathers for Color, Depth, and Child Participation
The tail is the strongest visual feature, so its design should match both the children’s abilities and the viewing distance. Broad shapes in distinct autumn colors remain recognizable from across a classroom. Fine patterns are more rewarding at close range, such as on a dining table or library shelf. Combining those two scales works well: use large red, orange, yellow, and brown silhouettes, then add marker lines, paper dots, fingerprints, or short written messages within each feather.
Preschool participants can decorate pre-cut feathers with crayons, dot markers, or torn-paper pieces. Early elementary children can trace templates and cut their own shapes. Older children can create a layered tail by placing shorter patterned feathers over a taller solid-color fan. Layering adds depth, but every added piece increases weight. Keep raised items, pom-poms, and thick foam shapes near the plate rather than at the feather tips, where leverage makes bending more likely.
For a collaborative Thanksgiving display, give each child one feather and invite a drawing or a short note about something they appreciate. Assemble the finished pieces around one large plate body or attach each child’s feather to an individual turkey. The shared version creates a strong focal point but limits how many contributions remain readable. Individual birds require more wall space yet make names and artwork easier to identify. Choose according to the display area rather than assuming a larger combined project will always be more effective.
Color order affects the finished balance. Random placement feels lively, but two very dark feathers next to each other can make one side look visually heavy. Lay out all pieces first and alternate light and dark colors before gluing. For patterned paper, turn busy prints inward toward the center and use quieter colors at the outside edges. This keeps the turkey’s face from competing with every part of the tail.
The most frequent design failure is decorating each feather fully before checking whether part of it will be hidden behind the plate. Mark the overlap area lightly in pencil so names, drawings, and important patterns remain above the rim. Another weak approach is cutting narrow slits along every edge to imitate feather barbs. The effect can be attractive, but thin fringes tear during handling and make group cleanup harder. Solid-edged feathers are better for displays expected to last through several days of activity.
Use the project’s viewing distance as the final editing test. Hold the assembled turkey several steps away. If the face disappears, enlarge the eyes or beak; if the tail looks crowded, remove one layer rather than squeezing in every remaining decoration. More detail is not automatically better. Clear shapes, controlled overlap, and visible contributions make the result easier to appreciate.
Adapt the Finished Turkey for Different Displays
The support method should be selected before adding feet because wall, window, and tabletop arrangements place different loads on the plate. A wall-mounted turkey needs little structural reinforcement if the feathers lie flat. Attach a loop of yarn or ribbon to the reinforced back, or mount the entire project directly with an appropriate removable fastener. Secure the loop at two points so the turkey does not rotate, and test the attachment over a table before placing it high on a wall.
A tabletop display needs a broad rear support rather than decorative paper legs alone. Fold a strip of cardstock into a triangular easel and glue one panel to the back of the plate. The bottom edge of the triangle should sit level with the lowest point of the body. For a centerpiece viewed from both sides, sandwich feather tabs and the top of the stand between two plates. That approach hides construction joints and adds stiffness, although it uses more material and takes longer to dry.
Place cards can use smaller dessert plates or circles cut from corrugated cardboard. Write a guest’s name on the body or on a small banner held across the lower rim. Keep the tail low enough that it does not block sightlines across the table, and position the turkey away from candles, serving dishes, and wet surfaces. Paper decorations are intended for dry display areas and should not touch food. A sealed plastic table covering can protect the project from spills without coating the turkey itself.
For a classroom bulletin board, consistency comes from fixing only a few shared dimensions. Give every participant the same plate size and a maximum feather length, then allow individual colors and faces. The birds will align more easily while retaining visible differences. Mounting them in a row requires more horizontal space than expected because feather fans extend beyond each plate. Arrange the completed pieces on the floor first and measure the full group before attaching anything to the board.
Storage matters when the display will return next year. Flattening a three-dimensional stand can weaken its folds, while stacked googly eyes and foam pieces can dent neighboring projects. Wall versions with paper-only details store most reliably in a rigid portfolio or shallow box, separated by plain sheets. A tabletop turkey is better treated as a seasonal project than a permanent keepsake unless its stand is designed to detach.
Check stability by placing the finished bird on its intended surface and gently tapping the table nearby. A leaning body, lifting stand edge, or dropping feather indicates that the support or glue joint needs attention. The Paper plate turkey craft for Thanksgiving displays format is flexible, but display durability comes from matching weight, attachment, and placement—not from applying the same construction to every setting.
Frequently Asked Questions
What type of paper plate works best for a turkey display?
An uncoated, sturdy plate with a raised rim is easiest to paint and resists bending. Reinforce a thin plate with a second plate when using layered cardstock or heavy decorations.
How many feathers should a paper plate turkey have?
Seven to nine broad paper feathers usually create a full, balanced fan on a dinner-size plate. Use fewer, wider pieces for younger children or a compact tabletop display.
How can the turkey stand up on a table?
Glue a folded triangular cardstock easel to the back, aligning its bottom edge with the base of the plate. Test it before adding heavy decorations and widen the stand if the turkey tips forward.
Can children make this turkey without paint?
Yes. Cover the plate with brown paper, color it with crayons, or leave a kraft-colored plate uncovered. A paper covering reduces drying time and keeps group work less messy.
Why do the turkey feathers keep falling off?
The feathers may have too little overlap, excess wet glue, or more weight than the plate supports. Dry both surfaces, increase the glued area, and reinforce the back with cardstock if needed.
Conclusion
A dependable turkey display comes from coordinating the plate, feather weight, adhesive, and final location before assembly begins. Use an uncoated plate for easier decorating, overlap cardstock feathers generously, and let painted or glued parts dry before adding another layer. Choose a rear loop for flat wall pieces and a wide folded easel for tabletop birds; decorative feet should not be expected to carry the structure. Children can contribute through color, patterns, cutting, or gratitude messages without every age group handling the same tasks. Set out the intended arrangement before mounting a class set, then inspect each turkey for loose pieces, a curling plate, or an unstable base. Those checks preserve the handmade variation while making the display easier to install and maintain.
Now retrieving an image set.
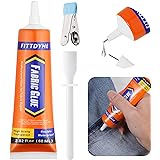
FITTDYHE Fabric Glue Permanent, 60 ML Washable Clear Clothing Glue, Super Fabric Glue for Rhinestones, Patches, Clothes, Denim, Leather, Polyester, Fabrics, Doll Repair, Flannel, Cotton
$9.99 (as of September 18, 2026 22:40 GMT -04:00 - More infoProduct prices and availability are accurate as of the date/time indicated and are subject to change. Any price and availability information displayed on [relevant Amazon Site(s), as applicable] at the time of purchase will apply to the purchase of this product.)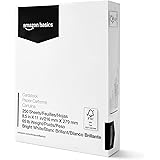
Now retrieving an image set.
Amazon Basics Cardstock Paper, 8.5" x 11", 65 lb/176 gsm, 96 Bright White, 250 Sheets
$10.63 (as of September 18, 2026 22:40 GMT -04:00 - More infoProduct prices and availability are accurate as of the date/time indicated and are subject to change. Any price and availability information displayed on [relevant Amazon Site(s), as applicable] at the time of purchase will apply to the purchase of this product.)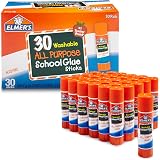
Now retrieving an image set.
Elmer's All Purpose School Glue Sticks, Acid-Free and Washable, Clear, 7 Grams, 30 Count - Craft Projects, Poster, Classroom Supplies, #1 Teacher Brand
$10.99 (as of September 18, 2026 22:40 GMT -04:00 - More infoProduct prices and availability are accurate as of the date/time indicated and are subject to change. Any price and availability information displayed on [relevant Amazon Site(s), as applicable] at the time of purchase will apply to the purchase of this product.)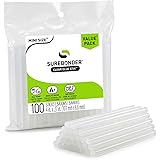
Now retrieving an image set.
Surebonder Clear, All Purpose, All Temp., Mini Size Hot Glue Sticks 0.27 in. Diameter, 4 in. Length -100 Pack
$5.97 (as of September 18, 2026 22:40 GMT -04:00 - More infoProduct prices and availability are accurate as of the date/time indicated and are subject to change. Any price and availability information displayed on [relevant Amazon Site(s), as applicable] at the time of purchase will apply to the purchase of this product.)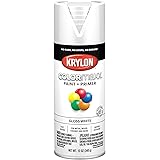
Now retrieving an image set.
Krylon ColorMaxx 12 Oz. Gloss Spray Paint, White - 1 Each
$4.48 (as of September 18, 2026 22:40 GMT -04:00 - More infoProduct prices and availability are accurate as of the date/time indicated and are subject to change. Any price and availability information displayed on [relevant Amazon Site(s), as applicable] at the time of purchase will apply to the purchase of this product.)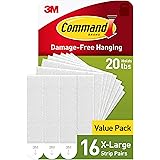
Now retrieving an image set.