
Paper making supplies for children’s experiments should include torn scrap paper, a water container, a blender reserved for crafts or a hand-pulping tool, a mesh mold, absorbent cloths, a sponge, and a flat drying surface. These items let children compare how fiber type, pulp thickness, pressing pressure, and added textures change a finished sheet. Adult supervision is needed around blenders, scissors, hot water, and small decorative pieces. For a useful experiment rather than a one-time activity, keep sheet size and pulp quantity consistent while changing only one variable per batch.
Core Supplies and What Each One Does
A workable child-sized paper-making station needs equipment for four jobs: separating fibers in water, catching the pulp, removing moisture, and supporting the sheet while it dries. A large plastic basin contains the wet work better than a shallow tray, while a measuring cup makes it easier to repeat pulp-to-water ratios. Keep the basin small enough that a child can reach its center without leaning against the rim.
The mold is the main sheet-forming tool. It consists of a rigid frame covered with fine mesh; a second open frame, called a deckle, may sit on top to define clean edges. A small commercial mold is convenient, but an adult can securely attach fiberglass window screen to a sturdy frame. Metal screening may have sharp cut ends and should not be handed to children unless every edge is fully enclosed. Loose fabric netting tends to sag, producing a thick center and thin corners rather than a reasonably even sheet.
Fiber must be dispersed before it reaches the mold. A household blender works quickly, but it should be operated by an adult and preferably dedicated to nonfood projects afterward. A lower-equipment alternative is to soak tiny paper pieces and work them in a lidded jar or mash them with a blunt tool. Hand processing leaves more visible fragments and creates rougher sheets, which can be useful when the experiment compares processing methods. It does not usually produce the same uniform pulp as mechanical blending.
Absorbent cloth, felt, or smooth reusable shop towels receive the wet sheet when it is transferred from the mesh. This transfer is called couching. Textured terry towels can emboss deep loops into soft pulp, so smooth cloth is more suitable when children need a flat writing surface. A sponge removes water through the back of the screen before the mold is lifted. Several cloth layers and a flat board then allow controlled pressing without rubbing the fragile fibers sideways.
A basic supply check should cover:
- Containment: basin, waterproof table covering, and a nearby towel for spills.
- Formation: prepared pulp, mold and deckle, measuring cup, and stirrer.
- Water removal: sponge, smooth absorbent cloths, boards, and light weights.
- Observation: labels, pencil, ruler, and a notebook for recording each batch.
Buying an elaborate kit does not correct poor mesh tension or inconsistent pulp measurements. Before adding decorative supplies, test one plain sheet. The mold should drain without shedding screen fibers, the cloth should release the damp sheet, and the pressing boards should stay flat. Readers comparing Paper making supplies for children’s experiments should prioritize dependable sheet-forming equipment over a large assortment of embellishments.
Choosing Fibers, Colorants, and Add-Ins
Paper source determines the color, strength, surface, and pulping time of a handmade sheet. Uncoated office paper and plain drawing paper break down predictably after soaking and are sensible starting fibers. Paper towels produce soft, absorbent pulp but may form a weaker sheet. Newspaper creates gray pulp and can transfer ink, while glossy magazine pages resist water because coatings interfere with fiber separation. Thermal receipts, heavily coated packaging, food-stained paper, and unknown specialty papers are poor choices for a child’s first trial.
Children can test fiber behavior by making equal batches from two clearly labeled sources. For example, one batch might use white drawing scraps and another the same dry volume of brown paper bag pieces. The brown pulp generally remains visibly fibrous and may require longer soaking. The comparison becomes meaningful only when the mold size, pulp amount, pressing method, and drying location stay the same. Mixing every available scrap into one basin creates an attractive recycling activity, but it hides which fiber caused a particular result.
Color can come from already-colored paper, which is easier to control than liquid colorant. Small amounts of washable, water-based color may tint pulp, but some color remains in the vat rather than attaching to the fibers. It can stain cloths and hands or produce a lighter sheet than expected. Paint is not an equal substitute: too much can coat fibers, slow drainage, and make the dried surface stiff. Separate tools and protective coverings are sensible whenever color is introduced.
Flat, lightweight add-ins are more successful than bulky decorations. Tiny flower petals, short threads, tissue-paper flecks, or a pinch of dried leaves can become trapped between fibers. Large petals and long yarn strands interrupt bonding, leaving holes or weak lines where a sheet tears. Glitter is difficult to contain, may pass through the screen, and contributes little to an experiment about fiber behavior. Seeds can add bulk, and prolonged soaking or slow drying may damage them; they should not be presented as guaranteed to germinate after paper making.
Use add-ins as a measured variable rather than an unrestricted handful. Make one plain control sheet and a second sheet with a teaspoon of short thread pieces mixed into the same quantity of pulp. Once dry, compare flexibility, visible gaps, edge strength, and the ability to take pencil marks. A sheet with evenly distributed fibers and no translucent thin patches usually indicates that the pulp was stirred and lifted well. A decorative sheet that separates around every inclusion shows that the add-in load exceeded the fiber network’s ability to hold together.
Material labels deserve attention when purchasing colorants or decorative components. Choose products intended for children’s art use, follow the manufacturer’s age guidance, and avoid assuming that “natural” means harmless. Dried plants may crumble, stain, or trigger individual sensitivities. For younger children who still mouth objects, omit small add-ins entirely and focus on paper color, pulp coarseness, and surface impressions.
Setting Up a Controlled Paper-Making Experiment
A paper-making activity becomes an experiment when one chosen condition changes and the remaining conditions are recorded. Children might compare long and short blending times, one scoop versus two scoops of pulp, or light versus firm pressing. Changing fiber type, color, pulp quantity, and drying method at once may produce different sheets, but it cannot show which choice caused the difference.
Begin by preparing enough pulp for a control and at least one comparison sheet. Tear rather than merely crumple the source paper, because small exposed edges absorb water more readily. Soaking time should be kept equal between samples unless soaking itself is the variable. An adult can blend the soaked pieces with ample water in brief pulses, never filling or operating the appliance beyond its instructions. Pulp should resemble suspended fibers rather than dry flakes or a dense paste.
Fill the basin deeply enough to move the mold beneath the surface, add a measured amount of pulp, and stir before every lift. Hold the mold level, raise it steadily, and let water drain without tipping. Tilting sends fibers toward one edge. After drainage slows, remove the deckle, place the mold pulp-side down on smooth cloth, sponge through the mesh, and lift the frame from one edge. If the pulp stays on the screen, more sponging or a more absorbent receiving cloth may be needed.
A compact experimental sequence keeps the comparison fair:
- Write the batch label and identify the single changed variable.
- Measure the same dry paper amount or prepared pulp volume for each control sheet.
- Use the same mold, lifting motion, pressing time, and drying location.
- Record observations while wet, then compare again only after every sheet is fully dry.
Suppose a child wants to test whether finer pulp makes smoother paper. Batch A can receive a shorter processing time, while Batch B receives a longer one; all other conditions remain matched. The child can inspect visible fragments, feel the dry surface, draw a pencil line, and gently bend both samples. “Smoother” should be connected to observations such as fewer raised fragments or a more continuous pencil line, not just a preferred appearance.
Sheet thickness is an especially useful variable because children can see its tradeoff. More pulp may create a sturdier sheet, but it also retains more water and dries slowly. Too little pulp exposes the mesh pattern and causes holes. The useful middle point is not a universal measurement because mold size, fiber source, and pulp concentration differ. Marking a scoop or using the same measuring cup makes repetition more reliable than estimating by eye.
Good supervision protects both children and the experiment. Adults should manage powered equipment and any cutting needed to build a mold. Keep wet floors clear, do not pour thick pulp directly down a drain, and strain leftover fibers from the water before disposal according to local household practices. A supply plan for Paper making supplies for children’s experiments should include cleanup tools and labels, not only the objects that appear in the finished sheet.
Pressing, Drying, and Diagnosing Failed Sheets
Pressing controls moisture and contact between fibers, while drying determines whether the sheet stays flat, releases cleanly, and avoids musty odors. After couching, place another smooth cloth over the wet paper and press between flat boards. Even hand pressure is safer and more informative than jumping on the boards or stacking unstable heavy objects. The goal is to push water into the absorbent layers without sliding the fibers out of position.
Cloths that become saturated stop removing water effectively. Replace them with dry layers if the sheet remains glossy-wet after pressing. A thin sheet may be left attached to its cloth until it gains enough strength to peel away; forcing it off immediately can split the center. Air circulation matters more than intense heat. A drying rack, clean screen, or flat protected surface in a ventilated room is preferable to an enclosed container. Hair dryers and ovens add unnecessary heat risk and can curl or scatter lightweight sheets.
Wrinkling is not automatically a failure. Handmade fibers shrink as water leaves, and unsupported edges may contract unevenly. Drying between breathable cloths under light, flat pressure can limit curling, although it takes longer than open-air drying. Open drying is useful when speed and texture are the experimental focus. Pressed drying is better when children want a flatter sheet for drawing or folding. Recording the method prevents a drying difference from being mistaken for a fiber difference.
Holes usually point to uneven pulp distribution, insufficient pulp, clumps, or a tilted mold. Stirring immediately before a level lift often fixes the problem. A sheet that crumbles after drying may contain fibers that were not separated enough, too many bulky inclusions, or too little pulp overlap. A sheet that will not release from the screen may have been couched onto a nonabsorbent surface, insufficiently sponged, or lifted straight upward rather than peeled gradually from an edge.
Slow drainage has a different set of causes. Extremely fine pulp, excess paint, a clogged mesh, or a vat overloaded with fibers can trap water. Diluting the vat and cleaning the screen is a better first response than pressing harder. Pressing cannot correct a sheet that formed as a dense, uneven mat. If a dried sample smells stale or feels cool and damp, it is not finished; separate it from stacked papers and increase airflow rather than sealing it for storage.
Success should be judged against the experiment’s purpose. A coarse paper-bag sheet can be rough yet successful if it demonstrates visible long fibers. A thin translucent sheet can still provide useful evidence about low pulp concentration. Keep samples labeled and compare edge integrity, flexibility, thickness, texture, color distribution, and writing performance. Those observations turn imperfect results into evidence and show which Paper making supplies for children’s experiments deserve adjustment before the next batch.
Frequently Asked Questions
Can children make paper without a blender?
Yes. Soak very small scraps, shake them with water in a tightly closed jar, or mash them with a blunt tool. The resulting pulp is usually coarser, so expect visible fragments and a rougher sheet.
What type of scrap paper works best for a first experiment?
Plain, uncoated drawing or office paper is predictable and easy to compare. Avoid glossy pages, thermal receipts, food-soiled scraps, and papers with unknown coatings.
Is a mold and deckle necessary?
A supported fine-mesh screen is necessary to catch fibers evenly; a separate deckle is optional. The deckle creates a defined border, while an open screen tends to produce irregular edges.
Why does handmade paper tear when it is removed from the screen?
The sheet may still hold too much water, contain too little pulp, or be resting on a cloth that does not absorb well. Sponge through the mesh and peel the frame away gradually from one edge.
How long does children’s handmade paper take to dry?
Drying time varies with thickness, pressing, humidity, airflow, and the drying surface. Treat the sheet as unfinished while it feels cool or damp, and do not stack or seal it until fully dry.
Conclusion
Build the station around a reliable mesh mold, measurable pulp portions, smooth absorbent cloths, and a safe way to remove water. Plain uncoated scraps provide a useful control before colorants, petals, thread, or other variables complicate the fiber network. Label every sample, change one condition at a time, and compare sheets only after they have dried fully.
Begin with a small plain batch to check mesh tension, couching, and release. If holes, crumbling, or slow drainage appear, correct pulp distribution and water removal before buying more decorative items. Imperfect sheets still have experimental value when children can connect a visible result to fiber choice, pulp concentration, pressing, or drying. The next practical step is to select one comparison—such as coarse versus finely processed pulp—and prepare matching quantities for two labeled sheets.

Now retrieving an image set.
Rust-Oleum Stops Rust Spray Paint, Semi-Gloss Black | Rust Resistant, Indoor and Outdoor, Beautiful Finish on Metal, Wood and More, Sprays from Any Angle, 12 oz
$6.48 (as of September 18, 2026 22:40 GMT -04:00 - More infoProduct prices and availability are accurate as of the date/time indicated and are subject to change. Any price and availability information displayed on [relevant Amazon Site(s), as applicable] at the time of purchase will apply to the purchase of this product.)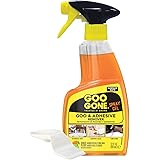
Now retrieving an image set.
Goo Gone Adhesive Remover Spray Gel 12 Oz with Scraper, Surface Safe | Citrus Cleaning Power for Hard Surfaces, Carpet & Fabric, Removes Glue, Stickers, Tape Residue, Grease, Gum & Wax, Drip Free
$17.98 (as of September 18, 2026 22:40 GMT -04:00 - More infoProduct prices and availability are accurate as of the date/time indicated and are subject to change. Any price and availability information displayed on [relevant Amazon Site(s), as applicable] at the time of purchase will apply to the purchase of this product.)
Now retrieving an image set.
Crayola Construction Paper Bulk Pack (480 Sheets) – 10 Assorted Colors, 9x12, Teacher School Supplies & Classroom Must Haves, Card Making Craft Supplies, Art Paper
$11.76 (as of September 18, 2026 22:40 GMT -04:00 - More infoProduct prices and availability are accurate as of the date/time indicated and are subject to change. Any price and availability information displayed on [relevant Amazon Site(s), as applicable] at the time of purchase will apply to the purchase of this product.)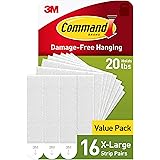
Now retrieving an image set.
Command 20 lb X-Large Picture Hanging Strips, 16 Pairs White Command Strips Heavy Duty Picture Hanger
$9.75 (as of September 18, 2026 22:40 GMT -04:00 - More infoProduct prices and availability are accurate as of the date/time indicated and are subject to change. Any price and availability information displayed on [relevant Amazon Site(s), as applicable] at the time of purchase will apply to the purchase of this product.)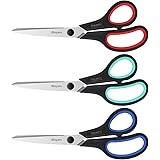
Now retrieving an image set.
iBayam 8.5" Heavy Duty Scissors All Purpose for Office School Crafts Sewing | 3-Pack, Ultra-Sharp 2.5mm Stainless Blades, Comfort Grip Handles, Left & Right Handed – Teacher Desk & Classroom Must-Have
$9.99 (as of September 18, 2026 22:40 GMT -04:00 - More infoProduct prices and availability are accurate as of the date/time indicated and are subject to change. Any price and availability information displayed on [relevant Amazon Site(s), as applicable] at the time of purchase will apply to the purchase of this product.)
Now retrieving an image set.