
Mixed-media craft ideas for ten-year-olds work best when each project combines a sturdy base, two or three compatible materials, and a clear layering order. Cardboard reliefs, painted collages, foil embossing, fabric portraits, and dimensional nature scenes let children experiment with texture without demanding adult-level precision. Apply wet paint and broad background pieces first, allow them to dry, then attach fabric, foil, yarn, or raised details with an adhesive suited to their weight. Limiting the material tray prevents visual clutter, while test scraps reveal whether markers bleed, glue warps the base, or heavy pieces need stronger attachment.
Choosing Materials That Work Together
A successful mixed-media project needs material contrast without material conflict. Ten-year-olds can manage several processes independently, but they still benefit from a limited selection that makes design decisions understandable. A useful starting combination is one firm base, one color medium, one flexible texture, and one raised element. Cardboard, acrylic or tempera paint, fabric scraps, and corrugated-card shapes provide four distinct surfaces while remaining easy to cut and arrange.
The base should match the weight and moisture of everything placed on it. Thin printer paper may buckle under paint, wet glue, buttons, or layered fabric. Cardstock handles light collage work, while cereal-box board, corrugated cardboard, canvas board, or a reused shipping box is better for relief art. If the finished piece must stand upright, test the base before decorating it. A heavily embellished top can make a narrow structure tip forward even when every attachment is secure.
Adhesive choice matters just as much as the decorative materials. A glue stick works cleanly for lightweight paper but usually cannot hold pebbles, thick yarn, craft sticks, or folded cardboard for long. White school glue suits porous pieces such as paper, felt, unfinished wood, and cardboard, although too much can soak the base. Tacky craft glue offers a thicker bond for heavier decorations. Hot glue requires close adult handling and is rarely necessary when a slower-drying child-appropriate adhesive will work.
Coloring media create another compatibility check. Water-based markers can smear beneath wet glue, and watercolor may reactivate when a damp layer is added. Colored pencils remain controlled but may appear faint on brown cardboard. Paint markers and permanent markers require attention to ventilation, surface protection, and product labeling, so ordinary washable paint or water-based markers are often simpler for a shared table.
For a manageable setup, place materials in four shallow trays: base pieces, color tools, soft textures, and dimensional additions. Offer choices within those limits rather than opening every supply container. More options do not automatically produce richer work; they often make it harder to establish a focal point. Readers comparing craft ideas for ten-year-olds using mixed media should prioritize compatible surfaces and adhesives before novelty supplies.
Eight Mixed-Media Projects With Room for Originality
The strongest projects provide a recognizable construction method without prescribing every color, shape, or subject. At age ten, children may reject crafts that look preassembled or leave no meaningful decisions. These eight options establish enough structure to prevent frustration while preserving control over composition and details.
- Cardboard relief landscape: Paint a firm board as sky and ground, then add stacked cardboard hills, folded trees, yarn paths, and tissue-paper foliage.
- Foil texture panel: Glue yarn or thin cardboard lines to a base, cover them with household foil, press gently around the raised forms, and add color with suitable water-based art markers.
- Fabric self-portrait: Draw a simple head-and-shoulders outline on board, then build clothing, hair, and background patterns from fabric, yarn, paper, and buttons.
- Magazine creature collage: Combine printed textures into an invented animal, then extend the picture with paint, pencil shading, and corrugated wings or scales.
- Nature-window scene: Frame a painted view with craft sticks or cardboard strips and add clean, dry leaves, twigs, seedpods, and paper details.
- Personal symbol map: Divide a large sheet into connected areas representing hobbies, places, foods, or memories through drawing, lettering, fabric, and found packaging.
- Painted cardboard sculpture: Cut slots in several sturdy shapes so they interlock, then add painted patterns, wrapped yarn, and lightweight hanging elements.
- Miniature room collage: Turn a shallow box into a room with painted walls, paper flooring, fabric rugs, and small furniture built from folded card.
Project selection should reflect the child’s preferred type of challenge. A careful illustrator may enjoy the symbol map because drawing remains central. A builder may stay engaged longer with slotted sculpture or a miniature room. A child who dislikes drawing can compose a convincing creature from existing magazine colors and textures. Mixed media should broaden the routes into art rather than force every child through the same skill.
Time constraints also change the best choice. A painted relief landscape may require separate painting, drying, and assembly sessions. A fabric portrait can be completed in one sitting if the base is already prepared and the fabric is easy to cut. Nature pieces must be completely dry and reasonably flat before attachment; fresh leaves shrink and curl, weakening both the composition and the glue bond.
A common mistake is showing a polished sample and treating it as the required result. Use a sample to demonstrate joins, layers, or balance, then put it away before children make design choices. If several children are working together, assign the same construction challenge rather than the same appearance—for example, “include one raised area and one soft texture.” That produces varied work while keeping the lesson focused.
A Reliable Order for Building and Layering
Layering succeeds when planning, wet processes, flat collage, and raised additions happen in that order. The sequence protects finished surfaces and reduces the need to pry off misplaced objects. Before gluing anything, arrange the largest shapes on the base and photograph the layout. The photograph acts as a simple reference if pieces shift while the background dries.
Begin with a thumbnail sketch no larger than a note card. It should show the main subject, the largest background division, and the intended focal area rather than every decoration. A small sketch exposes composition problems quickly: a miniature room may lack space for furniture, or a portrait may be too large for yarn hair and a patterned border. Children who resist sketching can place temporary paper shapes on the base instead.
Next, complete paint washes, stamped areas, and other wet background effects. Thin coats dry flatter than puddled paint and are less likely to soften cardboard. Paint both sides only when the reverse contributes to the project, because unnecessary moisture increases drying time. Set the work flat on a protected surface and wait until it no longer feels cool or tacky before adding absorbent paper or fabric.
Attach broad, flat elements before narrow lines and raised accents. In a relief landscape, the order might be painted sky, large hill shapes, smaller trees, yarn path, then tissue foliage. Putting tissue down first makes it vulnerable to glue smears and handling. In a fabric portrait, secure the large shirt and hair shapes before adding buttons, embroidery-thread features, or small paper patterns.
A compact working sequence keeps the table and artwork under control:
- Sketch or temporarily arrange the largest forms.
- Test paint, marker, and glue on scraps from the actual materials.
- Finish broad wet areas and let them dry flat.
- Glue paper and fabric from largest to smallest.
- Add raised, dangling, or fragile details last.
- Leave the piece undisturbed until adhesive turns clear and firm.
The test-scrap stage is especially useful when combining unfamiliar supplies. It reveals whether a marker beads on foil, paint cracks on flexible plastic, or glue darkens a delicate fabric. Skipping this check may save two minutes but can compromise a central piece. For more craft ideas for ten-year-olds using mixed media, the same sequence can be adapted by changing the base and textures rather than abandoning the underlying method.
Preventing Warping, Loose Pieces, and Visual Clutter
Most mixed-media failures can be traced to excess moisture, weak attachment, or too many competing details. These are construction problems rather than signs that the child lacks artistic ability. Diagnosing the physical cause makes correction possible without taking over the creative decisions.
Warping begins when one side of paper or cardboard absorbs more moisture than the other. Use a thicker base, apply thinner paint, and spread glue only beneath the attached shape instead of coating the entire board. Dry the project horizontally. Once the surface is no longer wet, a clean sheet of release paper and a light, flat book can sometimes reduce a gentle curl; do not press dimensional pieces or damp paint.
Loose decorations usually indicate that the adhesive does not suit the surfaces or that the contact area is too small. A round bead touches a flat board at only a tiny point, while a button or flat-backed wooden shape provides more bonding area. Heavy objects can be replaced with convincing lightweight versions: painted cardboard circles instead of metal washers, crumpled tissue instead of stones, or layered card instead of thick wood. If a special object must be used, build a small cardboard pocket, slot, or supporting ledge rather than relying on a dot of glue.
Visual clutter has a different cause. When every available material is used equally, texture stops guiding the eye. Ask the child to identify the first thing viewers should notice, then reserve the brightest color, strongest contrast, or tallest relief for that area. Repeating one material in three places can unify the piece more effectively than introducing three unrelated decorations. A miniature room, for example, might repeat the same blue fabric in a rug, cushion, and wall picture while keeping the furniture neutral.
Signs of a sound approach include a base that stays mostly flat, edges that remain attached after drying, and a focal area that can be identified from several feet away. Warning signs include glue squeezing around every shape, pieces sliding before they set, wet media bleeding into finished sections, or additions being placed only to fill empty space. Empty space is not unfinished by default; it can separate textures and make raised elements easier to read.
Intervention should remain proportionate. Adults can help cut unusually thick board, interpret product directions, or stabilize a difficult join without redesigning the project. If frustration rises, remove one technical obstacle rather than completing the next stage. A useful question is, “Which part needs to stay stronger?” rather than, “Do you want me to fix it?” That keeps construction support separate from authorship.
Frequently Asked Questions
What mixed-media supplies are most useful for a ten-year-old?
Start with cardstock or cardboard, washable paint, markers, white or tacky glue, fabric scraps, yarn, tissue paper, and lightweight found materials. These provide clear contrasts in color, flexibility, and depth without requiring specialized tools.
How many materials should one project include?
Three to five material types are usually enough to create contrast without overwhelming the composition. Count functional items such as the base and adhesive separately from visible decorative media.
Can mixed-media projects be completed in one session?
Yes, if wet paint is limited or replaced with markers and prepared colored paper. Projects with painted backgrounds or thick glue bonds are more reliable when drying and assembly occur in separate sessions.
What can replace hot glue for dimensional pieces?
Thick tacky glue works for many lightweight objects. Tabs, slots, folded cardboard supports, tied yarn, and small paper pockets can create stronger mechanical joins without relying solely on adhesive.
How can an adult help without controlling the design?
Assist with thick cutting, unstable structures, supply directions, and cleanup while leaving subject, color, placement, and texture choices to the child. Offer two workable construction options instead of correcting the appearance.
Conclusion
Choose a project by matching its construction challenge to the ten-year-old’s interests, available time, and tolerance for drying between stages. A firm base and compatible adhesive deserve priority because decorative variety cannot compensate for warped board or falling pieces. Keep the material range selective, test unfamiliar combinations on scraps, and move from broad wet layers to flat collage and finally dimensional details. When something fails, identify whether moisture, weight, surface contact, or visual competition caused it before replacing the child’s design. For the next session, prepare one sturdy base and four small material groups, then let the child select a focal subject and one raised feature. That setup offers enough structure for a finished result while preserving the experimentation that makes mixed media worthwhile.
Now retrieving an image set.
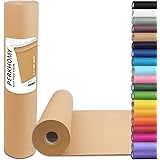
PerkHomy Brown Kraft Paper Roll 17.5" x 1,200" (100') for Gift Wrapping Bulletin Board Craft Art Bouquet Flower Packing Valentines Easel Moving Shipping Floor Poster Covering Table 70GSM 50LB
$7.49 (as of September 18, 2026 22:40 GMT -04:00 - More infoProduct prices and availability are accurate as of the date/time indicated and are subject to change. Any price and availability information displayed on [relevant Amazon Site(s), as applicable] at the time of purchase will apply to the purchase of this product.)
Now retrieving an image set.
Rust-Oleum Stops Rust Spray Paint, Semi-Gloss Black | Rust Resistant, Indoor and Outdoor, Beautiful Finish on Metal, Wood and More, Sprays from Any Angle, 12 oz
$6.48 (as of September 18, 2026 22:40 GMT -04:00 - More infoProduct prices and availability are accurate as of the date/time indicated and are subject to change. Any price and availability information displayed on [relevant Amazon Site(s), as applicable] at the time of purchase will apply to the purchase of this product.)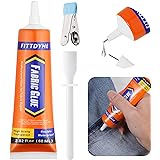
Now retrieving an image set.
FITTDYHE Fabric Glue Permanent, 60 ML Washable Clear Clothing Glue, Super Fabric Glue for Rhinestones, Patches, Clothes, Denim, Leather, Polyester, Fabrics, Doll Repair, Flannel, Cotton
$9.99 (as of September 18, 2026 22:40 GMT -04:00 - More infoProduct prices and availability are accurate as of the date/time indicated and are subject to change. Any price and availability information displayed on [relevant Amazon Site(s), as applicable] at the time of purchase will apply to the purchase of this product.)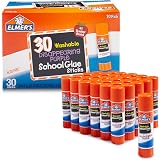
Now retrieving an image set.
Elmer's Disappearing Purple School Glue Sticks, Washable, 7 Grams, 30 Count - Posters, Back to School, Bulk Pack for Classrooms, #1 Teacher Brand
$7.49 (as of September 18, 2026 22:40 GMT -04:00 - More infoProduct prices and availability are accurate as of the date/time indicated and are subject to change. Any price and availability information displayed on [relevant Amazon Site(s), as applicable] at the time of purchase will apply to the purchase of this product.)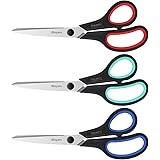
Now retrieving an image set.
iBayam 8.5" Heavy Duty Scissors All Purpose for Office School Crafts Sewing | 3-Pack, Ultra-Sharp 2.5mm Stainless Blades, Comfort Grip Handles, Left & Right Handed – Teacher Desk & Classroom Must-Have
$9.99 (as of September 18, 2026 22:40 GMT -04:00 - More infoProduct prices and availability are accurate as of the date/time indicated and are subject to change. Any price and availability information displayed on [relevant Amazon Site(s), as applicable] at the time of purchase will apply to the purchase of this product.)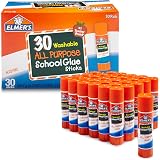
Now retrieving an image set.