
An easy bee craft for preschoolers with few pieces works well when four cutouts—a yellow body, two white wings, and one black stripe—are large enough for small hands to position and glue. Prepare the shapes in advance, place the body first, and let the child add the stripe and overlapping wings before drawing a face. A glue stick offers more control than liquid glue and reduces buckling. The finished bee remains recognizable without tiny antennae, separate eyes, or multiple stripes, while the limited piece count gives preschoolers meaningful practice with placement, crossing the midline, and following a short visual sequence.
The Four-Cutout Bee Design
A four-cutout design keeps the bee recognizable while avoiding the loose, tiny parts that often overwhelm preschoolers. The basic set consists of one large yellow oval for the body, one black rectangle for the stripe, and two white or pale-blue wing shapes. The child can draw the eyes, mouth, and antennae after assembly, so those details do not need to become separate pieces.
The body should be the largest and most visually obvious part. An oval about the length of an adult palm gives a young child enough room to hold the shape without bending it and enough surface area for the stripe and wings. A wide black strip is easier to align than several narrow strips. It also leaves open yellow areas at both ends, which helps the finished picture read clearly as a bee rather than a striped circle.
Two separate wings provide a useful placement choice without making the project complicated. Rounded teardrops, short ovals, or simple heart halves all work. Perfect symmetry is unnecessary. Slightly uneven wings make the result look child-made, and repositioning them gives preschoolers a manageable opportunity to decide where a part belongs.
Four cutouts offer a better balance than a one-piece coloring page or a detailed bee assembled from ten or more shapes. A coloring page requires less spatial reasoning, while a highly segmented project may shift most of the work to the adult. With four parts, the child still identifies the body, compares left and right, overlaps layers, and sees how separate forms create one image.
A common mistake is reducing the piece count by attaching very small decorations instead. Pom-poms, tiny eyes, sequins, and short antenna pieces may be harder to grasp than larger paper shapes and can present a mouthing concern for younger children. Drawn features preserve the low-piece design and allow each child to personalize the bee safely under normal adult supervision.
For a vertical bee, place the stripe across the middle and attach the wings on opposite sides. For a horizontal bee, rotate the oval, position the stripe near the center, and place both wings along the upper edge. The horizontal version resembles a bee in flight, while the vertical version is often easier for children who are matching a simple front-facing model.
Materials and Preparation for Small Hands
Sturdy paper and controllable adhesive matter more than decorative supplies for this project. Yellow and black construction paper provide strong color contrast, while white copy paper is sufficient for the wings. Lightweight paper is easier to cut but may wrinkle under wet glue. Cardstock stays flatter, although very thick stock can be difficult for preschoolers to press into place.
A glue stick is usually the practical choice because children can see where it has touched the paper and are less likely to create puddles. If liquid school glue is the only option, pour a small amount into a shallow container and provide a cotton swab or short craft stick for spreading it. A thin film bonds paper more reliably than a large blob, which can soak through the body and make the stripe slide.
Adults can cut all four shapes before the activity when the goal is independent assembly. Children who already use scissors comfortably may cut the stripe along one straight line or trim a pre-drawn oval. Curved wing shapes require more hand control, so expecting every preschooler to cut identical wings can turn a short bee activity into a frustrating cutting exercise. Choose the cutting demand according to the child rather than treating adult preparation as a shortcut.
A compact supply check prevents interruptions:
- Four cutouts: one yellow body, one black stripe, and two wings
- One base sheet: blue, green, or another color that contrasts with yellow
- Adhesive: a glue stick or a small portion of washable school glue
- Drawing tool: a black washable marker or thick crayon
- Optional protection: a reusable mat or scrap sheet beneath the work
Place the cutouts in a shallow tray or arrange them beside the base sheet. Stacked pieces are easily overlooked, especially when a white wing blends into the table. Presenting every part at once also lets the child count the four shapes before beginning. For group use, put one complete set in each envelope rather than creating a shared pile where stripes and wings can become mixed or lost.
Marker choice deserves attention because preschoolers often press hard. A thick washable marker makes visible facial features without requiring precise control. Avoid requiring a fine-tip pen for tiny eyes and a delicate smile. Large dots and a broad curved mouth are easier to produce and remain visible from across a classroom or display area.
The preparation principles behind this Easy bee craft for preschoolers with few pieces are simple: enlarge the parts that must be handled, draw details that would otherwise be tiny, and limit adhesive to the areas that actually overlap.
Assembly Steps Preschoolers Can Follow
A fixed sequence helps preschoolers understand which pieces sit underneath and which belong on top. Begin by setting the yellow oval on the base without glue. Ask the child to move it until there is room around the edges for both wings. This dry placement prevents the body from being glued against the side of the page, where one wing may no longer fit.
- Glue the yellow oval near the center of the base sheet.
- Place the black strip across the middle of the oval and glue it down.
- Tuck the narrow end of one wing beneath or just behind one side of the body.
- Add the second wing on the opposite side, then draw the face and antennae.
Demonstrate one adhesive motion rather than completing a sample in front of the child from start to finish. For a glue stick, show a swipe around the edge and one through the center. Then return the piece and let the child determine its final orientation. A fully finished model can be useful as a visual reference, but it should not imply that the stripe must be perfectly level or the wings must match exactly.
Some children will place the stripe diagonally, put both wings on one side, or turn the oval upside down. Those choices do not automatically require correction. Intervene when a part will not attach, the child cannot proceed, or the intended concept is being lost. A prompt such as “Where could the other wing go so the bee has one on each side?” provides more reasoning practice than silently moving it.
Signs the process is working include the child identifying the body first, using a manageable amount of glue, pressing overlapping areas, and moving through the four parts without repeatedly asking what comes next. The result does not need to match the adult example. Independent placement is more meaningful than visual uniformity when the activity is intended to build sequencing and spatial awareness.
If a child loses interest midway, reduce the remaining decisions rather than taking over. Offer two direct choices: “Would you like the wing here or here?” Another option is to hand over one piece at a time. This changes the task from scanning several shapes to completing one visible action. For children ready for greater independence, set out the complete four-piece set and a small finished reference without verbal directions.
The same sequence can support a home activity, a preschool table, or a small-group station. At home, an adult can pause for conversation about buzzing or flowers. In a group, a simple picture card showing body, stripe, wings, and face limits repeated instructions. The adaptable sequence is what makes an Easy bee craft for preschoolers with few pieces workable across different attention spans.
How to Fix Common Bee-Craft Problems
Sliding pieces usually indicate excess glue rather than poor placement skills. Lift the loose shape, spread the adhesive into a thinner layer, and let it become slightly tacky before pressing again. If the paper is already wet, place a dry scrap sheet over the project and press gently with a flat hand. Rubbing directly over damp construction paper can tear its surface or transfer color.
Wings that keep lifting often lack enough contact with the body. Only a small portion of each wing needs adhesive, but that portion should sit beneath or firmly overlap the yellow oval. Gluing the entire wing to the base makes it flat and secure; gluing only the inner tip allows the outer edge to lift slightly for dimension. The first option suits projects that will be carried home in a bag, while the second creates a more dimensional display.
If the black strip extends beyond the body, decide whether trimming is necessary. An adult can cut the extra after the glue dries, but trimming wet paper tends to pull the strip out of position. Folding the ends around the body is another option when the bee will not be glued flat to a background. For the simplest version, pre-measure the stripe so it is slightly narrower than the oval at its midpoint.
A bee that does not look immediately recognizable often needs clearer contrast, not additional pieces. A yellow body on a pale-yellow background can disappear visually, and narrow stripes may be hard to see. Move the bee to a blue or green base, widen the black band, or draw bold antennae and a face. Adding multiple decorative items may clutter the image without solving the contrast problem.
Unequal wings, off-center faces, and tilted stripes are normal outcomes of preschool construction. Correcting them can communicate that adult neatness matters more than the child’s decisions. Reserve intervention for functional problems such as a missing attachment point, unsafe use of materials, or so much adhesive that the paper is breaking down.
For repeated group difficulties, adjust the setup before the next session. Enlarge the wings if children cannot grasp them, switch from liquid glue to glue sticks if pieces drift, or outline the body’s approximate location on the base when spacing is consistently difficult. Changing the materials is often more effective than repeating instructions. A well-scaled project should let the child succeed with short prompts rather than constant physical assistance.
Simple Ways to Extend the Activity
Extensions should build on the completed bee without introducing a second complicated project. Once the four pieces are secure, children can draw flowers, a dotted flight path, or a hive around the bee. These additions preserve the simple assembly while allowing more time for mark-making and storytelling.
Counting can be added by asking the child to touch the body, stripe, and two wings while counting to four. Positional language fits naturally as well: the stripe goes across the body, the wings sit beside or behind it, and the bee may fly above a flower. These words describe actions the child can see, which is more concrete than adding an unrelated worksheet.
For a name activity, an adult can write the child’s name beneath the bee and invite the child to trace or decorate the letters. A group display can place all the bees around one large paper hive. Because every bee uses the same four-part structure but different placement and facial details, the display remains visually connected without requiring identical results.
A science connection should stay accurate and age-appropriate. Compare the paper bee’s simplified design with a photograph of a real bee and notice that the craft is a symbol, not an anatomical model. Real bees have six legs, while the minimal cutout version omits legs to keep assembly manageable. Children can draw six legs if they want a closer representation, but separate leg pieces would work against the low-piece goal.
A common extension mistake is adding every possible learning objective at once. Requiring cutting, counting, letter tracing, color naming, and detailed bee anatomy can make a brief art experience feel like a test. Choose one extension based on the setting. A child interested in drawing may add a garden; a child fascinated by numbers may count six drawn legs; a group preparing a wall display may focus on names.
Preserve room for the child’s own explanation. Asking “Where is your bee going?” can produce a richer response than directing the child to copy a predetermined scene. The completed image from this Easy bee craft for preschoolers with few pieces can become a storytelling prompt, a spring display, or a short shape lesson without changing its manageable four-cutout foundation.
Frequently Asked Questions
What four pieces are needed for the bee?
Use one large yellow oval, one wide black strip, and two white or pale-blue wings. Draw the face and antennae so no tiny cutouts are required.
Should preschoolers cut the bee shapes themselves?
Pre-cut the shapes for beginners. Children with established scissor control can cut the straight stripe or follow a bold oval outline while an adult prepares the curved wings.
Is a glue stick or liquid glue better?
A glue stick is cleaner and gives most preschoolers better control. If using liquid glue, offer a small amount with a cotton swab or craft stick for spreading.
How can I make the bee without googly eyes?
Use a thick black crayon or washable marker to add two eye dots, a mouth, and antennae after the paper pieces are attached.
What if both wings are placed on the same side?
Ask the child whether the bee needs a wing on each side and offer a chance to reposition one before the glue sets. Leave the choice alone if the child prefers the original design.
Conclusion
Keep the project centered on four large, high-contrast cutouts and a short assembly order: body, stripe, wings, then drawn details. Pre-cut curved shapes when scissor work would overshadow construction, and use a glue stick or a very small amount of liquid adhesive to prevent sliding and wrinkling. Preschool results will naturally include tilted stripes, uneven wings, and expressive faces; those variations show that children made real placement decisions. If the activity needs an added purpose, choose one focused extension such as counting the pieces, drawing six legs, describing positions, or creating a flower scene. Prepare one complete set per child, demonstrate only the necessary adhesive technique, and leave enough room for independent choices.
Now retrieving an image set.
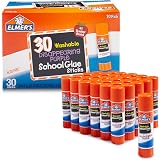
Elmer's Disappearing Purple School Glue Sticks, Washable, 7 Grams, 30 Count - Posters, Back to School, Bulk Pack for Classrooms, #1 Teacher Brand
$7.49 (as of September 18, 2026 22:40 GMT -04:00 - More infoProduct prices and availability are accurate as of the date/time indicated and are subject to change. Any price and availability information displayed on [relevant Amazon Site(s), as applicable] at the time of purchase will apply to the purchase of this product.)
Now retrieving an image set.
Handcraft Blends Peppermint Essential Oil - Huge 4 Fl Oz | Steam Distilled, Premium Grade for Diffuser, Aromatherapy, Skin, Massage, Candle & Soap Making Fragrance
$9.99 (as of September 18, 2026 22:40 GMT -04:00 - More infoProduct prices and availability are accurate as of the date/time indicated and are subject to change. Any price and availability information displayed on [relevant Amazon Site(s), as applicable] at the time of purchase will apply to the purchase of this product.)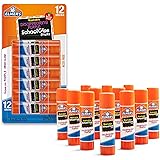
Now retrieving an image set.
Elmer's Disappearing Purple School Glue Sticks, Washable, 6 Grams, 12 Count - Arts & Crafts, Poster, Projects, Back to School, #1 Teacher Brand
$4.59 (as of September 18, 2026 22:40 GMT -04:00 - More infoProduct prices and availability are accurate as of the date/time indicated and are subject to change. Any price and availability information displayed on [relevant Amazon Site(s), as applicable] at the time of purchase will apply to the purchase of this product.)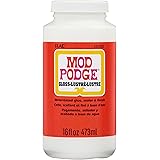
Now retrieving an image set.
Mod Podge Gloss Sealer, Glue & Finish: All-in-One Craft Solution- Quick Dry, Easy Clean, for Wood, Paper, Fabric & More. Non-Toxic - Craft with Confidence, Made in USA, 16 oz., Pack of 1
$7.99 (as of September 18, 2026 22:40 GMT -04:00 - More infoProduct prices and availability are accurate as of the date/time indicated and are subject to change. Any price and availability information displayed on [relevant Amazon Site(s), as applicable] at the time of purchase will apply to the purchase of this product.)
Now retrieving an image set.
Double-Sided Fabric Tape,Hem Tape No Sew No Iron,1/4"+1/2" (2 Rolls) | No Sewing or Ironing Required, Quick Clothing Repairs, Fabric Bonding, For Hemming and DIY Crafts
$7.99 (as of September 18, 2026 22:40 GMT -04:00 - More infoProduct prices and availability are accurate as of the date/time indicated and are subject to change. Any price and availability information displayed on [relevant Amazon Site(s), as applicable] at the time of purchase will apply to the purchase of this product.)
Now retrieving an image set.