
A goat craft for preschoolers using paper shapes works best with one large oval body, a smaller oval head, four rectangular legs, two triangular ears, two short horns, and a small beard. Adults can pre-cut the pieces for younger children, while older preschoolers can trace and cut the simpler shapes with child-safe scissors. Children should arrange every piece before gluing so the legs remain visible and the ears and horns do not become confused. Large shapes, washable glue, and drawn facial details keep the activity manageable while building shape recognition, positional vocabulary, and early cutting skills.
Choosing Shapes That Look Like a Goat
A recognizable paper goat needs a clear body silhouette more than intricate decoration. Use a large horizontal oval for the body and a smaller vertical or slightly tilted oval for the head. Four narrow rectangles become legs, two triangles form ears, and two short curved strips or tapered triangles suggest horns. A small triangle placed point-down beneath the chin makes the beard, which is often the feature that distinguishes the finished animal from a sheep or calf.
Scale matters as much as shape choice. On a standard sheet of construction paper, a body about the length of an adult hand leaves room for the head and legs without forcing pieces off the page. The head should be roughly half the body’s length. Make the ears and horns large enough for preschool fingers to pick up, turn, and glue; tiny pieces tend to stick to fingertips or disappear beneath the head.
Simple geometric pieces are preferable to realistic outlines for this age group. A detailed goat template may produce a polished adult-looking result, but it gives children fewer decisions to make. Separate shapes let them compare sizes, decide what belongs above or below the body, and notice how several flat forms create one animal. That process is the practical value of a Goat craft for preschoolers using paper shapes.
Choose colors according to the goal of the activity. White, tan, gray, brown, or black paper resembles common goat coloring, but accuracy does not require every child to use the same combination. A purple body with orange legs still demonstrates correct assembly and shape recognition. If animal identification is the priority, preserve the horns, beard, ears, and four legs rather than insisting on realistic color.
A common mistake is adding too many separate parts. Hooves, pupils, nostrils, a tail, spots, and horn ridges can turn a manageable activity into prolonged adult assistance. Draw the smallest details with a washable marker after the main pieces are attached. The craft is working when children can name or position most large pieces themselves, even if the resulting goat is not symmetrical.
Materials and Preparation by Preschool Skill Level
Preparation should match the children’s cutting control rather than their age label alone. Some preschoolers can cut across a strip and follow broad straight lines; others are still learning to open and close scissors. Pre-cutting difficult pieces does not remove the learning value. It shifts the child’s work toward sorting, arranging, gluing, and describing the shapes.
The basic setup requires construction paper or light cardstock, a background sheet, a glue stick or small amount of washable school glue, child-safe scissors, and washable markers or crayons. Construction paper is easy to handle and inexpensive, while light cardstock makes sturdier pieces that are easier to reposition. Heavy cardstock can be tiring to cut, and thin tissue paper wrinkles as soon as wet glue touches it.
Use the following preparation levels to keep the challenge appropriate:
- Beginning cutters: Provide all shapes pre-cut and place them in a shallow tray.
- Developing cutters: Pre-cut the ovals, but let children cut rectangles from marked strips and snip triangular ears from squares.
- Confident cutters: Offer bold outlines to cut, keeping curves wide and corners uncomplicated.
For group use, place one complete set in each tray or envelope. Counting the pieces before children begin prevents a missing leg from becoming an assembly problem later. If several colors are available, separate paper scraps by size rather than creating a crowded pile. Children can choose a large scrap for the body, a medium scrap for the head, and small scraps for facial features.
Glue sticks generally give children more control than an open puddle of liquid glue. If liquid glue is the only option, pour a small amount into a lid and apply it with a cotton swab or short craft stick. Excess glue makes construction paper buckle and causes movable pieces to slide out of place. Foam shapes, buttons, beads, and loose plastic eyes are unnecessary for this design and may be unsuitable where younger siblings or children who mouth objects are present.
Adult supervision remains necessary for scissors and adhesives. Check product labels and follow the manufacturer’s age and use directions. The most effective setup is not the one with the greatest number of materials; it is the one that allows a child to complete meaningful decisions without waiting for an adult to rescue every step.
How to Assemble the Goat Step by Step
Dry arrangement should come before adhesive. Ask children to build the goat loosely on the background sheet, beginning with the body near the center. This rehearsal lets them rotate shapes, correct overlaps, and understand where each part belongs. Gluing the first plausible arrangement immediately often leaves no space for legs or places the head too close to the page edge.
- Place the large body oval horizontally in the middle of the background.
- Tuck the tops of four leg rectangles slightly beneath the lower edge of the body.
- Add the small head oval near one end of the body, overlapping it slightly.
- Place one triangular ear on each side of the upper head.
- Set the two horns above the ears and the beard below the chin.
- Add a small tail, then draw eyes, a nose, a mouth, and hooves.
Once the arrangement fits, move one piece at a time, apply glue, and return it to the same location. This method is easier than clearing the page and trying to reconstruct the design from memory. With a glue stick, a few passes around the edge and across the center are enough. Press each piece briefly with a flat hand rather than rubbing it, which can tear lightweight paper.
Overlap communicates how the animal is assembled. Sliding the top of each leg under the body makes the legs appear connected; placing them entirely on top can make the goat look striped. The head can overlap the body or sit beside it with a short rectangular neck between them. The overlapping version uses fewer parts, while the neck version gives children another rectangle to identify and position.
Children may confuse ears and horns because both pieces can be triangular. Explain the visual difference through location and direction: ears extend outward from the sides, while horns point upward from the top. If the distinction remains difficult, use wide tan triangles for ears and narrow gray or brown triangles for horns. Color becomes a practical sorting cue without requiring realistic drawing.
Allow small differences to remain. Legs at uneven angles, a large beard, or mismatched ears show that the child controlled the placement. Adults should intervene when a child cannot operate the materials safely, becomes stuck because a piece is missing, or asks for help—not merely because the goat differs from the sample. For another look at the complete project concept, use this Goat craft for preschoolers using paper shapes activity as a reference rather than a model children must copy exactly.
Teaching Shapes, Position Words, and Farm Features
The assembly process creates natural opportunities for short, concrete language practice. Instead of pausing for a separate lesson, name a shape while the child handles it: “The large oval is the body” or “Put one rectangle below the oval.” The object, action, and word occur together, making the direction easier to understand than an abstract question about geometry.
Useful position words include above, below, beside, between, under, over, top, and bottom. Ask a child to place the horns above the head or the beard below the mouth. For a child who does not yet follow multi-part directions, give one instruction at a time and point to the relevant area. A more experienced child can handle a two-part direction such as placing both ears beside the head before adding the horns.
Shape comparisons should acknowledge that craft pieces may change when rotated or partly covered. A rectangle remains a rectangle when it stands vertically as a leg. A triangle can point sideways as an ear or downward as a beard. This is more informative than asking children only to recite names from fixed flash cards because the same shape performs several visual jobs.
The goat features also support a brief farm-animal discussion. Children can observe that a goat has cloven hooves, ears, a tail, and often horns; some goats have noticeable beards. Avoid teaching that every goat looks identical. Horn presence, coat length, coloring, and beard visibility vary. The craft uses selected visual cues to make the animal readable, not to reproduce every possible goat accurately.
Keep conversation proportional to attention span. Three or four focused prompts usually produce more participation than questioning children about every piece. Suitable prompts include “Which oval is larger?”, “What goes under the body?”, and “How are the ears different from the horns?” If children stop arranging pieces and wait for approval after each question, the teaching has begun to interrupt the making. Return control by offering a choice: “Would you like the head on the left or the right?”
A finished project demonstrates more than visual neatness. Signs of productive participation include selecting the correct size category, rotating a piece to test its fit, correcting an arrangement before gluing, or using a position word while explaining the picture. Those behaviors are more useful indicators than whether every leg is straight.
Common Problems and Useful Variations
Most assembly problems come from piece size, premature gluing, or an overloaded design. If the goat does not fit on the background, remove the pieces and reduce the body size or rotate the sheet to landscape orientation. If the legs disappear, attach them before the body or slide their upper ends beneath its lower edge. If horns look like extra ears, narrow them, change their color, or position them more vertically.
Wet, curled paper usually signals too much liquid glue. Blot a visible puddle carefully, place a clean sheet over the project, and press lightly rather than adding more adhesive. A glue stick is the simpler alternative for children who repeatedly squeeze bottles too hard. When pieces refuse to stick, check whether crayon coverage, damp paint, or an excessively small glued area is preventing contact.
Adapt the layout without increasing the number of tiny materials. A standing side-view goat is easiest because all four legs can line up below one body. A front-facing goat requires more spatial judgment: the head becomes central, the body sits behind it, and legs must be arranged symmetrically. Save that version for children who want a greater challenge rather than using it as the default demonstration.
For a collaborative display, each child can make one goat while an adult prepares a large pasture background. Children may add broad paper strips for a fence, green rectangles for grass, or a large yellow circle for the sun. Keep these additions larger than the goat’s facial details so the extension remains manageable. Another option is to place several differently colored goats together and compare the repeated shapes across the group.
When cutting causes frustration, switch the task rather than completing every piece for the child without explanation. Offer prepared ovals and let the child make straight snips for legs. When arrangement is the difficult part, show only the first anchor—the body in the center—then let the child test the remaining positions. The aim is a reachable challenge, not identical products.
Photograph or display the work only after checking that each child’s name is handled according to the setting’s privacy practices. Let wet projects dry flat before stacking them. A successful variation preserves the core decisions about body, head, legs, ears, horns, and beard; adding elaborate scenery should not displace those decisions.
Frequently Asked Questions
What paper shapes are needed for a preschool goat craft?
Use two ovals, four rectangles, two wide ear triangles, two narrow horn shapes, and one small triangle for the beard. A tail and neck are optional.
Should preschoolers cut the goat shapes themselves?
Children who can make controlled snips can cut rectangles and simple triangles. Adults can pre-cut curved ovals or all pieces for children who are still learning scissor control.
How can I stop the paper goat from looking like a sheep?
Add two visible horns and a pointed beard beneath the chin. Use a smooth oval body rather than covering it with curled paper or cotton-like texture.
What glue works best for construction-paper shapes?
A washable glue stick offers controlled coverage and usually keeps the background flatter. Use liquid school glue sparingly when a glue stick is unavailable.
How long should the activity take?
Allow roughly 20 to 30 minutes for arranging, gluing, and drawing details, with extra time for child-led cutting or group discussion. Stop sooner if attention or safe tool use declines.
Conclusion
Build the project around a few large, easy-to-handle forms: two ovals, four rectangular legs, paired ears and horns, and a pointed beard. Match the cutting work to each child’s current control, and prepare difficult curves in advance when that keeps the activity accessible. Have children test the complete arrangement before adhesive is opened, then glue from the body outward so there is room for every feature. Shape names and position words fit naturally into the assembly, but conversation should not take control away from the maker. Treat uneven placement as evidence of independent work unless it prevents the child from completing the animal. For the next session, adjust only the part that caused difficulty—piece size, cutting load, glue amount, or page orientation—rather than making the entire design more adult-directed.

Now retrieving an image set.
Handcraft Blends Peppermint Essential Oil - Huge 4 Fl Oz | Steam Distilled, Premium Grade for Diffuser, Aromatherapy, Skin, Massage, Candle & Soap Making Fragrance
$9.99 (as of September 19, 2026 22:40 GMT -04:00 - More infoProduct prices and availability are accurate as of the date/time indicated and are subject to change. Any price and availability information displayed on [relevant Amazon Site(s), as applicable] at the time of purchase will apply to the purchase of this product.)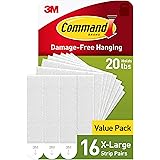
Now retrieving an image set.
Command 20 lb X-Large Picture Hanging Strips, 16 Pairs White Command Strips Heavy Duty Picture Hanger
$9.75 (as of September 19, 2026 22:40 GMT -04:00 - More infoProduct prices and availability are accurate as of the date/time indicated and are subject to change. Any price and availability information displayed on [relevant Amazon Site(s), as applicable] at the time of purchase will apply to the purchase of this product.)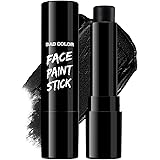
Now retrieving an image set.
BADCOLOR Black Cream-Blendable Face Body Paint Stick for Adults Children Eye Black Softball Football Baseball Sports , Non-Toxic Hypoallergenic for Halloween SFX Makeup Cosplay Joker Costume Parties
$5.99 (as of September 19, 2026 22:40 GMT -04:00 - More infoProduct prices and availability are accurate as of the date/time indicated and are subject to change. Any price and availability information displayed on [relevant Amazon Site(s), as applicable] at the time of purchase will apply to the purchase of this product.)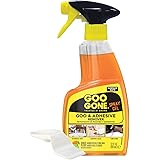
Now retrieving an image set.
Goo Gone Adhesive Remover Spray Gel 12 Oz with Scraper, Surface Safe | Citrus Cleaning Power for Hard Surfaces, Carpet & Fabric, Removes Glue, Stickers, Tape Residue, Grease, Gum & Wax, Drip Free
$17.98 (as of September 19, 2026 22:40 GMT -04:00 - More infoProduct prices and availability are accurate as of the date/time indicated and are subject to change. Any price and availability information displayed on [relevant Amazon Site(s), as applicable] at the time of purchase will apply to the purchase of this product.)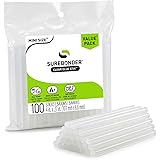
Now retrieving an image set.
Surebonder Clear, All Purpose, All Temp., Mini Size Hot Glue Sticks 0.27 in. Diameter, 4 in. Length -100 Pack
$5.97 (as of September 19, 2026 22:40 GMT -04:00 - More infoProduct prices and availability are accurate as of the date/time indicated and are subject to change. Any price and availability information displayed on [relevant Amazon Site(s), as applicable] at the time of purchase will apply to the purchase of this product.)
Now retrieving an image set.