
A Valentine craft for pre-K with minimal supplies works well as a folded heart card made from one sheet of construction paper, a glue stick, and crayons. An adult can prepare a large heart shape, while children fold the card, add simple drawn marks, and attach a smaller heart inside. Large pieces, short directions, and controlled glue placement keep the activity manageable for developing hands. Allow about 15 minutes for decorating, expect varied results, and prioritize independent choices over perfectly matched cards.
Choose a Heart Card That Fits Pre-K Abilities
A folded heart card suits pre-K children because it combines a recognizable Valentine shape with a small number of manageable actions. The child can fold, press, draw, and glue without assembling narrow strips or aligning several tiny parts. Those actions leave room for individual expression while keeping the project achievable during a short classroom, daycare, library, or kitchen-table session.
The most workable design begins with a sheet of construction paper folded in half. An adult draws half of a large heart against the folded edge and either cuts it out beforehand or helps the child cut along the broad curved line. When opened, the shape becomes a symmetrical heart card. A smaller paper heart can be attached inside, although the card still works if the child simply draws a heart, person, pet, or Valentine message there.
Large shapes matter more than decorative complexity at this age. A preschooler may be able to make short snips but struggle to rotate paper smoothly around a tight curve. A palm-sized heart is easier to hold than a cluster of thumbnail-sized decorations. Similarly, a glue stick is easier to control when the target piece has enough surface area to grip without covering the child’s fingertips.
A common weak assumption is that every finished card should look like the adult example. Pre-K work naturally shows uneven folds, open glue edges, energetic marks, and emerging attempts at letters. Correcting each difference can turn a simple Valentine activity into an adult-directed assembly task. Demonstrate where the fold and glue go, then let the child decide how the front looks.
Signs that the design is appropriately challenging include the child completing several actions, making visible choices, and asking for limited rather than constant physical help. Repeated frustration with tiny pieces, torn folds, or an inability to identify the next action usually means the project needs simplification. Use a larger sheet, remove the inner heart, or offer a prepared outer shape. For another streamlined version of a Valentine craft for pre-K with minimal supplies, keep the same basic card and change only the drawing prompt.
Gather and Prepare the Three Basic Materials
Construction paper, a glue stick, and crayons are enough to make a complete heart card. Red or pink paper makes the Valentine theme immediately visible, but white, purple, brown, or any available color works. Using what is already on hand is more useful than buying matching shades, especially when the goal is a low-preparation activity rather than identical classroom displays.
Construction paper is generally easier for young children to handle than thin printer paper because it holds a fold and tolerates firm crayon pressure. Printer paper remains a reasonable substitute, but it may wrinkle when heavily glued and can tear if a child repeatedly erases or colors one spot. Cardstock creates a sturdier keepsake, although some pre-K scissors have difficulty cutting it. Material thickness should match the child’s cutting ability rather than an adult preference for a polished card.
Choose a washable glue stick sized for comfortable gripping. Liquid school glue can attach the same pieces, but squeezing pressure and flow are harder to regulate; a large puddle also delays drying and may soak through lightweight paper. If liquid glue is the only option, an adult can place a small amount in a shallow reusable lid and let the child apply dots with a cotton swab or fingertip under supervision.
Crayons provide color, writing, and decoration in one tool. Markers create stronger lines but can bleed through thin paper, while paint adds drying time, water containers, and cleanup. Stickers, glitter, ribbon, and craft gems are optional rather than missing necessities. Small loose decorations can be difficult to grasp, tempting to mouth, or easy to scatter, so they do not improve this particular minimal-supply project.
Preparation should reduce waiting without removing the child’s meaningful work. Before the session, check that glue sticks open and turn properly, peel broken crayon wrappers if they interfere with gripping, and make one large sample only to show the folding action. For children who are not ready to cut a curved outline, prepare the outer hearts while leaving coloring, gluing, and message-making to them. Do not preassemble every layer; the attachment step is a valuable part of the activity.
A compact setup checklist is sufficient:
- One sheet of paper per child: plus a few scraps for inner hearts.
- One glue stick per child or pair: checked before the activity begins.
- A small crayon selection: enough choice without covering the work area.
- Child-safe scissors if appropriate: used with close adult supervision.
Make the Folded Heart Card Step by Step
The smoothest sequence separates folding, cutting, decorating, and gluing instead of giving every direction at once. Pre-K children are more likely to retain one short instruction paired with a visible action. Place only the materials needed for the current stage within reach; unused scraps and open glue sticks tend to become distractions while the card shape is still being formed.
- Fold the paper. Bring the short sides together and press the folded edge with a finger. Exact corner alignment is not required.
- Create the heart. Draw half a heart with its center on the fold. An adult may cut the line, or a child who uses scissors confidently may follow the broad curve with support.
- Open and decorate. Unfold the heart and add crayon lines, dots, faces, names, or pretend writing to the front.
- Add the inside piece. Cut or tear a smaller heart from a scrap. Rub glue around its back edges and press it inside the card.
- Finish the message. Invite the child to draw the recipient or dictate a short phrase for an adult to write.
Tearing the inner heart is a useful alternative to cutting. Fold a small scrap, let the child pinch and tear a rounded shape, then open it. The result may not be symmetrical, but tearing uses both hands together and removes the need to manage scissors for a second piece. If even that step causes frustration, draw the inside heart with crayon rather than introducing more materials.
Glue application works best when demonstrated as a border rather than a fully colored surface. Turn the small heart face down, make a slow line near its outer edge, close the glue stick, and press the piece with a flat hand. If the corners lift, add one short swipe beneath the loose area. Repeatedly coating the paper wastes glue and makes the heart slide when pressed.
Expect the active portion to take roughly 10 to 20 minutes, depending on whether shapes are prepared and how long children want to draw. A child who finishes quickly can add marks to the envelope or back of the card if those items are available, but an extension should not be compulsory. A child still engaged in drawing should not be rushed merely because classmates have moved on.
The activity is working when the card opens, the attached piece stays in place after brief drying, and the child can identify whom it is for or what was added. Perfect symmetry is not a meaningful success measure. If the fold tears or the outer heart separates into two pieces, glue both halves onto another sheet as a flat Valentine picture rather than discarding the work.
Manage Glue, Scissors, Time, and Group Setup
Minimal supplies reduce clutter, but adult planning still determines whether the session feels calm or congested. The main pressure points are sharing tools, handling scissors, opening glue too early, and asking children to wait while every shape is cut. Prepare for those moments rather than adding more decorative materials to occupy the group.
For a group, place children in pairs with one glue stick between them only if turn-taking is already familiar. Otherwise, glue sharing can take longer than the card itself. Crayons can sit in two or three shallow containers distributed across the table. Keep paper scraps in one tray rather than piling them beside each child, where they may be mistaken for required parts.
Scissor use should reflect demonstrated ability and close supervision. Child-safe scissors are tools, not toys, and the adult should establish that they remain at the table and point away from faces and bodies. A beginner can make a few straight snips in scrap paper while the adult cuts the heart curve. A child with more control can cut the broad outline while the adult rotates the paper or reminds the child to pause. Never require cutting as proof of participation.
Small detached pieces deserve extra attention around children who still mouth nonfood objects. The simplest response is to eliminate confetti, sequins, beads, gems, and similar embellishments. Crayon decoration produces detail without loose miniature components. Check product labels and follow the manufacturer’s age and use directions for glue, crayons, and scissors; “washable” describes cleanup, not permission for unsupervised use.
A frequent failure mode is completing too much preparation in front of waiting children. If an adult must draw and cut every heart after the group sits down, attention shifts to unused glue and crayons. Prepare templates or outer shapes first, or rotate two children at a time through the folding station while others draw on their opened cards. The activity should not depend on long, silent waiting.
Keep a damp cloth nearby for hands and tables, but do not wipe the card while glue is wet because that can smear crayon and weaken paper. Place finished cards open on a shelf or tray until the glue no longer feels tacky. Stack them only after drying. More planning options for a Valentine craft for pre-K with minimal supplies should preserve this same priority: fewer objects on the table and more actions the child can actually perform.
Adapt the Card Without Adding a Supply List
Useful adaptations change the action, scale, or prompt rather than requiring new products. A child who finds folding difficult can decorate a flat adult-cut heart. A child ready for more independence can draw the half-heart line and cut it. Both children can participate in the same session without being expected to produce matching results.
For early language practice, invite the child to dictate one short message such as “Love, Mia,” “For Grandpa,” or “You are my friend.” The adult can write the words lightly while the child traces selected letters, or write exactly what the child says beneath the drawing. Requiring every child to copy a long sentence may shift attention from making the card to struggling with letter formation.
Color prompts create variation with no additional supplies. Ask children to make a border of dots, draw three large circles, cover one side with long lines, or add a face to the inner heart. These prompts support deliberate mark-making while remaining open enough for different motor abilities. Avoid correcting color choices; a blue or green Valentine remains fully recognizable once the heart form is visible.
If the card is intended for family members, allow each child to choose a recipient rather than assuming a particular household structure. A card can be addressed to a parent, grandparent, sibling, caregiver, friend, teacher, or pet. A group Valentine for a classroom door is another option when individual recipient choices may feel uncomfortable.
Children with limited hand strength may benefit from a smaller piece of paper, short crayons, or a glue stick that turns easily. Children who dislike sticky sensations can press the attached heart with a clean scrap placed over it. A visual model of each stage may help a child follow the sequence, but it should show the process rather than establish one correct decorative result.
The strongest adaptation preserves ownership. If an adult holds the child’s hand through every crayon mark, aligns every edge, and chooses every color, the finished card records adult control rather than pre-K participation. Simplify until the child can make a visible contribution. The same principle keeps any Valentine craft for pre-K with minimal supplies developmentally realistic and genuinely personal.
Frequently Asked Questions
Can pre-K children cut out their own hearts?
Some can follow a broad curved line with child-safe scissors, while others need an adult-cut shape. Base the decision on demonstrated scissor control and supervise closely.
What can replace construction paper?
Printer paper, a paper grocery bag, or lightweight cardstock can work. Thin paper wrinkles more easily with glue, while thick cardstock may be harder for preschoolers to cut.
How can I make the card without scissors?
Prepare the outer heart beforehand, let the child tear a smaller inner heart, or draw a large heart on a folded rectangular card.
How much glue should a pre-K child use?
A narrow glue-stick line near the back edge of the inner heart is usually enough. Add a small swipe only where an edge lifts.
What should a child write inside a Valentine card?
The child can add a name, pretend writing, a drawing, or a dictated phrase. A long copied message is unnecessary for a meaningful pre-K card.
Conclusion
A successful pre-K Valentine card depends on an achievable sequence, not an elaborate supply collection. Use sturdy paper, crayons, and controlled glue; prepare curved cuts only when the child’s current scissor skills call for help. Large shapes and one-stage directions make it easier for young children to fold, decorate, and attach a piece without losing track of the process.
Before beginning, test the glue, decide who will handle the scissors, and clear unnecessary decorations from the table. During the activity, watch for ownership rather than uniformity: the child should choose marks, colors, and a recipient whenever possible. If cutting, folding, or gluing becomes the obstacle, simplify that one action and preserve the rest. The next practical step is to prepare one sample heart, set out three basic materials, and leave enough room for each child’s card to look distinctly their own.
Now retrieving an image set.
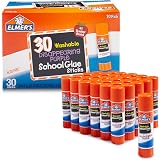
Elmer's Disappearing Purple School Glue Sticks, Washable, 7 Grams, 30 Count - Posters, Back to School, Bulk Pack for Classrooms, #1 Teacher Brand
$7.49 (as of September 18, 2026 22:40 GMT -04:00 - More infoProduct prices and availability are accurate as of the date/time indicated and are subject to change. Any price and availability information displayed on [relevant Amazon Site(s), as applicable] at the time of purchase will apply to the purchase of this product.)
Now retrieving an image set.
PartyWoo Gold Crepe Paper Streamers 4pcs 328 FT Gold Streamers | Wedding Birthday Baby Shower Engagement Anniversary New Year Eve Graduation Bridal Shower Party Decorations
$6.99 (as of September 18, 2026 22:40 GMT -04:00 - More infoProduct prices and availability are accurate as of the date/time indicated and are subject to change. Any price and availability information displayed on [relevant Amazon Site(s), as applicable] at the time of purchase will apply to the purchase of this product.)
Now retrieving an image set.
Mod Podge Gloss Sealer, Glue & Finish: All-in-One Craft Solution- Quick Dry, Easy Clean, for Wood, Paper, Fabric & More. Non-Toxic - Craft with Confidence, Made in USA, 16 oz., Pack of 1
$7.99 (as of September 18, 2026 22:40 GMT -04:00 - More infoProduct prices and availability are accurate as of the date/time indicated and are subject to change. Any price and availability information displayed on [relevant Amazon Site(s), as applicable] at the time of purchase will apply to the purchase of this product.)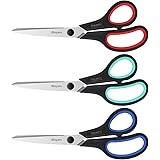
Now retrieving an image set.
iBayam 8.5" Heavy Duty Scissors All Purpose for Office School Crafts Sewing | 3-Pack, Ultra-Sharp 2.5mm Stainless Blades, Comfort Grip Handles, Left & Right Handed – Teacher Desk & Classroom Must-Have
$9.99 (as of September 18, 2026 22:40 GMT -04:00 - More infoProduct prices and availability are accurate as of the date/time indicated and are subject to change. Any price and availability information displayed on [relevant Amazon Site(s), as applicable] at the time of purchase will apply to the purchase of this product.)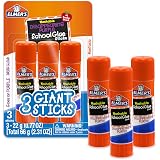
Now retrieving an image set.
Elmer's Disappearing Purple School Glue Sticks, Washable, 22 Grams, 3 Count - Poster, Vision Board, Back to School Supplies, #1 Teacher Brand
$2.89 (as of September 18, 2026 22:40 GMT -04:00 - More infoProduct prices and availability are accurate as of the date/time indicated and are subject to change. Any price and availability information displayed on [relevant Amazon Site(s), as applicable] at the time of purchase will apply to the purchase of this product.)
Now retrieving an image set.