
Paper mache supplies for children’s beginner projects should include torn absorbent paper, a simple flour-and-water or washable school-glue paste, a lightweight form, a shallow paste tray, and a protected drying area. Short paper strips are easier for small hands to smooth, while thin paste coats reduce dripping, wrinkles, and slow drying. Adults should supervise mixing and cutting, check glue labels for age guidance, and avoid balloons where latex sensitivity or burst fragments are concerns. Two or three fully dried layers usually suit a decorative first project; adding too much wet paper at once often causes sagging, trapped moisture, and mold.
The Core Supply Kit for a First Project
A beginner kit works best when every item has one clear purpose and can be handled without complicated measuring or specialized tools. The working supplies are absorbent paper, paste, a form to cover, a shallow container, and a protected place where the object can remain untouched while it dries. Add a washable table covering, child-sized apron or old shirt, damp cloth, and a separate bowl of clean water for wiping sticky fingers. These few items support a small bowl, mask, animal head, or simple sculpture without creating an overwhelming workstation.
Newspaper is traditional because it tears easily, bends around curves, and shows where strips overlap. Uncoated packing paper and plain newsprint are useful alternatives. Glossy magazine pages resist moisture and tend to lift at the edges, while thick cardstock creates ridges that young beginners struggle to smooth. Tear paper into strips before paste is opened. Pieces about the width of a child’s finger and short enough to follow the form are usually easier to control than long ribbons. Narrower pieces belong around corners, ears, rims, and other tight shapes.
The form should be light, stable, and uncomplicated. An upturned paper bowl, crumpled paper secured with masking tape, a small cardboard tube, or a clean molded cardboard package gives children a dependable base. Balloons create rounded forms but introduce extra concerns: they can roll, burst, leave fragments, and may be unsuitable around someone with a latex allergy. A taped paper form is quieter, reusable during the session, and less likely to collapse unexpectedly.
A compact first-project checklist includes:
- Structure: cardboard, a paper bowl, or firmly taped scrap paper
- Covering: torn newspaper, newsprint, or uncoated packing paper
- Binder: washable PVA school glue diluted as needed, or freshly mixed flour paste
- Handling tools: a shallow tray, spoon or craft stick, and blunt scissors for adult-supervised preparation
- Cleanup and drying: table cover, apron, damp cloth, drying board, and name label
Buying a large specialty kit is rarely necessary for a first attempt. Kits offer convenience, but they may include oversized forms, more paste than a child needs, or decorative pieces that distract from learning how to overlap and smooth paper. Assemble only enough material for one modest object. The best sign that the setup is suitable is that the child can reach the paper, paste, and form without moving bowls across the table. For a printable shopping reference, keep this list with Paper mache supplies for children’s beginner projects when comparing packaged sets with household materials.
Choosing Paper, Paste, and Project Forms
Paper and paste must work as a pair: the paper needs to absorb enough binder to soften, while the paste needs to spread thinly without soaking the structure. Thin newsprint accepts paste quickly and conforms to rounded surfaces. Brown packing paper is somewhat stronger and makes a useful final structural layer, but its stiffness can frustrate a young child if every layer uses it. Alternating easy-to-see paper colors can help a beginner notice gaps and accidental piles.
Washable white school glue is the most predictable binder for many family craft sessions. It is ready to use, has consistent adhesion, and can be thinned with a small amount of water if it feels too tacky to spread. Product formulas and age directions vary, so an adult should read the label rather than assume every PVA product is intended for children. Craft adhesives labeled with strong solvents, instant-bonding properties, or prominent ventilation warnings do not belong in a child’s beginner setup.
Flour-and-water paste is inexpensive and easy to mix in small batches. Add water gradually to plain flour and stir until the mixture resembles a smooth, pourable batter rather than dough. Lumps create bumps under the paper, and an overly watery mixture saturates cardboard before it bonds the strip. Flour paste is perishable and contains wheat, so it should not be used where contact with wheat is a concern. Mix only what the session requires, discard leftovers promptly, and dry the finished object thoroughly. Glue paste is often the more practical choice in humid conditions or when drying time is uncertain.
Some adults assume more paste produces a stronger sculpture. Excess binder actually makes strips slide, lengthens drying, and can soften taped cardboard until the shape bends. A child can pull a strip through a shallow tray and gently remove surplus paste between two fingers, or brush a thin coating onto the form before pressing down dry paper. The strip should look damp and flexible, not carry blobs that drip from its edges.
Match the form to the planned finish. A paper bowl is well suited to a decorative dish that will hold dry, lightweight objects, but a child-made paper mache bowl should not be treated as food-safe or waterproof. Crumpled paper wrapped in masking tape suits creatures and planets because parts can be added without waiting for a balloon to be removed. Corrugated cardboard works for flat plaques, although exposed cut edges need small strips laid across them. Plastic containers can serve as temporary molds only when the release method is planned; beginners often find permanent cardboard forms easier because nothing has to be extracted later.
Before choosing among Paper mache supplies for children’s beginner projects, decide whether the priority is easy cleanup, low cost, or reliable drying. Washable glue generally favors predictability, flour paste favors low-cost short sessions, and a cardboard base favors stability. No option compensates for thick wet layers or a damp storage area.
A Safe, Manageable Workspace Setup
A well-arranged workspace limits spills by shortening the distance between each action. Cover the table, place the form on a washable tray or scrap of sturdy cardboard, and keep the paste in a broad, shallow dish near the child’s dominant hand. Put dry strips on the opposite side so the supply pile does not fall into the paste. A damp cloth should remain within adult reach, while phones, books, food, and drink stay away from the work surface.
Prepare cutting, taping, and any difficult shaping before children begin dipping strips. Adults should handle utility knives, staplers, hot glue, and other tools that are unnecessary at the child’s station. Blunt scissors may be suitable for some children under direct supervision, but tearing paper is often better for paper mache because feathered edges blend more smoothly than hard cut lines. Long hair should be tied back, sleeves secured, and hands washed after the activity rather than merely wiped on an apron.
Age labels and supervision matter more than broad claims that a material is “non-toxic.” That wording does not mean a paste is edible, safe near the eyes, or appropriate for every age. Check the packaging for intended use, follow its cleanup directions, and stop if a child develops skin or breathing irritation. Small decorative items such as beads, buttons, or loose plastic eyes create choking concerns for younger children and are better replaced with painted details. Balloons and fragments likewise require close adult control and immediate disposal.
Plan drying space before construction begins. A shelf with circulating room air is preferable to a closed cupboard, damp basement, or sealed plastic box. Set the object on a labeled board that can be moved without touching the wet surface. Direct high heat can dry the outside while the interior remains damp, and it may warp cardboard or damage a balloon form. Gentle airflow and time produce more even results. If paste pools beneath the object, lift it carefully and wipe the board before the bottom bonds to it.
A realistic family scenario illustrates the difference. Two children sharing one deep bowl of paste may reach across each other, tangle long strips, and drip over the floor. Giving each child a small tray, a limited stack of short strips, and an individual drying board keeps the sequence visible and reduces competition. Refill materials as needed rather than placing the entire supply on the table.
The session is going well when strips remain separated, the form holds its shape, and hands can smooth overlaps without paste running down the object. Pause if the base starts flexing, paper slides off, the child repeatedly reaches across the tray, or the work area becomes too slippery to manage. A short reset—wiping the table, removing excess paste, and offering smaller pieces—is more effective than pushing through a deteriorating setup.
Layering, Drying, and Finishing Without Common Failures
Strong beginner work comes from thin, overlapping coverage followed by complete drying. Place the first strip on the form, smooth it from the center toward the edges, and add the next piece so it overlaps slightly. Change strip direction as the surface develops; crossing fibers distributes stress better than arranging every strip in parallel rows. Press out air pockets as they appear because a trapped bubble can harden into a weak hollow blister.
Apply one complete layer rather than building thick patches around a favorite feature. Children often keep adding wet paper to the front while the back remains uncovered, making the form heavy and unstable. Rotate the drying board instead of lifting a slippery sculpture. For a small decorative object, two or three even layers are a manageable starting point, with drying between layers when the base begins to soften. Larger wearable masks or projecting parts may need more reinforcement, but adding thickness should follow successful drying rather than replace it.
Dryness must be judged beneath the surface. A pale, firm exterior can hide cool, soft paper underneath. Check the thickest overlap, bottom edge, and joints where ears, handles, or tubes meet the main form. A piece ready for another layer should feel firm and room-temperature rather than cool or yielding. A sour or musty smell, persistent softness, dark damp areas, or visible fuzzy growth means the project should not be painted or sealed. A mold-affected porous craft is generally better discarded than handed back to a child for repair.
Cracks and loose edges usually reveal a process problem. A lifted corner may need a small fresh strip feathered over it. Broad sagging suggests too much paste or insufficient support, while deep cracks can result from an overly thick layer drying unevenly. Do not hide dampness under acrylic paint or varnish. Coatings slow moisture escape and can preserve the defect underneath. If the piece remains misshapen after drying, treat it as a learning sample rather than adding another heavy wet coat.
Finishing begins only when the object is fully dry. Lightly trim stray paper with adult help, then apply a water-based child-appropriate paint according to its label. A thin white base coat can reduce the amount of colored paint needed over printed newspaper, although leaving some print visible may suit the design. Tempera is easy to clean but may remain more vulnerable to moisture; acrylic craft paint can give stronger coverage but may stain clothing and requires closer handling supervision. Decorative paper, yarn, or painted features are safer for many young beginners than tiny glued embellishments.
Sealers are optional for display pieces. They do not make a project suitable for food, outdoor weather, bathing, or prolonged water contact. If a clear coating is used, an adult should select a water-based product intended for the setting, follow ventilation and age guidance, and apply it only to a completely dry object. Review the supply plan in Paper mache supplies for children’s beginner projects before finishing; the same restraint that controls paste should control paint and sealer. Thin coats preserve details and reveal whether the underlying structure is sound.
Frequently Asked Questions
What is the easiest paper mache paste for a child’s first project?
Washable white school glue is usually the most consistent option when its label suits the child’s age and intended use. Flour-and-water paste costs less but is perishable, contains wheat, and demands especially thorough drying.
Can printer paper be used instead of newspaper?
Yes, but standard printer paper is stiffer and may lift around curves. Tear it into small pieces, use paste sparingly, and reserve it for flatter areas or a smooth final layer.
How many layers should a beginner apply?
Two or three even layers are often enough for a small decorative object with a permanent cardboard base. Add reinforcement only after checking that earlier layers are firm and dry.
How long does children’s paper mache take to dry?
Drying varies with paste quantity, layer thickness, airflow, humidity, and form size. Judge the thickest areas by feel rather than the clock; they should be firm, dry, and no cooler than the room.
Why is the paper mache still soft after the surface looks dry?
Moisture is probably trapped in thick overlaps or against a nonabsorbent form. Move the piece to a dry area with gentle airflow, avoid painting it, and discard it if musty odors or mold appear.
Conclusion
A successful first paper mache session depends more on restraint than on an extensive supply collection. Choose absorbent paper, a clearly labeled child-appropriate binder, and a stable form that does not complicate removal. Prepare short strips and individual work areas before opening the paste, then supervise contact with adhesives, cutting tools, balloons, and small decorations.
Build the object with thin overlapping coverage, pausing whenever paper slides or the base softens. Drying deserves as much attention as construction: inspect thick joints and the underside before adding another layer, paint, or sealer. For the next session, begin with one small cardboard-based object and enough material for only two or three layers. That scale lets a child practice dipping, smoothing, rotating, and checking coverage while an adult can still control spills and spot moisture problems early.
Now retrieving an image set.
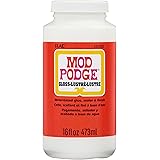
Mod Podge Gloss Sealer, Glue & Finish: All-in-One Craft Solution- Quick Dry, Easy Clean, for Wood, Paper, Fabric & More. Non-Toxic - Craft with Confidence, Made in USA, 16 oz., Pack of 1
$7.99 (as of September 18, 2026 22:40 GMT -04:00 - More infoProduct prices and availability are accurate as of the date/time indicated and are subject to change. Any price and availability information displayed on [relevant Amazon Site(s), as applicable] at the time of purchase will apply to the purchase of this product.)
Now retrieving an image set.
Amazon Basics Clear Thermal Laminating Sheets for Documents and Photos, 9 x 11.5-Inch, 2.8 mil, 200-Pack
$17.99 (as of September 18, 2026 22:40 GMT -04:00 - More infoProduct prices and availability are accurate as of the date/time indicated and are subject to change. Any price and availability information displayed on [relevant Amazon Site(s), as applicable] at the time of purchase will apply to the purchase of this product.)
Now retrieving an image set.
Crayola Construction Paper Bulk Pack (480 Sheets) – 10 Assorted Colors, 9x12, Teacher School Supplies & Classroom Must Haves, Card Making Craft Supplies, Art Paper
$11.76 (as of September 18, 2026 22:40 GMT -04:00 - More infoProduct prices and availability are accurate as of the date/time indicated and are subject to change. Any price and availability information displayed on [relevant Amazon Site(s), as applicable] at the time of purchase will apply to the purchase of this product.)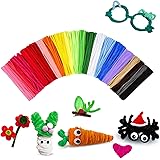
Now retrieving an image set.
200 Pcs Pipe Cleaners Craft Bulk, 20 Colors Pipe Cleaner, Chenille Stems | Kids Toys & Games Gifts for Ages 5-7, Craft Supplies for Projects Creative DIY Room Decor, Halloween Christmas Decorations
$5.99 (as of September 18, 2026 22:40 GMT -04:00 - More infoProduct prices and availability are accurate as of the date/time indicated and are subject to change. Any price and availability information displayed on [relevant Amazon Site(s), as applicable] at the time of purchase will apply to the purchase of this product.)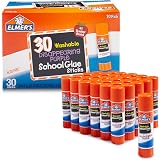
Now retrieving an image set.
Elmer's Disappearing Purple School Glue Sticks, Washable, 7 Grams, 30 Count - Posters, Back to School, Bulk Pack for Classrooms, #1 Teacher Brand
$7.49 (as of September 18, 2026 22:40 GMT -04:00 - More infoProduct prices and availability are accurate as of the date/time indicated and are subject to change. Any price and availability information displayed on [relevant Amazon Site(s), as applicable] at the time of purchase will apply to the purchase of this product.)
Now retrieving an image set.