
A paper clip craft using safe construction methods should rely on intact coated clips, blunt joining motions, covered wire ends, and a stable paper or cardboard base rather than cut or sharply bent metal. Children should work under close adult supervision because small clips can be swallowed and repeated bending may create sharp break points. Join parts by sliding clips over layered cardstock, linking closed clips, or letting an adult secure clips with pliers before covering the connection with tape. Count every clip before and after the activity, test the finished structure for loose pieces, and treat the result as a display item rather than a toy.
Choose Clips and a Project That Fit the Child
Project selection determines how much handling, bending, and fastening the activity will require. The safest beginner designs use paper clips as visible accents or simple connectors, not as wire that must be reshaped. A cardstock caterpillar joined with closed clips, a bookmark decorated with one clip, or a cardboard mobile assembled by an adult involves fewer exposed connection points than a freestanding wire figure.
Use clean, undamaged clips with smooth surfaces and fully rounded ends. Vinyl-coated clips are easier to see on a work surface and may feel more comfortable in small hands, but the coating does not make them harmless. Reject clips with rust, peeling plastic, burrs, distorted loops, or ends that no longer sit close to the body of the clip. Jumbo clips can be easier to count and grip than miniature ones, although any paper clip remains a small object that demands supervision.
Age labels on craft supplies do not replace judgment about the individual child. A child who still places objects in the mouth, throws small items, or struggles to follow stop-and-wait directions should use a paper-based alternative instead. Draw colorful clip shapes on cardstock, use large interlocking craft links, or let the child decorate a design whose real metal connections have already been installed by an adult. Older children may perform more of the assembly, but an adult should retain tasks involving pliers, difficult bends, cutting, or damaged fasteners.
The base material matters as much as the clip. Medium-weight cardstock accepts a clip without tearing as readily as thin writing paper. Corrugated cardboard provides better support for upright or hanging pieces, while foam sheets may compress and release a clip unexpectedly. If a clip slides off with a light tug, increase the number of paper layers or change the base rather than squeezing the metal into a sharp bend.
A practical material decision follows three priorities:
- Visibility: Choose clips that contrast with the tabletop and project base.
- Integrity: Use each clip in its original rounded form whenever possible.
- Containment: Plan where every clip will remain during building, drying, display, and cleanup.
This approach to Paper clip craft using safe construction methods keeps the creative task focused on arranging color, shape, and movement instead of manipulating bare wire.
Prepare a Controlled Construction Area
A defined workspace makes dropped or missing clips easier to notice. Use a clear table away from food, floor vents, upholstered furniture, and the reach of younger siblings or pets. A shallow tray with raised edges gives each participant a contained building surface. Place the supply container on the adult’s side so clips are issued in a known quantity rather than poured into a loose pile.
Count the clips before work begins and write down the total. Counting is more dependable than relying on a quick visual sweep, especially when coatings blend into a patterned rug or when several children share supplies. Give each child only the number needed for the current part of the design. When a clip falls, pause the activity and retrieve it immediately; continuing to distribute materials makes the missing-item check harder.
Set out only tools needed for the chosen construction method. Child-safe scissors may be suitable for paper components, but paper clips should not be cut with them. Standard scissors can slip, become damaged, or launch a clipped fragment. If pliers are needed to close a connection, the adult should use them away from the child’s face and hands. Hot glue is usually unnecessary for this type of project and adds a burn hazard without solving the central problem of a loose metal piece.
Adhesive choice should match the job. Washable craft glue is useful for attaching paper decorations, yet it does not reliably lock smooth metal into a load-bearing joint. Masking tape or paper craft tape can cover a clip already seated against cardboard, while a folded cardstock patch glued over the connection creates a neater enclosure. Tape is a cover, not permission to use a broken or pointed clip. If the metal end can be felt through the covering, replace the connection.
Before inviting children to the table, make one sample connection and test it. Slide a clip over two layers of cardstock, pull gently in the direction the finished piece will hang, and turn the joint over to inspect both sides. A successful setup stays flat, does not tear the card, and cannot be removed with casual handling. A failing setup twists, widens the hole, or lets the clip travel toward an edge. Adjusting the base at this stage avoids repeated handling later.
Clear rules should be concrete: clips stay on the tray, no clips go near the mouth or face, and dropped pieces are reported immediately. “Be careful” is too vague to guide behavior. Specific boundaries make supervision easier and allow the adult to stop the project when the environment is no longer controlled.
Build With Low-Risk Connections
Low-risk assembly preserves the clip’s rounded shape and places the paper or cardboard around it. The simplest connection is a slide-on joint: overlap two punched cardstock tabs, then slide one intact clip over both layers. Position the rounded outer loop toward the exposed edge and keep the inner end seated against the card. This method allows movement without requiring a child to open the clip widely.
For a linked-paper animal, cut body segments from sturdy card and punch holes well inside each edge. An adult can pass a closed clip through adjacent holes by gently rotating it into place, then press the clip flat with pliers if needed. Cover the reverse side with a folded paper patch so fingers cannot rub against the connection. The segments should pivot slightly without pulling the holes longer. If the holes begin to split, larger card tabs or reinforcement circles are safer than tightening the clip.
A second method uses an intact clip as a decorative holder. Children can draw and cut a cardstock character, while an adult slides a large coated clip over the bottom to create a page marker. The design should remain light and flat. Adding pom-poms, thick clay, or several layers above the clip creates leverage that can make the marker detach. Paper embellishments provide color without turning the clip into a weak support for a top-heavy object.
Closed clip chains are visually appealing but need stricter control because every link is a separate small part. Reserve short chains for children who can reliably follow handling rules, and have the adult join the clips. Do not pull loops apart sideways to make linking easier; widening the wire leaves ends protruding and weakens the original form. A cardstock chain made from glued paper strips offers a better choice when children want to perform the linking themselves.
Use the following sequence for each joint:
- Lay the paper components flat and confirm their orientation.
- Have the adult install or approve the intact clip connection.
- Check both faces for projecting wire, torn paper, or excessive movement.
- Cover the connection where skin could repeatedly contact it.
- Apply a gentle pull before moving to the next joint.
The pull check should be firm enough to mimic handling, not an attempt to destroy the project. A joint that opens, slides, or exposes an end has failed and should be replaced rather than bent back repeatedly. Metal fatigue can develop where a clip is opened and closed many times, and the eventual break may leave a sharp edge. Limiting each clip to one planned position is more dependable than continual redesign.
For classrooms or mixed-age groups, divide roles rather than relaxing the method. Younger participants can color and arrange paper pieces; older participants can align tabs; the supervising adult can make and cover metal connections. The detailed process in Paper clip craft using safe construction methods is most useful when the assembly role reflects actual dexterity and impulse control rather than a single age assumption.
Inspect, Display, and Disassemble the Craft
Final inspection determines whether the object is suitable for display or must be repaired. Place it on the table and examine every joint from the front, back, and edges. Look for an exposed inner tip, a clip that has rotated off its tab, whitening or tearing around a punched hole, loose tape, and decorations that add too much weight. Run a fingertip over covered areas only after confirming visually that no point is protruding.
Recount all unused clips and compare the combined number of stored and installed clips with the starting total. If the count does not match, search the tray, tabletop edge, chairs, clothing, and nearby floor before the activity ends. A magnetic pickup tool may collect plain steel clips, but not every coated or specialty clip responds equally, so it should supplement rather than replace counting and visual inspection.
Display location changes the risk profile. A lightweight hanging decoration should be placed where children cannot repeatedly pull it and where it will not fall into a crib, play area, food surface, or pet space. Wall-mounted cardstock is generally easier to manage than a mobile suspended over active play. Avoid attaching a paper clip craft to clothing, backpacks, bedding, or objects used during running; movement and snagging can loosen the connections.
Treat the finished piece as artwork, not as a durable action toy. A poseable creature may invite repeated bending, but each adjustment stresses the metal and paper around the joint. If movement is central to the play experience, use paper fasteners installed by an adult, folded paper hinges, or yarn connections appropriate to the child and project. Paper clips work better for limited movement in a supervised display than for repeated articulation.
Signs that the construction is holding include clips remaining flat, holes retaining their original shape, coverings staying adhered, and the project supporting its own light weight without twisting. Warning signs include clicking or shifting at a joint, a widening gap in the clip, torn fibers around the connection, or a missing fastener. Remove the craft from use as soon as one of these appears. Adding more tape around a moving joint can hide the failure without correcting it.
Disassembly deserves the same control as construction. An adult should remove clips over the tray, count them, and discard any deformed, rusted, or weakened pieces in a closed waste container. Store reusable clips in a lidded container outside children’s reach. Paper components can then be recycled or retained according to their coatings and adhesives. These closing steps ensure that a successful activity does not leave small metal parts scattered after attention has shifted elsewhere.
Frequently Asked Questions
Are paper clips appropriate for preschool crafts?
They may not suit preschoolers who mouth objects or cannot keep small parts on a tray. A safer format is adult-installed clips on a display piece, with the child limited to decorating large paper components.
Should children bend paper clips into shapes?
Keeping clips intact is preferable. Repeated or tight bending can weaken the metal and create sharp ends; any shaping that is necessary should be performed and inspected by an adult with suitable pliers.
Can glue secure a paper clip permanently?
Ordinary washable glue is better for paper than smooth metal and should not be trusted as the only restraint. Seat the clip mechanically on layered card, test it, and cover the connection with paper or tape.
What can replace paper clips for younger children?
Folded paper hinges, glued cardstock loops, yarn handled under supervision, or large age-appropriate linking pieces can provide similar movement without exposed metal connections.
How should a finished paper clip craft be stored?
Keep it out of reach in a dry display location and inspect it before each handling session. Do not store it loose in a toy bin, where clips can snag, deform, or detach unnoticed.
Conclusion
A sound paper clip project uses the metal sparingly and lets sturdy card provide most of the structure. Select intact, visible clips; assign metal handling to an adult when the child’s dexterity or behavior makes that prudent; and build every joint so it stays flat and can be inspected from both sides. Count components before and after the session, cover contact points, and replace any connection that shifts instead of hiding it under extra tape.
Choose a lightweight display design for the first attempt, prepare one tested sample joint, and issue clips from a controlled tray. Once complete, keep the artwork away from active play and check it for torn paper or moving fasteners. If the project needs frequent bending or rough handling, switch to paper hinges or another connection designed for movement rather than asking a paper clip to serve as a toy mechanism.
Now retrieving an image set.
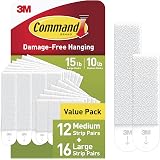
Command 15 & 10 lb Assorted Picture Hanging Strips, 28 Pairs, SIOC | White Picture Hanging Strips, Damage-Free Wall Hangers for Frames, No Tools Required, Ideal for Decorating Apartments, Dorms
$13.99 (as of September 29, 2026 22:47 GMT -04:00 - More infoProduct prices and availability are accurate as of the date/time indicated and are subject to change. Any price and availability information displayed on [relevant Amazon Site(s), as applicable] at the time of purchase will apply to the purchase of this product.)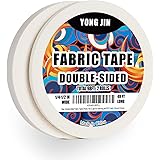
Now retrieving an image set.
Double-Sided Fabric Tape,Hem Tape No Sew No Iron,1/4"+1/2" (2 Rolls) | No Sewing or Ironing Required, Quick Clothing Repairs, Fabric Bonding, For Hemming and DIY Crafts
$7.99 (as of September 29, 2026 22:47 GMT -04:00 - More infoProduct prices and availability are accurate as of the date/time indicated and are subject to change. Any price and availability information displayed on [relevant Amazon Site(s), as applicable] at the time of purchase will apply to the purchase of this product.)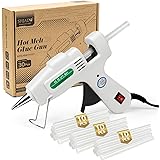
Now retrieving an image set.
SHJADE Hot Glue Gun with 30 Glue Sticks, 20W Mini Hot Melt Gun Kit(White) | Fast Preheating, Ideal for School Crafts, DIY Arts, and Quick Home Repairs, Compact, Suitable for 0.27" Glue Sticks
$8.53 (as of September 29, 2026 22:47 GMT -04:00 - More infoProduct prices and availability are accurate as of the date/time indicated and are subject to change. Any price and availability information displayed on [relevant Amazon Site(s), as applicable] at the time of purchase will apply to the purchase of this product.)
Now retrieving an image set.
Mod Podge Gloss Sealer, Glue & Finish: All-in-One Craft Solution- Quick Dry, Easy Clean, for Wood, Paper, Fabric & More. Non-Toxic - Craft with Confidence, Made in USA, 16 oz., Pack of 1
$7.99 (as of September 29, 2026 22:47 GMT -04:00 - More infoProduct prices and availability are accurate as of the date/time indicated and are subject to change. Any price and availability information displayed on [relevant Amazon Site(s), as applicable] at the time of purchase will apply to the purchase of this product.)
Now retrieving an image set.
Rust-Oleum Stops Rust Spray Paint, Semi-Gloss Black | Rust Resistant, Indoor and Outdoor, Beautiful Finish on Metal, Wood and More, Sprays from Any Angle, 12 oz
$6.48 (as of September 29, 2026 22:47 GMT -04:00 - More infoProduct prices and availability are accurate as of the date/time indicated and are subject to change. Any price and availability information displayed on [relevant Amazon Site(s), as applicable] at the time of purchase will apply to the purchase of this product.)
Now retrieving an image set.